If you’re a proud owner of a Traeger grill, you know that it’s the ultimate weapon for outdoor cooking and grilling. With its advanced technology and user-friendly features, cooking your meats to perfection has never been easier. But like any cooking appliance, you’ll need to clean it now and then to keep it in top condition and maintain its excellent performance.
Cleaning the inside of your Traeger grill may seem daunting at first, especially if you’ve never done it before. But fret not. With just a few simple steps, you can make your grill look and perform like it’s fresh out of the box.
So if you’re wondering how to clean the inside of your Traeger grill, look no further. In this post, we’ll give you a step-by-step guide on how to thoroughly clean the interior of your grill. We’ll show you how to get rid of ash, grease, and food debris while keeping all the components looking spotless. Plus, we’ll share some tips and tricks to ensure your grill lasts longer and enhances your overall grilling experience.
Keep reading to discover everything there is to know about cleaning the inside of your Traeger grill. Get ready to impress your guests with delicious meals cooked on a pristine grill.
Contents
Why Clean the Inside of Your Traeger Grill?
A clean grill not only ensures that your food tastes better, but it also prolongs the lifespan of your grill. In this post, we will discuss why you should clean the inside of your Traeger grill and provide you with a step-by-step process for doing so effectively.
Prevent Flare-Ups
Grease and food particles can accumulate on the grill grates, which can cause flare-ups that burn your food and ruin your experience. By regularly cleaning the inside of your Traeger grill, you can remove these potential fire hazards and ensure that your food cooks evenly.
Maintain Pellet Quality
Traeger grills use wood pellets as fuel, and ash buildup can clog the auger responsible for feeding pellets into the firepot, causing uneven heating and affecting the flavor of your food. By cleaning out the ash, you can ensure that your pellets continue to burn cleanly and produce consistent heat.
Promote Good Hygiene
Grills can harbor bacteria and germs, especially if they are not cleaned regularly. By keeping your grill clean, you reduce the risk of foodborne illnesses and ensure that everyone who eats your food stays healthy.
Step-by-Step Process for Cleaning Your Traeger Grill
Let It Cool Down
Before cleaning the inside of your Traeger grill, ensure it has cooled down completely. Trying to clean a hot grill is dangerous; let it cool down for at least an hour before starting the cleaning process.
Remove Parts
Once cooled down, remove the grates, grease tray, and heat diffuser.
Scrape Away Debris
Use a scraper or spatula to remove any large pieces of debris or food particles from the inside of the grill gently.
Vacuum the Interior
Take a vacuum cleaner and use it to suck up any remaining dirt or ash from the grill’s interior.
Wipe Down Surfaces
After vacuuming, use a damp cloth or sponge to wipe down the inside of the grill. You can use warm soapy water or a mild cleaning solution to help remove any stubborn stains or grease buildup. Be sure to rinse thoroughly with clean water afterward and allow the grill to air dry before reassembling all the parts.
Step-by-Step Guide to Cleaning the Inside of Your Traeger Grill
It’s time to talk about the less glamorous side of grilling – cleaning. But don’t worry, with this step-by-step guide, cleaning the inside of your Traeger grill will be a breeze.
First things first, safety always comes first. Before you start cleaning, make sure your grill is turned off and has completely cooled down. This will prevent any accidental burns or injuries.
Now let’s get started. The first step is to remove the cooking grates and drip tray from your grill. These components can get pretty dirty after several uses, so soak them in warm soapy water and scrub them clean with a soft-bristled brush. For those tough stains or build-up, you can use a grill cleaner specifically designed for Traeger grills.
Once your grates and drip tray are spotless, it’s time to tackle the inside of your grill. Use a vacuum or soft-bristled brush to remove any loose debris or ash from the firepot and surrounding areas. Just make sure you don’t damage any internal components while cleaning.
Now comes the exciting part – wiping down the interior walls and ceiling of your grill. Use a damp cloth or sponge to do this. But be sure to use gentle pressure and avoid any areas with electrical components or wiring.
To ensure optimal performance and longevity, it’s important to clean the inside of your Traeger grill regularly. Here is a quick summary of the steps:
- Turn off the grill and let it cool down completely.
- Remove the cooking grates and drip tray.
- Soak them in warm soapy water and scrub them clean.
- Use a vacuum or soft-bristled brush to remove any loose debris or ash.
- Wipe down the interior walls and ceiling with a damp cloth or sponge.
- Replace the drip tray and cooking grates back into your grill.
Cool Down the Grill Before Cleaning
Before you begin, there’s something you need to know – cooling down the grill is an essential step that should never be overlooked.
Why is it so important to cool down the grill before cleaning? Let’s start with safety. Trying to clean a hot grill can be hazardous and may result in burns or other injuries. But beyond that, allowing the grill to cool down completely also ensures that the cleaning process is effective. If the grill is still hot, grease and debris can become baked on, making it much harder to remove.
So how do you cool down your Traeger grill? It’s easy – just turn off the heat and let it sit for at least 30 minutes to an hour. During this time, you can take a break and gather your cleaning supplies. But remember, never use water or any other liquid to cool down your Traeger grill. This can damage the electrical components and even start a fire. It’s best to let it cool down naturally before proceeding to the next step of the cleaning process.
Now that your grill has cooled down completely, it’s time to tackle the debris and ash inside. Here are some steps you can follow:
- Start by removing any large debris with a dry brush or scraper.
- Empty the ash catcher and dispose of the ash properly.
- Use a vacuum or shop vac to remove any remaining ash or debris.
- Wipe down the inside of the grill with a damp cloth or sponge.
By following these steps, you’ll have a clean and well-maintained Traeger grill that will continue to serve up delicious meals for years to come.
Remove Grates, Grease Tray, and Heat Diffuser
Attention all grill masters. Are you ready to give your Traeger grill the care it deserves? The first step in cleaning the inside of your grill is removing the grates, grease tray, and heat diffuser. These components are prone to accumulating grease and food particles that can affect the taste of your grilled food and even damage your grill’s interior.
To begin, make sure your grill has completely cooled down before attempting any cleaning. Once it’s safe to proceed, start by lifting off the grates. Depending on your model, you may need to remove screws or clips first, but once they’re free, they should come off easily. Take care when removing them to prevent scratching or damage.
Next, slide out the grease tray located under the grates. This tray is designed to catch excess grease and prevent it from accumulating inside the grill. Dispose of the grease by pouring it into a container or wiping it off with a paper towel.
The heat diffuser, located above the grease tray, serves as a barrier between the flames and the cooking surface. To remove it, lift it up and out of the grill. Over time, the heat diffuser can accumulate grease and debris. Therefore, it is crucial to give it a thorough cleaning before putting it back in place.
Now that you’ve removed these components, take some time to give them a good scrub down before putting them back in place. You can use a grill brush or warm soapy water to clean them thoroughly.
Overall, removing the grates, grease tray, and heat diffuser is a simple process that should only take a few minutes. It’s an essential step in maintaining your Traeger grill’s cleanliness and ensuring that it functions correctly for years to come. Don’t forget to consult your owner’s manual for specific instructions for your model and always follow proper safety protocols when cleaning your grill.
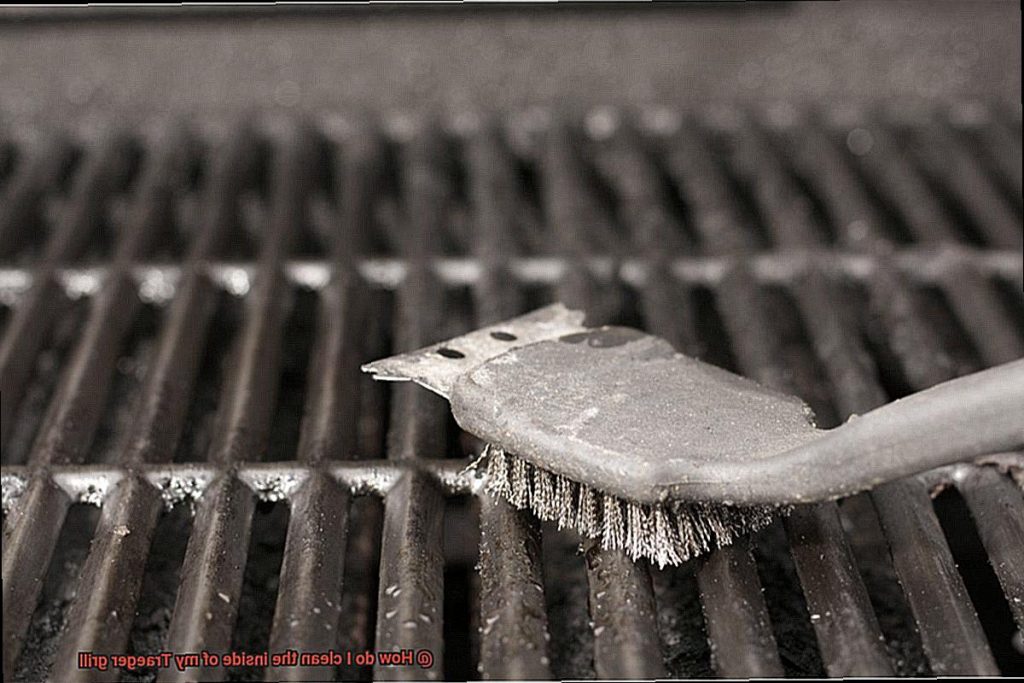
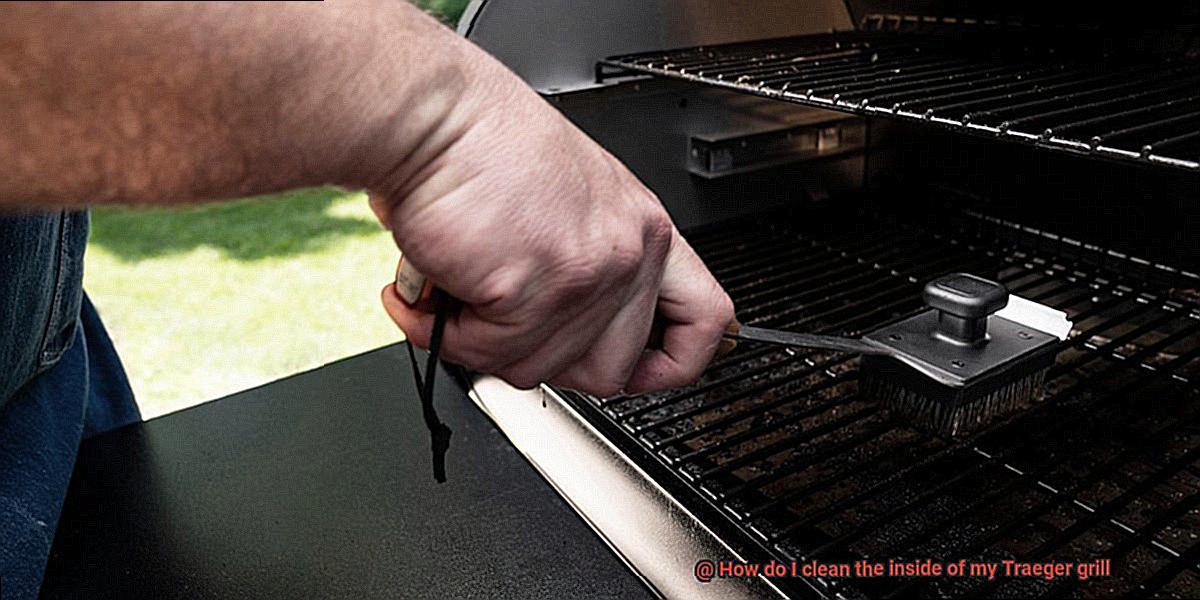
Scrape Any Large Debris or Food Particles from Interior
Keeping your Traeger grill in excellent condition is essential to ensure it functions correctly. One of the crucial steps in maintaining your grill’s performance is to scrape away any large debris or food particles from the interior. Don’t worry, it’s an easy process.
To start, let the grill cool down completely before cleaning. Once it’s cooled, grab your trusty grill brush or scraper and get to work. It’s essential to give the grates a thorough scrape, as well as the inside walls and bottom of the grill. Accumulated debris can cause damage to the grill’s heating elements and other components over time.
After cleaning the grates, remove them and set them aside. Using a putty knife or scraper, gently remove any remaining buildup on the interior walls and bottom of the grill. If there are any stubborn spots, use a damp cloth or sponge to wipe them away.
It is crucial to avoid pressure washing or hosing down your Traeger grill as it can damage its electrical components. Instead, opt for a damp cloth or sponge to wipe away any remaining debris.
Here are some tips to keep in mind while cleaning your Traeger grill:
- Use a scraper or putty knife to remove any large debris.
- Clean the grates thoroughly.
- Gently clean the inside walls and bottom of the grill.
- Avoid using pressure washers or hoses.
- Use a damp cloth or sponge to wipe away remaining residue.
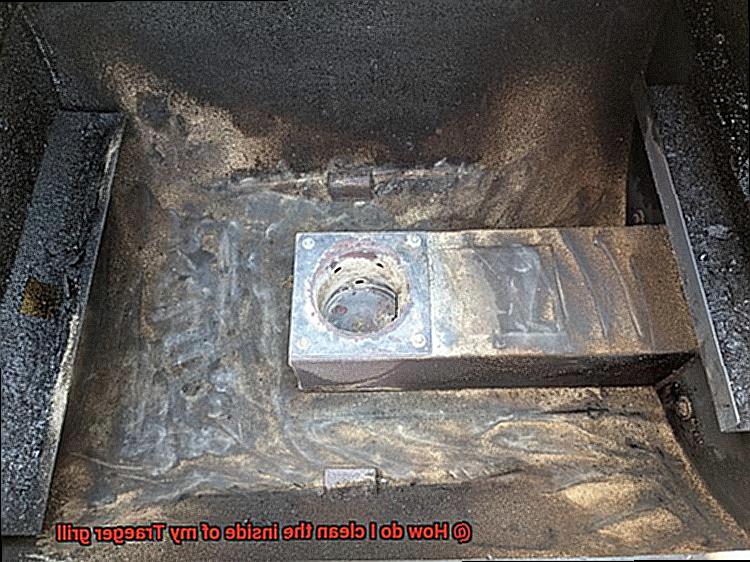
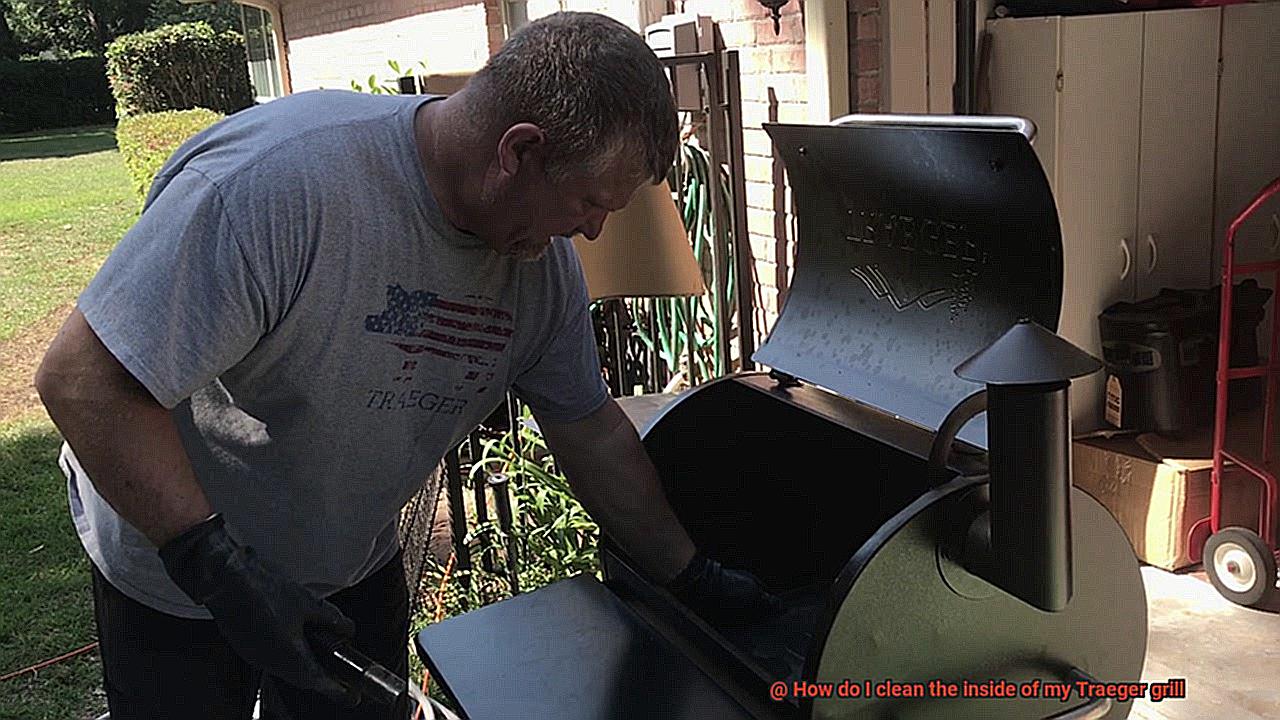
Vacuum Out Any Remaining Dirt or Ash
If so, then vacuuming out any remaining dirt or ash after each use is an essential step in maintaining your grill.
Why is this step so crucial? Firstly, vacuuming ensures that your grill is clean and ready for your next grilling session. No one wants last week’s debris lingering inside their grill, right? Secondly, using a vacuum cleaner with a HEPA filter will trap even the tiniest particles of ash and dirt, preventing them from clogging up your grill’s air vents. This means that your grill will function efficiently and prevent any damage caused by clogged air vents.
So, how do you go about vacuuming out your Traeger grill? First, turn off your grill and wait for it to cool down completely. Once it is cooled, remove the grates and heat diffuser. Use a brush or scraper to loosen any stubborn debris stuck on the surfaces of the grill. Be gentle to avoid scratching or damaging the surfaces.
Next, use your vacuum cleaner with a HEPA filter to suck up all the dirt, ash, and debris from inside the grill. Don’t forget to vacuum every corner of the grill, including the sides and bottom. Check that all the ash and dirt have been removed before moving on to the next step.
Regular vacuuming of your Traeger grill’s interior will prevent any buildup of ash and dirt, making cleaning easier in the future. Plus, it’ll save you time in the long run, giving you more time to spend grilling up delicious meals for your friends and family.
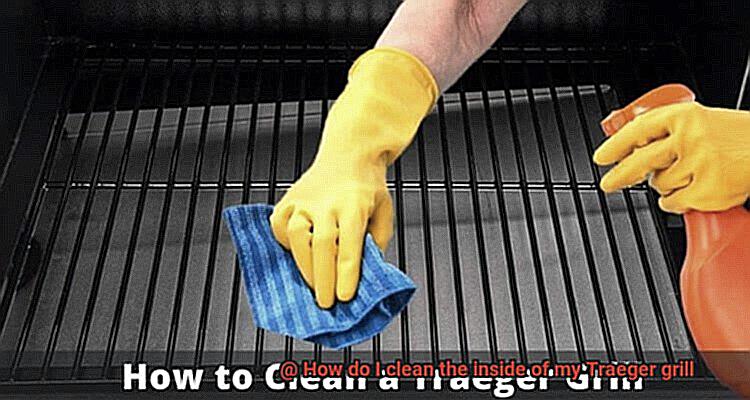
Wipe Down Interior with Warm Soapy Water or Mild Cleaning Solution
One of the essential steps to achieving this is by regularly wiping down the interior of your Traeger grill with warm soapy water or mild cleaning solution.
Have you ever wondered why your grilled food tastes off even though you followed the recipe to a tee? The answer could be in the buildup of grease, ash, and food particles that can affect the flavor of your food. Moreover, if left uncleaned, it can pose a potential fire hazard.
So, here are some practical steps to help you maintain your grill:
- Step 1: Ensure that your grill has completely cooled down before cleaning it. Once it has cooled, remove the grates and any other removable parts from the interior of the grill.
- Step 2: Using a soft-bristled brush or sponge, gently scrub away any debris or buildup on the interior walls, bottom, and sides of the grill.
- Step 3: Mix warm water with a mild dish soap or cleaning solution specifically designed for grills. Dip your brush or sponge into the solution and thoroughly wipe down the interior surfaces of your Traeger grill.
- Step 4: Rinse your brush or sponge regularly to avoid spreading any dirt or grime around. After wiping down the interior surfaces, use a clean damp cloth or sponge to rinse away any remaining soap residue.
- Step 5: Dry all surfaces thoroughly to prevent any rusting or damage.
It is crucial to note that using harsh chemicals or abrasive materials when cleaning your Traeger grill can damage its finish and affect its performance. Stick to warm soapy water or mild cleaning solutions specifically designed for grills to ensure a thorough yet gentle clean.
Clean the Drip Tray Regularly
If you’re a true grill master, you know that maintaining your Traeger grill’s performance is key to grilling success. But did you know that cleaning the drip tray is a crucial task in keeping your grill in top condition? As an expert in this area, trust me when I say that regularly cleaning your drip tray not only maintains your grill’s performance but also prevents potential fire hazards.
So, let’s dive into the details. The drip tray is located underneath the grill grates and collects all the grease and food particles that fall from the cooking surface. If not cleaned regularly, this can cause a buildup of grease, which can lead to flare-ups and even a fire hazard. By cleaning the drip tray, you’re not only protecting your grill but also ensuring the safety of yourself and those around you.
To clean the drip tray, start by removing it from the grill. Most Traeger grills have a removable drip tray that can be easily taken out for cleaning. Once removed, use a scraper or spatula to remove any large pieces of food or debris from the tray. Then wash the tray with warm soapy water and a sponge or brush. If necessary, you can also use a mild degreaser. Rinse thoroughly with water and dry with a clean towel.
If there is still some grease buildup on the drip tray, don’t worry – there’s a solution. Mix 1 tablespoon of baking soda with 1 cup of water to create a paste. Apply the paste to the drip tray and let it sit for 15-20 minutes. Then scrub with a sponge or brush and rinse thoroughly with water. Voila. Your drip tray is now sparkling clean.
It’s important to note that some Traeger grills come with disposable aluminum drip trays. If this is the case for your grill, simply replace the tray when it becomes full or dirty.
nFCQWlo61WY” >
Conclusion
In conclusion, a clean Traeger grill is the key to achieving mouth-watering and perfectly cooked meals every time you fire it up. Our step-by-step guide makes it easy to keep your grill’s interior free from ash, grease, and food debris while maintaining its pristine appearance.
Regular cleaning of your Traeger grill can prevent flare-ups, maintain pellet quality, and promote good hygiene. Always allow the grill to cool down completely before beginning the cleaning process, and avoid using harsh chemicals or abrasive materials that could damage its finish.
Before cleaning, remove the grates, grease tray, and heat diffuser to ensure a thorough job. Vacuum out any remaining dirt or ash and wipe down the interior with warm soapy water or a mild cleaning solution. Don’t forget to clean the drip tray regularly to prevent potential fire hazards.
By following these tips and tricks for keeping your Traeger grill in top condition, you’ll be able to impress guests with delicious meals cooked on a spotless grill for years to come.