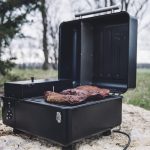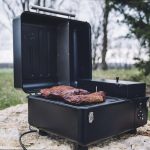
Is your Traeger grill giving you a headache with its inconsistent heating and subpar performance? The hot rod could be the culprit behind these issues. It’s the ignition rod that lights up the pellets in the firepot, keeping it burning and ensuring a well-cooked meal. But like any other part, it can wear out or become damaged over time.
But don’t worry. Replacing your Traeger hot rod is an easy process that won’t require professional help. And by doing it yourself, you can save both time and money on costly repairs.
In this post, we’ll take you through all the steps involved in changing your hot rod. From gathering the necessary tools to removing the old one and installing a new one, we’ve got you covered. We’ll also share some helpful tips and tricks to make sure everything goes smoothly.
So if you’re ready to give your Traeger grill an upgrade, grab your tools and let’s get started on this DIY project.
Contents
What is a Traeger Hot Rod and Why Is It Essential?
It’s an investment in your culinary journey. And at the heart of this fantastic piece of equipment lies the Traeger Hot Rod. But what exactly is it, and why is it so essential?
At its core, the Traeger Hot Rod is a heating element located at the bottom of the pellet hopper in your grill. It’s responsible for igniting the wood pellets that create the heat and smoke necessary for cooking your food. Without a functioning hot rod, your grill won’t be able to cook correctly, leading to unevenly cooked meals or even a failure to cook at all.
The hot rod provides a constant source of ignition for your grill, ensuring that your food cooks evenly and thoroughly every time. It’s the ignition system that sets Traeger grills apart from traditional charcoal or gas grills, making it an essential component for any Traeger enthusiast.
To keep your grill functioning optimally, it’s crucial to keep the hot rod in good condition and replace it as needed. Signs of a faulty hot rod include difficulty starting the grill or a decrease in temperature during cooking. Don’t wait until it’s too late to replace your hot rod. Regular maintenance will ensure that you’re always ready to grill up some delicious meals.
Replacing a hot rod on a Traeger grill is a relatively straightforward process that can be done with basic tools and following the manufacturer’s instructions. Remember to turn off the power before attempting to replace the hot rod.
Tools and Materials Needed to Change the Hot Rod
For with the right tools and materials, you can make this process a breeze.
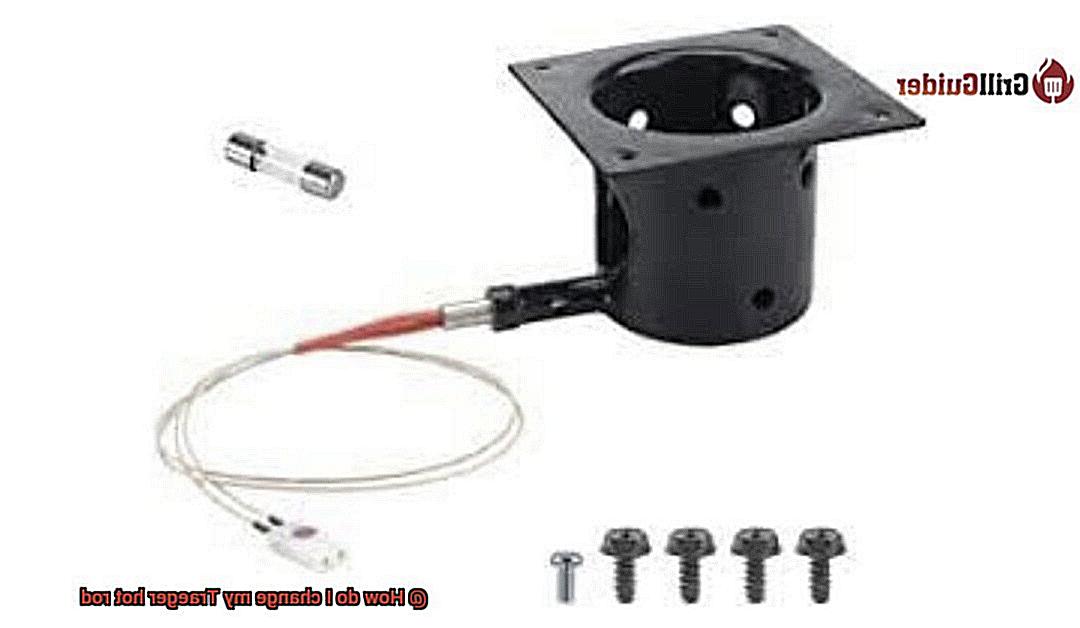
First and foremost, ensure that you have a replacement hot rod that’s compatible with your Traeger grill. You can purchase one from a local hardware store or online. Once you have your replacement hot rod, it’s time to gather the rest of the necessary tools.
You’ll need a trusty Phillips head screwdriver to remove the screws that hold the hot rod in place. Pliers come in handy when removing the wire connectors that attach to the hot rod. A wire brush is necessary to clean the igniter mounting hole and ensure a good connection for the new hot rod. Lastly, don’t forget a shop vac or compressed air to clean out any debris or ash that may have accumulated in the firepot after removing the old hot rod.
It’s vital to wear gloves when handling the hot rod as it can get extremely hot. Remember to consult your owner’s manual before beginning the process as some Traeger models may require additional tools or materials.
Step-by-Step Guide for Changing the Hot Rod
Attention all Traeger grill aficionados. If you’re experiencing issues with your hot rod, fret not. Changing it is a breeze. Whether you’re a seasoned pro or a novice griller, this comprehensive step-by-step guide will walk you through the process of changing the hot rod in your Traeger grill with ease.
Before we dive into the steps, it’s crucial to gather some tools. You’ll need pliers, a Phillips head screwdriver, a wire brush, shop vac or compressed air, a replacement hot rod that’s compatible with your grill, and gloves to protect your hands. Once you have everything together, let’s get started.
- Step 1: Always remember to turn off and unplug your Traeger grill before beginning any work.
- Step 2: Remove the grill grates and heat shield to gain access to the hot rod.
- Step 3: The hot rod is typically located on the bottom of the grill near the firepot.
- Step 4: Use pliers to disconnect the wires attached to the old hot rod.
- Step 5: Utilizing a Phillips head screwdriver, remove the screws holding the old hot rod in place.
- Step 6: Carefully remove the old hot rod from the grill.
- Step 7: Before installation, inspect the new hot rod for any damage or defects.
- Step 8: Insert the new hot rod into place and secure it with screws.
- Step 9: Reattach wires to the new hot rod.
- Step 10: Replace the heat shield and grill grates.
- Step 11: Plug in your Traeger grill and turn it on to test that everything is working correctly.
By following these easy steps, you can successfully change the hot rod in your Traeger grill. Always consult your owner’s manual before starting any work, and remember to wear protective gloves to ensure your safety. Don’t let a faulty hot rod stop you from enjoying delicious meals on your Traeger grill.
Unplugging the Grill
Before you start tinkering with your grill, let’s talk about a critical step that is often overlooked – unplugging the grill.
Why is it so crucial to unplug your grill before beginning any work on it? For starters, your safety should always be a top priority. Grills use electricity to function, and attempting to work on a plugged-in grill puts you at risk of electrocution or other accidents. By unplugging the grill, you eliminate this danger and ensure that you can work on it without any hazards.
But that’s not all – it’s also essential to allow your grill to cool down before unplugging it. If you’ve been grilling up a storm, the surfaces of your grill can get scorching hot. Waiting at least an hour before unplugging the grill prevents any accidental burns or injuries that could happen if you touch a hot surface.
Now that we’ve covered why it’s essential to unplug and cool down your grill let’s talk about how to do it. It’s simple – just remove the power cord from the outlet. But be sure to hold onto the plug itself rather than pulling on the cord, which could damage either the cord or outlet.
To recap, here are some key takeaways:
- Always unplug your grill before beginning any work on it.
- Allow your grill to cool down for at least an hour before unplugging it.
- When unplugging, hold onto the plug rather than pulling on the cord.
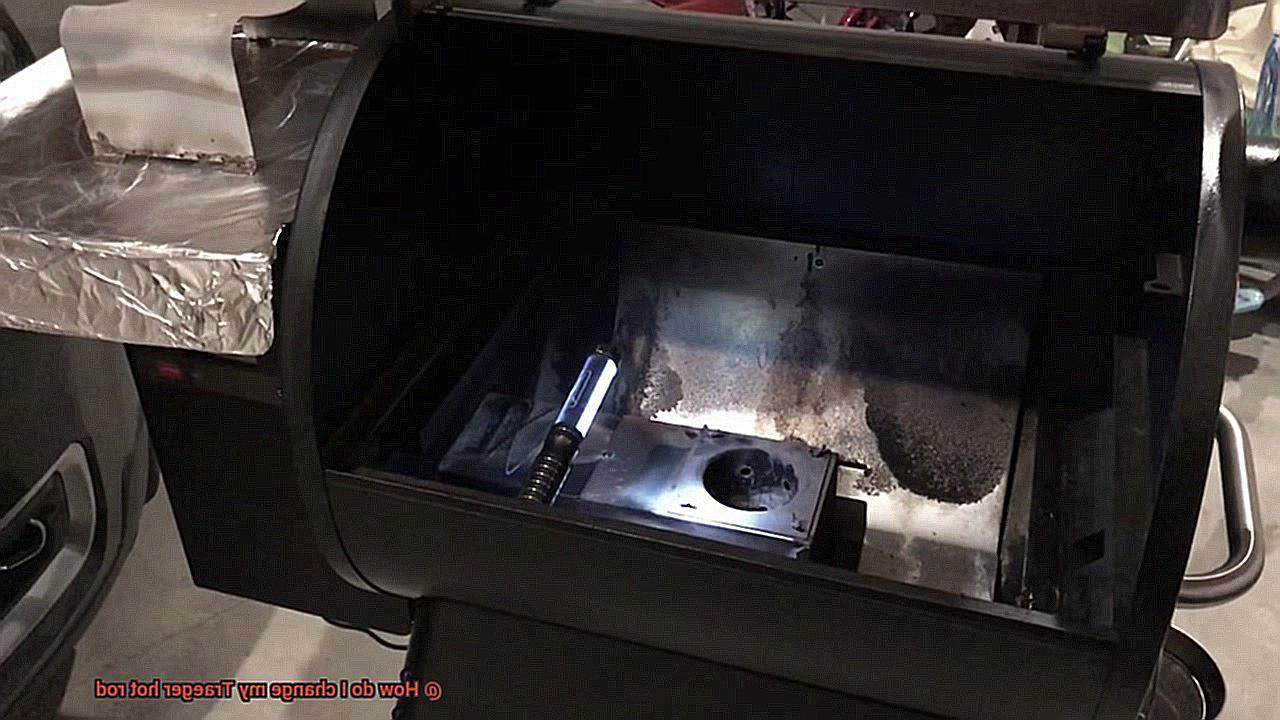
Locating the Hot Rod
Attention grill masters. If you suspect that your Traeger grill’s hot rod needs replacement, locating it is the first step. The hot rod is a crucial component responsible for igniting pellets and starting the fire. Allow me, as an expert in the field, to guide you through this process with my research notes.
Safety comes first, just like how superheroes wear protective gear before fighting crime. Remember to unplug your grill before tinkering with it. Now let’s get started.
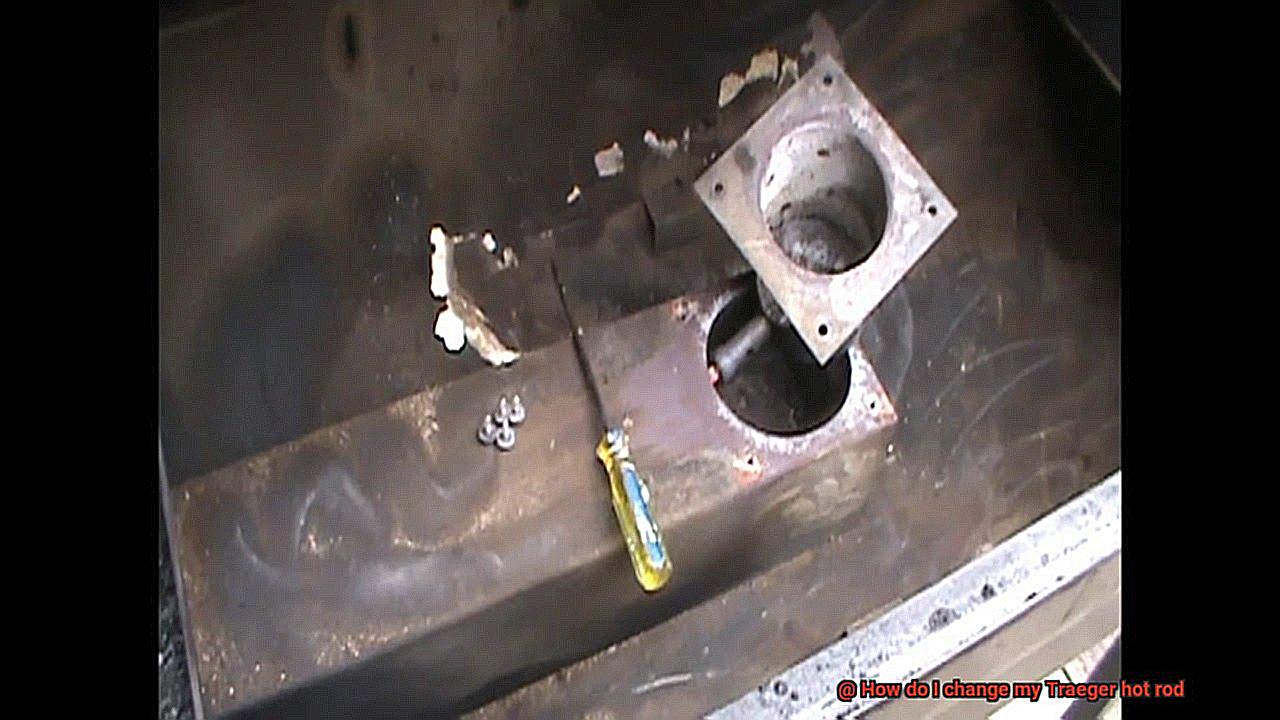
To locate the hot rod on your Traeger grill, remove the grates and heat baffle. You should be able to find it in the bottom center of the firepot, directly under the pellet hopper. Note that the hot rod’s location may vary depending on your Traeger grill model. Don’t hesitate to consult your owner’s manual or contact Traeger customer support for assistance if needed.
Once you’ve located the hot rod, it’s time to prepare for replacement. Gather all necessary tools and replacement parts, including a replacement hot rod, screws, and bolts to secure it in place.
So, here are some key takeaways:
- The hot rod ignites pellets and starts the fire.
- Locate it by removing the grates and heat baffle.
- It’s typically at the bottom center of the firepot.
- Check your owner’s manual or contact customer support if unsure.
- Prepare for replacement with all necessary tools and parts.
Removing the Old Hot Rod
First and foremost, safety comes first. Make sure your grill is unplugged and has completely cooled down before proceeding with removing the old hot rod. Once you’ve done that, it’s time to get to work.
To access the hot rod, remove the grill grates, drip tray, and heat baffle. Yes, this may seem like a lot of effort, but trust me when I say that it’s worth it. It gives you an opportunity to give your grill a much-needed deep clean while you’re at it.
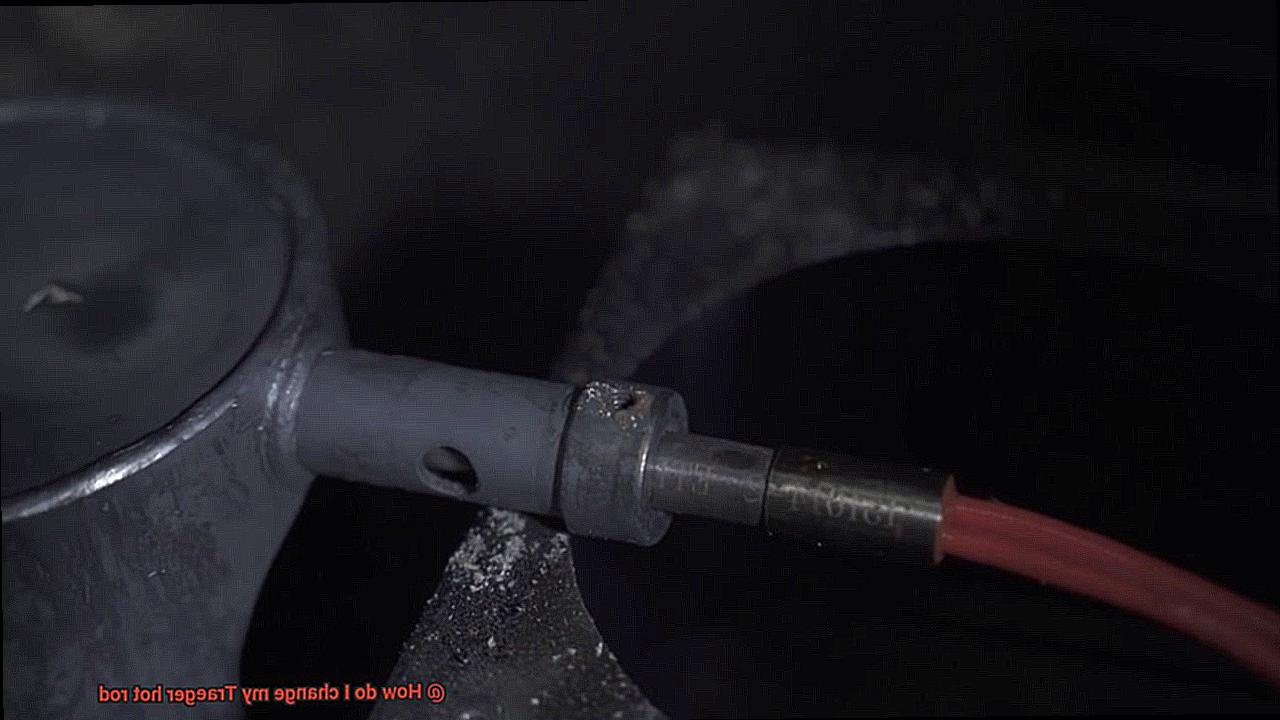
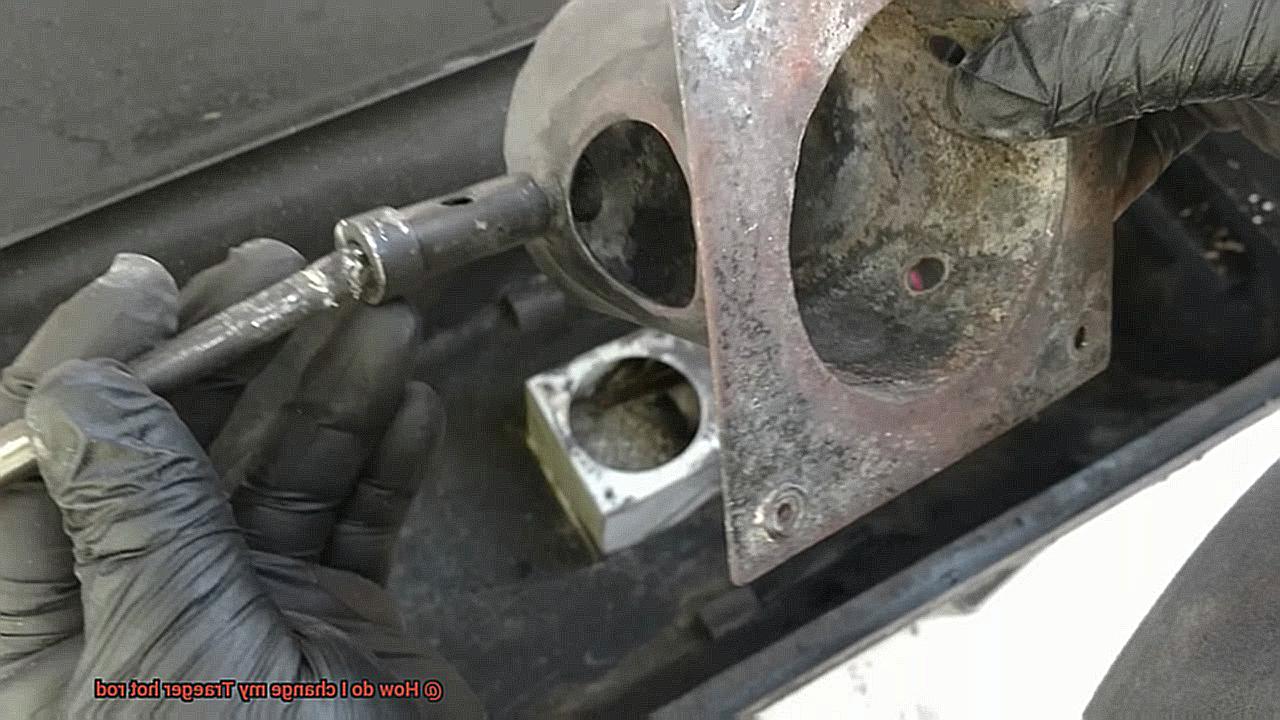
Now that you have exposed the firepot, locate the hot rod in the center of it. It’s held in place by two screws. Use a Phillips head screwdriver to remove these screws and gently pull the hot rod out of the firepot. Be mindful not to damage any of the wiring or ceramic insulator surrounding it. If it’s stuck or difficult to remove, try wiggling it back and forth while gently pulling it out.
Once you’ve successfully removed the old hot rod, take a good look at it. Is it worn out or damaged? If so, dispose of it properly and replace it with a new one before using your grill again. However, if it’s still in good condition, keep it as a backup just in case.
In summary, removing the old hot rod may seem like a daunting task at first, but with these simple steps and proper tools, you’ll be done in no time. Don’t forget to take care of your Traeger grill by regularly cleaning and maintaining it for years of delicious meals to come.
Installing the New Hot Rod
This crucial component is responsible for igniting the pellets and keeping the fire going, so it’s essential to make sure it’s working correctly. Luckily, with some caution and basic knowledge of your grill’s components, this is a simple task that can be done at home.
Before getting started, make sure your grill is unplugged and has cooled down completely to avoid any injuries. Then, remove the grill grates, drip tray, and heat baffle to access the firepot’s center where the hot rod is located.
Using a Phillips head screwdriver, gently remove the old hot rod, being careful not to damage any wiring or ceramic insulator around it. Dispose of it if it’s worn out or keep it as a backup if it’s still in good condition.
Now it’s time to install the new hot rod. But before you dive in, double-check that you’ve purchased the correct replacement part for your specific Traeger grill model. Insert the new hot rod into the housing and secure it tightly by screwing it in place. Connect the wires to the terminals correctly and ensure that they are firmly attached.
Once everything is in place, plug in your grill and turn it on to test if everything is working correctly. Congratulations. You’ve successfully installed a new hot rod in your Traeger grill.
It’s crucial to note that not all Traeger grills have the same hot rod specifications, so be sure to check your grill’s manual or consult with a professional before purchasing a replacement. Using an incorrect or incompatible hot rod can cause damage to your grill and pose a safety hazard.
Now that you have everything taken apart, take advantage of this opportunity to deep clean your grill. This will help keep your grill in top condition and ensure that it continues to function correctly.
Securing the New Hot Rod in Place
Make sure you know how to properly secure it in place to ensure optimal performance and safety.
First things first, prioritize safety. Unplug and completely cool down your grill before attempting to replace the hot rod. Once you’ve done that, locate the old hot rod on your grill – it’s usually found towards the bottom and connected to wires.
Carefully remove the wires from the old hot rod and set them aside. It’s now time to install the new hot rod. Place it in the same location as the previous one and ensure it’s securely in place. Depending on your model, you may need a screw or bolt to secure it or it may snap into place easily.
Once your new hot rod is securely in place, reattach the wires carefully and make sure they’re firmly attached to prevent any electrical malfunctions.
Finally, plug your Traeger grill back in and turn it on to test if everything is working correctly. Listen out for a soft clicking sound as the hot rod heats up and ignites the pellets – this means everything is good to go.
In summary, securing your new hot rod in place is a simple yet critical step in changing out your Traeger grill’s hot rod. Follow these steps carefully to ensure optimal function and avoid any damage or issues with your grill. Happy grilling.
Testing Out the Grill After Changing the Hot Rod
You have successfully changed the hot rod on your Traeger grill, but before you start planning your next backyard cookout, there is one crucial step you need to take – testing out the grill after changing the hot rod. Testing the grill after changing the hot rod is crucial as it will help identify any potential issues before they become bigger problems.
To ensure that your grill is working efficiently and producing delicious meals every time you use it, follow these simple steps:
- Step 1: Turn on the grill and set it to the desired temperature. Let it heat up for at least 10 to 15 minutes, ensuring that the temperature remains constant. This will help you confirm that the new hot rod is working efficiently and that there are no issues with temperature control.
- Step 2: Place some food on the grill to cook. Keep it simple with something like burgers or chicken breasts. This will help you verify that the grill is cooking evenly and that there are no hot or cold spots. Plus, who doesn’t love a good burger?
- Step 3: While your food is cooking, pay attention to any unusual sounds or smells coming from the grill. Any strange noises or odors could indicate a problem with the grill, and it’s best to address them immediately.
- Step 4: Once your food is cooked, remove it from the grill and inspect it for any signs of uneven cooking or undercooking. If everything looks good, then congratulations. You’ve successfully changed your Traeger hot rod and tested out your grill.
Testing out your grill after changing the hot rod is an essential step in maintaining a well-functioning grill. It helps ensure that your Traeger grill is working efficiently and producing delicious meals every time you use it. Here are some additional tips to keep in mind:
- Clean your grill thoroughly before testing it out after changing the hot rod.
- Use a meat thermometer to check that your food has reached the appropriate internal temperature.
- Take note of how long it takes for your food to cook at different temperatures.
eXynkEv0vjY” >
Conclusion
In conclusion, don’t let a faulty hot rod ruin your grilling experience. Replacing it is a straightforward process that can be done in the comfort of your own home with the right tools and know-how. The hot rod is a critical component of your Traeger grill, responsible for igniting pellets and ensuring even cooking. If you notice difficulty starting the grill or a decrease in temperature during cooking, it’s time to change the hot rod.
To start, unplug and cool down your grill before removing the grates, heat baffle, and old hot rod. Gather all necessary tools and replacement parts, including a new hot rod, screws, and bolts to secure it in place. Once you have everything ready to go, insert the new hot rod into the housing and secure it tightly by screwing it in place. Connect the wires to the terminals correctly and ensure they are firmly attached.
Testing out your grill after changing the hot rod is crucial to identify any potential issues before they become bigger problems. Turn on your grill and set it to the desired temperature while paying attention to any unusual sounds or smells coming from the grill. Once your food is cooked, remove it from the grill and inspect it for any signs of uneven cooking or undercooking.
By following these steps carefully, you can successfully change out your Traeger hot rod and enjoy delicious meals every time you use your grill. Remember always to prioritize safety by wearing protective gear when handling hot components like the hot rod.
Don’t let a faulty hot rod get in between you and perfectly grilled meals.