Your morning smoothie routine shouldn’t be ruined by a leaky blender gasket. You deserve the perfect blend every time, and a worn-out gasket can compromise that experience. The small but mighty gasket seals the gap between the blade assembly and the blender jar to prevent spills and leaks. But fear not. In this blog post, we’ll show you how to fix your blender gasket like a pro.
We’ll walk you through each step of the process, from gathering necessary tools to removing and replacing the gasket with ease. Plus, we’ll share some helpful tips for maintaining your blender gasket’s lifespan so that it stays in top-notch condition for all your blending needs.
Whether you’re a smoothie aficionado or a culinary genius, having a reliable blender is essential for creating mouth-watering recipes. So let’s explore the world of blender gaskets together and get yours working like new again.
Contents
What is a Blender Gasket?
Blenders are an indispensable kitchen tool for anyone who loves to whip up smoothies, purees, or soups. But did you know that a blender gasket is a crucial component that ensures the smooth and efficient functioning of your blender?
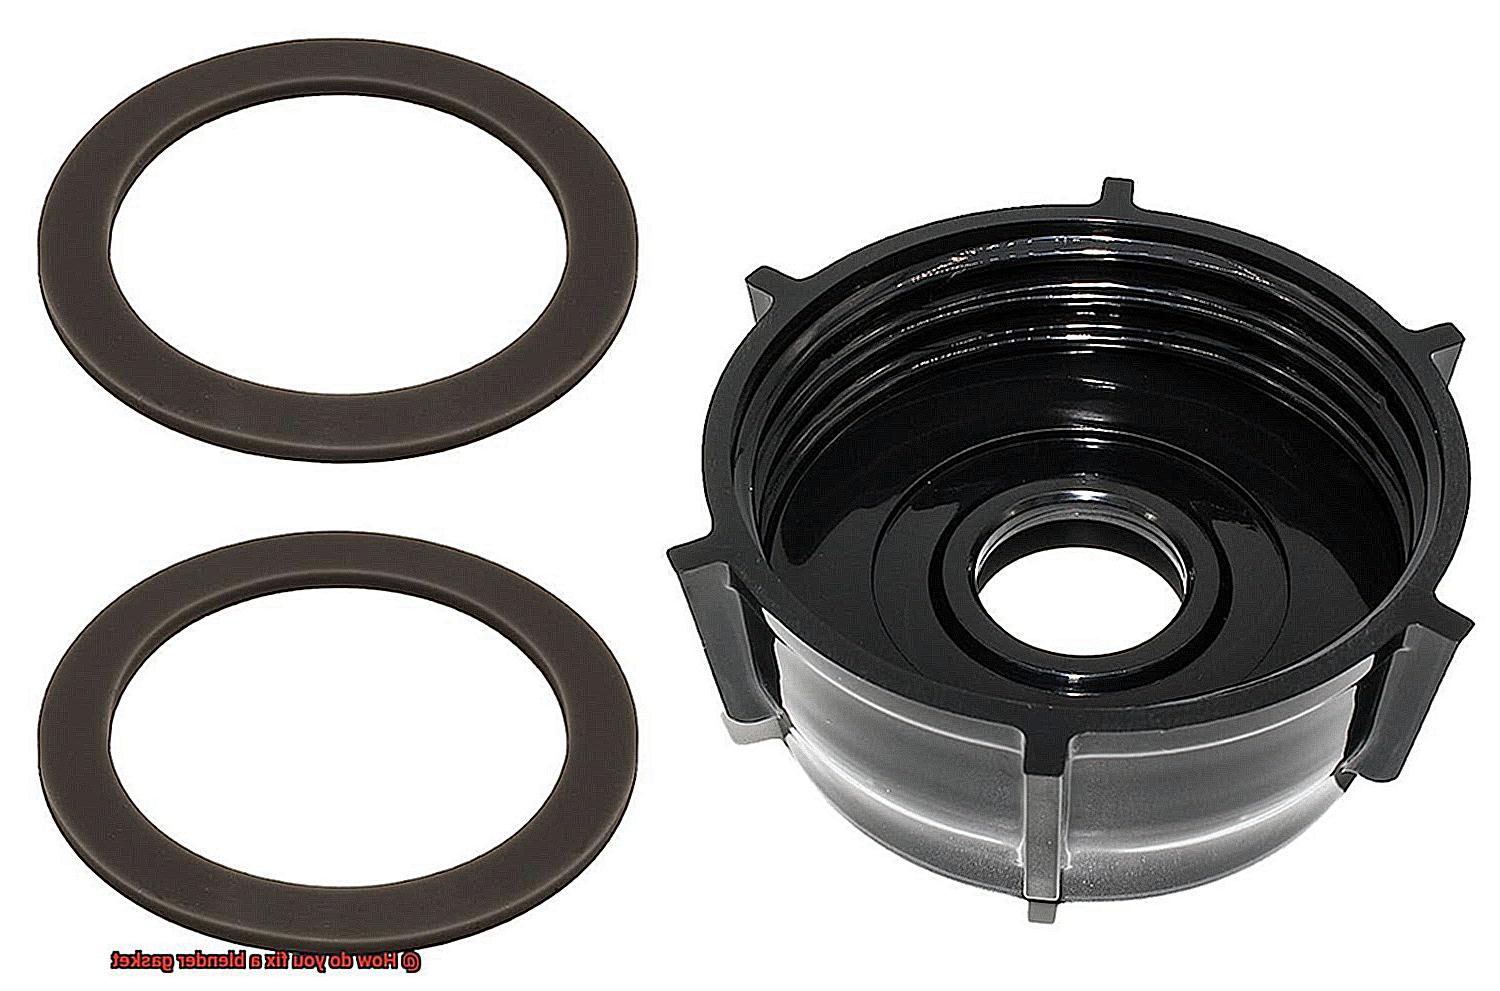
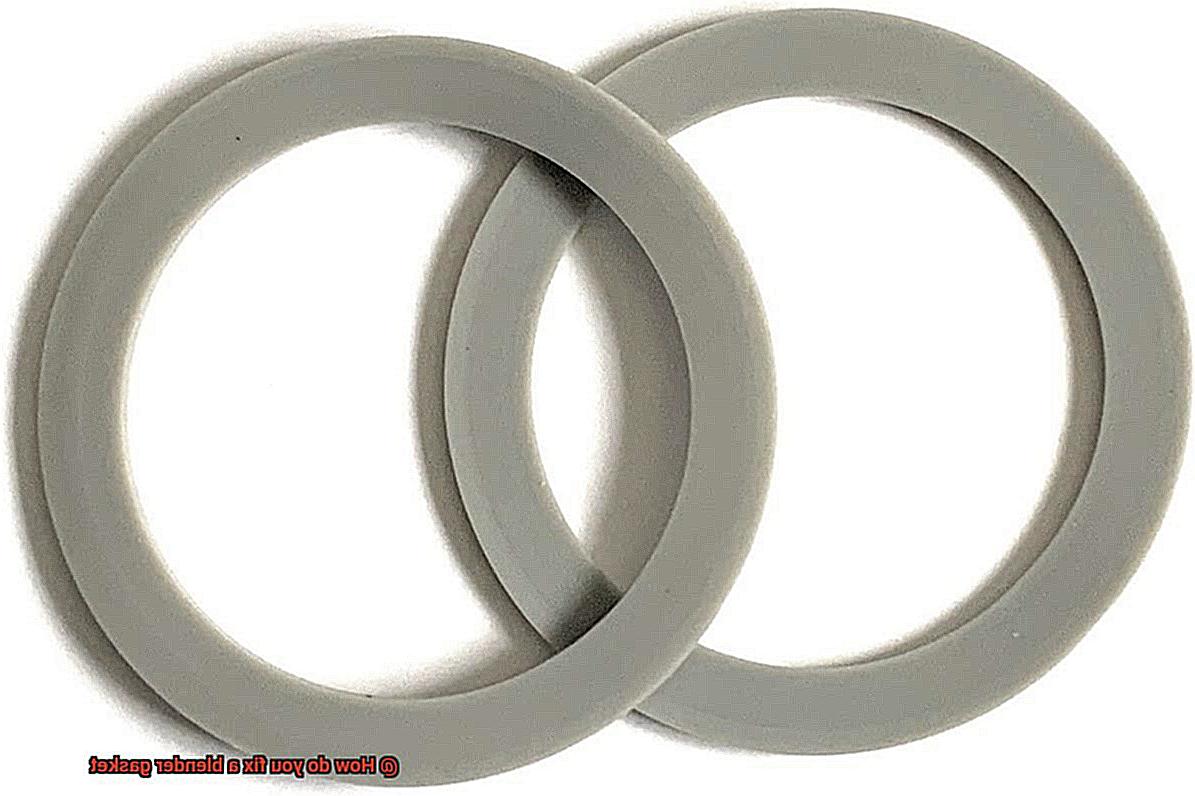
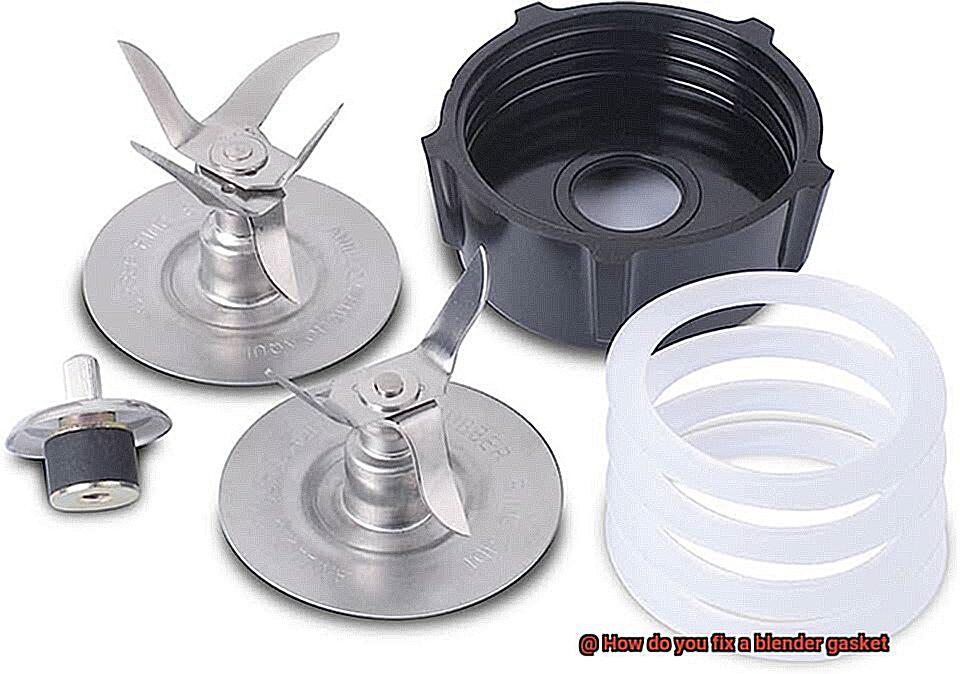
So, what exactly is a blender gasket? It’s a small rubber ring that sits at the base of the blade assembly and creates a seal between the blade assembly and the blender jar. This seal is essential to prevent leaks and ensure that the blending process is smooth and efficient. Blender gaskets come in different sizes and shapes to fit various blender models, and they are usually made of silicone or rubber, making them flexible and durable.
Over time, blender gaskets can become damaged or worn out, leading to leaks and reduced blending power. However, replacing a damaged blender gasket is an easy and inexpensive process that can be done at home with just a few tools.
If your blender has a removable gasket, replacing it is as simple as gently pulling off the old gasket, cleaning the area where the gasket was located with soap and water, and sliding the new gasket into place. On the other hand, if your blender has an integrated gasket, you will need to disassemble the blade assembly to access it.
To replace an integrated gasket, start by unplugging the blender and removing the jar from the base. Unscrew the blade assembly from the bottom of the jar using a wrench or pliers while being careful not to damage the threads on either component. Clean all components thoroughly with soap and water, inspecting the gasket for any signs of damage or wear. If necessary, gently pull off the old gasket and slide a new one into place before reassembling everything securely.
Types of Blender Gaskets
Blenders are a must-have in every kitchen, and a damaged or worn-out gasket can make blending a frustrating experience. Blender gaskets are small rubber rings that seal the base of the blender jar to prevent leakage. There are several types of blender gaskets available in the market, each with unique features and benefits. Let’s explore them in detail.
O-ring Gaskets
The O-ring gasket is circular and fits snugly around the blender blade assembly. Made from rubber or silicone, they provide a strong seal that prevents leaks and spills. These gaskets are easy to install and replace, making them a popular choice for most home cooks.

Flat Gaskets
Flat gaskets are flat discs made from rubber or nylon material. They sit between the blade assembly and jar to create a seal that prevents leaks. Flat gaskets are easy to install and replace, making them another popular choice for home cooks.
Lip Gaskets
Lip gaskets have a protruding edge that fits into a groove in the blade assembly. They are commonly used in high-powered blenders as they provide a tighter seal that can withstand high speeds and pressure. Made from silicone material, lip gaskets can last longer than other types of blender gaskets.
Combination Gaskets
Some blenders use a combination of both flat and O-ring gaskets to create a tight seal. This can be especially useful for high-powered blenders that require a strong seal to prevent liquid from escaping during blending.
Specialized Gaskets
Some blenders use specialized gaskets designed for specific blender models or brands. These types of gaskets may be harder to find and replace, but they are necessary for maintaining the integrity and functionality of your blender.
It is important to note that blender gaskets come in different sizes and shapes depending on the brand and model of your blender. Choosing the right size and type of gasket is crucial to ensure a proper fit and prevent leaks.
Removing the Old Gasket
Blenders are undoubtedly one of the most versatile and useful kitchen appliances. They can whip up smoothies, purees, and even soups in a matter of seconds. But, like any machine, they require maintenance to function at their best. One important aspect of blender maintenance is making sure the gasket seal is in good condition. However, removing the old gasket can be challenging. Fear not. We have compiled some tips to help you effortlessly remove the old gasket and install a new one.
First and foremost, safety should always be your top priority. Unplug your blender from the power source and detach all blades or attachments before starting the process.
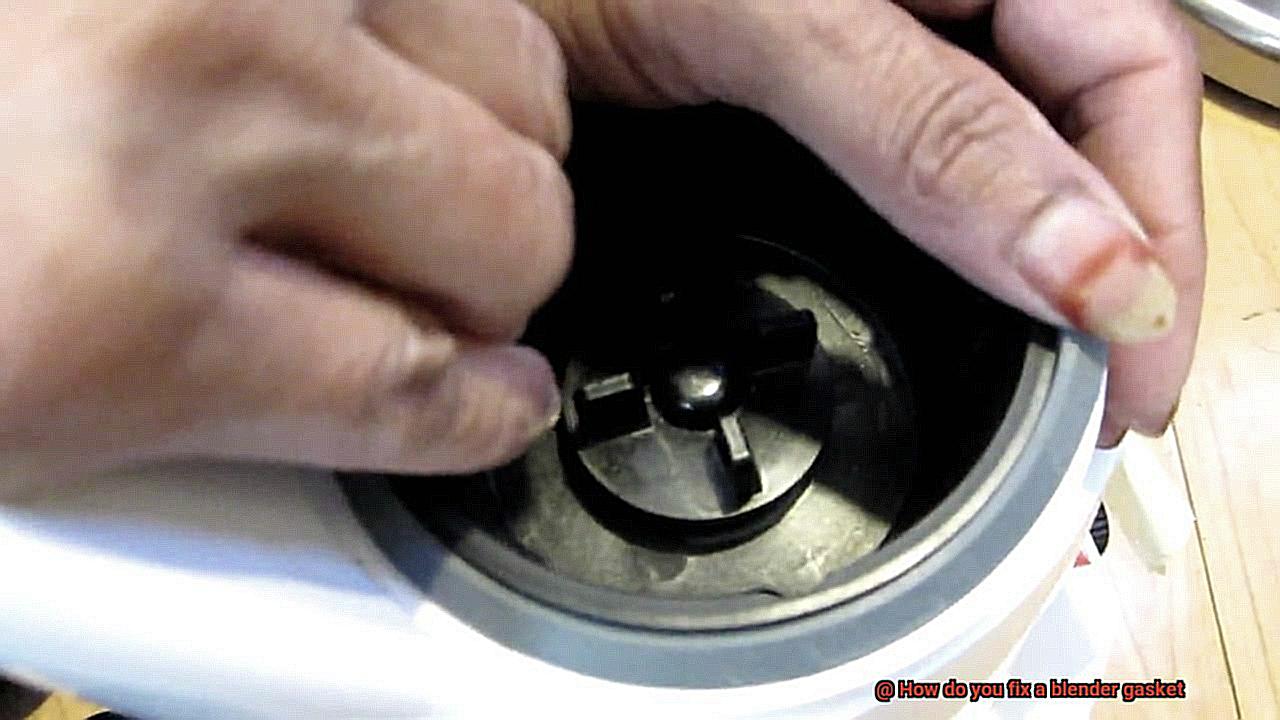
The gasket seal is usually located around the blade assembly, but it can be tricky to spot. Inspect it carefully to ensure you are working on the right area.
Using a flathead screwdriver or butter knife, gently pry up one side of the gasket seal. Be cautious not to damage your blender or the blade assembly during this process. Once one side is lifted, work your way around the gasket until it’s entirely removed.
If you encounter resistance while removing the old gasket, try using pliers to exert gentle pressure on it. However, make sure not to pull too hard as this could damage your blender. If you’re still having trouble, use a hairdryer or heat gun to loosen the adhesive holding it in place.
After successfully removing the old gasket, take a moment to clean the blade assembly and surrounding area with warm soapy water. This ensures that there is no dirt or debris that could interfere with the new gasket’s seal.
Cleaning the Area
Blenders are kitchen superheroes, but even they need maintenance to stay in top-notch shape. One of the most important steps to take before repairing a blender gasket is cleaning the area around it. Let’s explore the significance of this step and how to do it effectively.
Cleaning the area around a blender gasket is crucial to prevent any dirt or debris from interfering with the repair process. You don’t want any food residue or other grime getting in the way of your fix, as it could make matters worse. A few moments spent wiping down the area around the gasket will save you time and effort in the long run.
To clean the area around a blender gasket, start by unplugging and removing the jar from the base. Carefully remove the blade assembly and set it aside. Using a damp cloth, gently wipe down the area around the gasket, being sure to remove any food residue or other debris that may have accumulated. Be gentle during this process to avoid damaging any other components.
If there is any residue or buildup that is difficult to remove, you can use a small amount of mild soap and warm water to clean the area. Rinse thoroughly and dry completely before continuing with the repair process. Take your time with this step to ensure you’ve cleaned everything adequately.
In addition to preventing interference during repairs, cleaning the area around a blender gasket helps keep your blender functioning correctly. Here are a few tips for effective cleaning:
- Unplug and remove the jar from the base
- Remove blade assembly and set it aside
- Gently wipe down the area around the gasket with a damp cloth
- Use mild soap and warm water for stubborn residue
- Rinse thoroughly and dry completely
Replacing a Removable Gasket
Blenders are essential kitchen appliances that help us whip up delicious smoothies, purees, and sauces. However, after some time, their superhero powers may dwindle due to a worn or damaged gasket. Don’t fret. Replacing a removable gasket on a blender is a simple process that can be done by anyone with a little bit of patience and attention to detail.
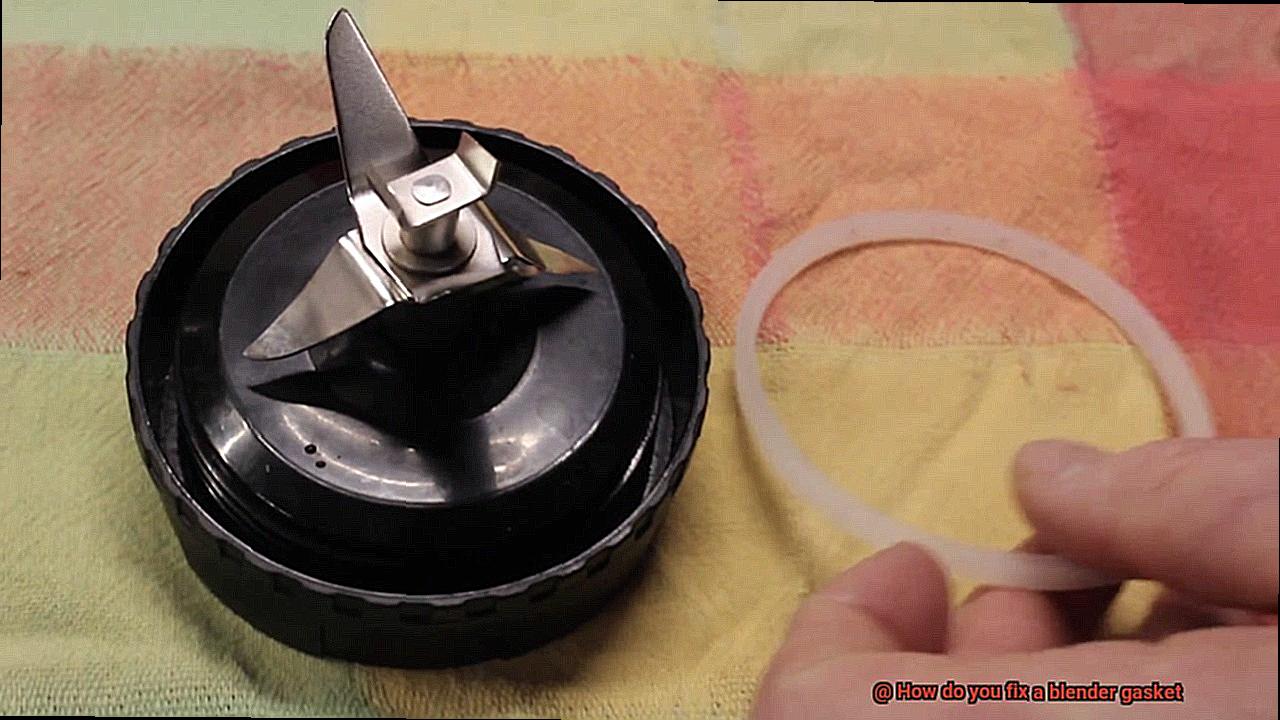
The first step is to locate the gasket. Typically, it’s located at the base of the blender blade assembly. Some gaskets may require some wiggling or twisting to remove, but most will pop out with a little bit of pressure.
Once you have removed the old gasket, it’s important to purchase the correct replacement for your specific blender model. Gaskets come in different sizes and shapes, so make sure you double-check before making a purchase. Also, ensure that the new gasket is clean and free from any debris or residue before installing it.
To install the new gasket, press it firmly into place around the base of the blade assembly. Ensure that it is seated evenly and securely in its groove without any gaps or spaces between the gasket and the blade assembly. Once installed, reattach the blade assembly to your blender and test it out to ensure everything is working correctly.
Accessing an Integrated Gasket
In this post, we will delve into the process of accessing an integrated gasket in your blender.
Before beginning, safety should be your top priority. Unplug your blender and take care when handling the sharp blades. Once you’ve taken the necessary precautions, it’s time to get started.
The first step is to carefully disassemble your blender and locate the gasket. This rubber seal is located at the base of the blade assembly and helps prevent leaks, ensuring smooth operation.
The next step is removing the blade assembly from the blender jar. This can be achieved by unscrewing it from the base of the jar. Once you have removed the blades, you will have a better view of the gasket.
Accessing an integrated gasket can be challenging as it may involve removing retaining clips or screws holding it in place. Keep these small parts safe and ensure they are replaced correctly during reassembly.
With any retaining clips or screws out of the way, it’s time to carefully remove the old gasket. It may be stuck in place, so use a flathead screwdriver or other tool to pry it loose gently. Avoid damaging any surrounding components as you do so.
Once you have removed the old gasket, give the area a thorough cleaning with soap and water. Use a small brush or toothbrush to remove any debris that has accumulated around the gasket.
When installing a new gasket, choose one that is compatible with your blender model. Carefully press it into place and then reassemble your blender. Finally, test your blender to ensure that everything is working correctly.
Replacing an Integrated Gasket
Replacing an integrated gasket may seem daunting, but with our expert guidance, you’ll have a leak-proof blender in no time.
First things first, identify your blender model and locate the blade assembly. This will help you purchase the correct replacement gasket. Most manufacturers provide replacement parts, so check their website or customer service hotline to get the right gasket.
Once you have the replacement gasket, it’s time to remove the old one. Disassembling the blade assembly from the blender jar may require unscrewing or twisting depending on your blender model. Use a flathead screwdriver or similar tool to gently pry off the old gasket, taking care not to damage any other parts during this process.
After removing the old gasket, give the area a thorough clean to ensure there is no debris or residue on the blade assembly or blender jar. Align the new gasket onto the blade assembly and press it firmly into place. Ensure that it fits evenly around the edges and is snugly in place.
Now it’s time to reassemble the blade assembly back onto the blender jar. Tighten all parts securely before using your blender again. We recommend testing your blender before use to ensure that there are no leaks or other issues with your new integrated gasket.
In summary, replacing an integrated gasket requires attention to detail and patience but is a straightforward process when following these simple steps: identify your blender model, purchase the correct replacement part, remove the old gasket carefully, install the new one properly, and reassemble everything before testing it out.
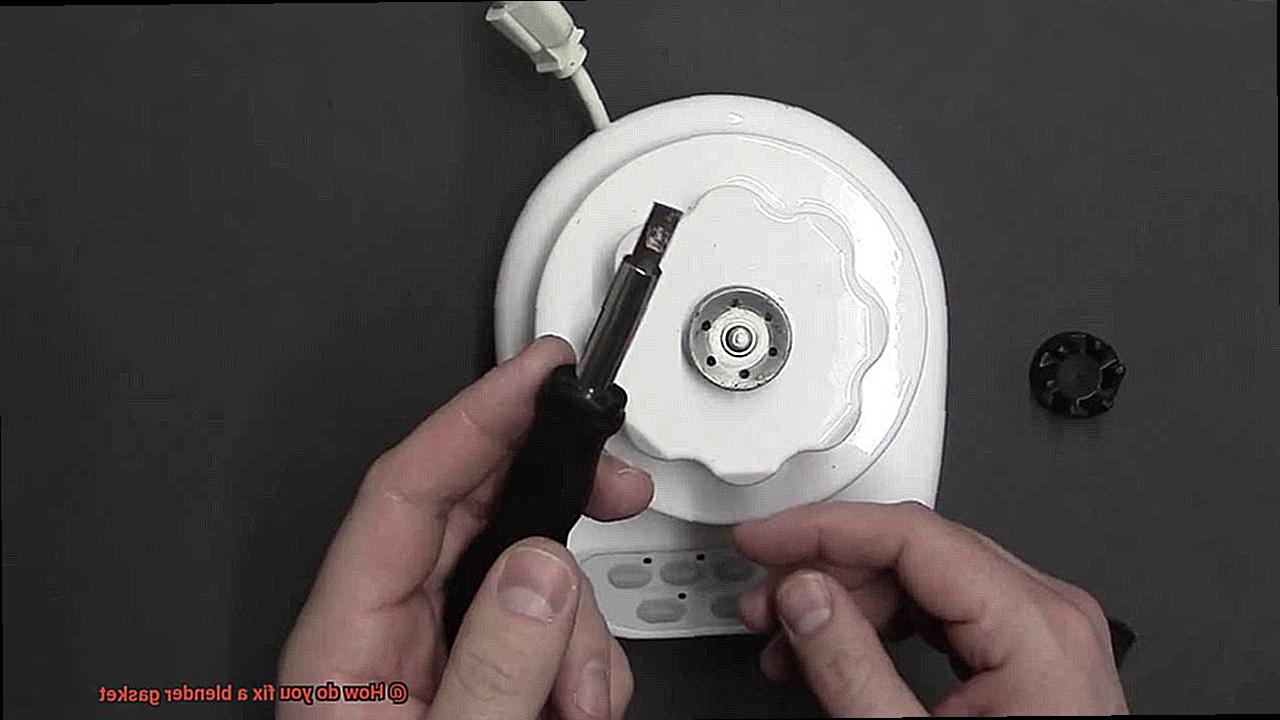
Reassembling the Blade Assembly
We all know that reassembling the blade assembly can be a bit of a daunting task, but it’s essential to ensure that your blender is running at peak performance. In this section, we will guide you through the process step by step.
First and foremost, it’s crucial to make sure all parts are thoroughly cleaned and dried. No one wants a gritty or moldy smoothie. Once you’ve got everything spick and span, it’s time to start reassembling.
Step 1: Align the Gasket on the Blade Assembly
The gasket is a critical component for preventing leaks, so take your time and ensure that it’s properly aligned on the blade assembly before inserting it into the blender jar. A little extra care here can save you from a messy disaster later on.
Step 2: Carefully Insert the Blade Assembly into the Blender Jar
This step requires steady hands and patience. Gently insert the blade assembly into the blender jar, ensuring that it’s securely seated. A wobbly or loose blade can cause uneven blending or even damage your blender.
Step 3: Align and Insert the Sealing Ring onto the Blender Jar Base
The sealing ring is what creates a tight seal between the blender jar and base. Double-check that it’s aligned correctly before inserting it onto the blender jar base.
Step 4: Slowly Screw the Base onto the Blender Jar
Take your time here and screw the base onto the blender jar carefully. Be sure not to overtighten, as this can cause damage to your blender.
Step 5: Lock the Blender Jar onto the Motor Base
Flip the blender jar upside down and place it onto the motor base. Give it a firm twist clockwise until you hear a satisfying click. This means your blade assembly is now properly reassembled.
It’s essential to note that if there are any cracks or tears in the gasket, it should be replaced before reassembling the blade assembly. A damaged gasket can cause leaks and compromise the performance of your blender.
26WCveNy1GU” >
Conclusion
In summary, repairing a blender gasket is a breeze, and you can do it yourself with minimal effort. A blender gasket may seem insignificant, but it plays an essential role in preventing spills and leaks by creating a seal between the blade assembly and the blender jar. There are several types of blender gaskets available on the market, including O-ring, flat, lip, combination, and specialized gaskets. To fix a blender gasket, you need to remove the old one carefully, clean the area thoroughly, replace it with a new one and reassemble the blade assembly onto the blender jar.
It’s crucial to select the appropriate replacement gasket for your specific blender model and ensure that it’s clean and free from debris or residue before installing it. Safety should always be your top priority when working on your blender. Take necessary precautions such as unplugging it from the power source and handling sharp blades with care.
By following these simple steps, you can restore your blender’s functionality like a pro and enjoy smooth blending every time. Remember to maintain your blender gasket regularly by cleaning it and checking for signs of wear or damage.