Want to make the most of your firewood? Tired of dealing with smoky fires and residue buildup? You’ve come to the right place.
Drying wood for burning at home is a simple process that can work wonders for your fire’s quality and your stove or fireplace’s lifespan. But not all wood dries equally, and different species require different techniques.
In this blog post, we’ll walk you through the process of drying wood for burning at home, providing insider tips and tricks along the way. We’ll cover everything from moisture levels to drying stages, as well as various methods for drying wood – whether it’s air-drying or kiln-drying.
By the end of this post, you’ll be equipped with all the know-how you need to dry wood effectively and efficiently – no matter your budget or needs. So let’s dive in and get started.
Contents
What Type of Wood is Best for Burning?
When it comes to burning wood, not all types of wood are created equal. The type of wood you choose can greatly impact the quality of your fire and the safety of your home. So, what type of wood is best for burning?
The answer is simple: hardwoods such as oak, maple, hickory, and ash are generally considered the best types of wood for burning. These woods have a high density and low moisture content, which means they produce a longer-lasting, hotter fire that emits less smoke and creosote buildup compared to softwoods.
But why are hardwoods so much better than softwoods? Softwoods such as pine, spruce, and cedar are often cheaper and more readily available than hardwoods, but they burn faster and produce less heat than hardwoods. Additionally, softwoods tend to produce more smoke and creosote buildup, which can be dangerous if not properly maintained.
Another crucial factor to consider when burning wood is its moisture content. Wet or green wood contains a high amount of water, which can greatly reduce its heating value and produce more smoke and creosote buildup. That’s why it is recommended to only burn seasoned wood that has been dried for at least six months to a year.
Once you’ve selected the right type of wood for your needs, the next step is cutting it into pieces of the right size. The ideal length for firewood is 16-18 inches, with a diameter no more than 6 inches. This size makes it easier to stack and store the wood and allows for better air circulation during the drying process.
There are several methods of drying wood for burning at home. The most common method is air-drying, which involves stacking the wood in a dry, well-ventilated area and letting it sit for 6-12 months. During this time, the moisture content of the wood will gradually decrease as it dries out.
Another method of drying wood is kiln-drying. This involves using a special oven or kiln to dry the wood quickly over a period of days rather than months. Kiln-dried wood has a lower moisture content than air-dried wood and burns more efficiently, but it can be more expensive to purchase.
How to Cut Firewood for Drying
Before you can start building that fire, you need to make sure that your firewood is properly cut and dried. Here are some important steps to follow when cutting firewood for drying:
Choose the Right Type of Wood
To ensure efficient burning, it is crucial to select the right type of wood. Hardwoods such as oak, hickory, and maple are ideal for burning because they have a high density and low moisture content. Softwoods such as pine and fir have a lower density and higher moisture content, which makes them less efficient for burning.
Cut the Wood to the Right Length
The ideal length for firewood is around 16 inches, as it allows for easy handling and stacking. However, this may vary depending on your specific needs. When cutting the wood, it’s important to use a well-maintained chainsaw and wear protective gear such as gloves, eye protection, and earplugs.
Split the Wood into Smaller Pieces
After cutting the wood to the appropriate length, it should be split into smaller pieces to increase surface area and speed up the drying process. A splitting maul or axe can be used to split the wood into manageable pieces. This will also make it easier to handle when it comes time to stack it.
Stack the Wood in a Dry and Well-Ventilated Area
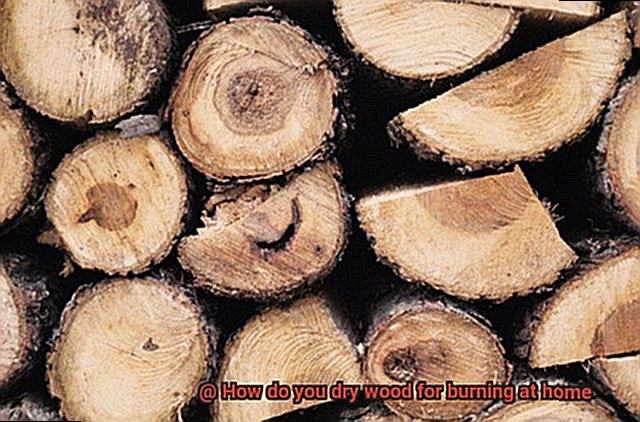
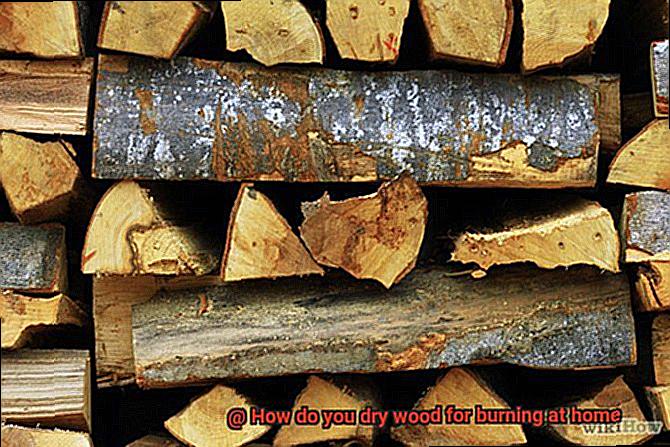
Once the firewood has been split, it should be stacked in a dry and well-ventilated area with plenty of sunlight and airflow. It is important to stack the wood off the ground to prevent moisture from seeping in from the soil. Stacking them in a criss-cross pattern will also help with airflow.
Allow Time for Drying
After stacking the wood, it’s time to wait for it to dry out. Air-drying is the most common method of drying wood for burning at home. It involves letting the wood sit for 6-12 months in a dry, well-ventilated area. During this time, the moisture content of the wood will gradually decrease as it dries out.
Test the Moisture Content
To determine when your firewood is ready for burning, you can use a moisture meter to test its moisture content. The ideal moisture content for firewood is around 20%, which means that it has been properly dried and is ready for burning.
Air-Drying Wood at Home
Whatever the reason may be, air-drying wood at home is an easy and budget-friendly way to ensure a steady supply of dry firewood for those chilly winter nights.
To begin, it’s important to start with freshly cut wood that has a moisture content of around 30-50%. This might seem counterintuitive, but too much moisture will cause the wood to burn inefficiently, while too little moisture can make it brittle and prone to breaking. Once you have your wood, chop it into manageable pieces, typically around 16-18 inches in length, and stack it in a single layer on a raised platform or pallets to allow air to circulate underneath.
Selecting the right location for stacking the wood is crucial. You’ll want a dry, well-ventilated area such as a shed or covered porch that shields the wood from rain while allowing plenty of fresh air to circulate. Avoid stacking the wood directly on the ground or against walls because this could trap moisture and slow down the drying process.
Several factors determine how long it takes for air-drying wood, including the type of wood, size of the pieces, and humidity of the environment. Generally speaking, it can take anywhere from six months to two years for the wood to reach its optimal moisture content for burning. During this time, it’s critical to check the wood regularly for signs of mold or decay and rotate the stack periodically to ensure even drying.
Air-drying your own firewood at home is not only eco-friendly but also saves you money over time. So why not give it a try and enjoy cozy fires without breaking the bank? Here are some additional tips to help you get started:
Kiln-Drying Wood at Home
Then, kiln-drying wood at home might be the solution for you.
Kiln-drying wood is like baking a cake – you need the right ingredients, temperature, and time to achieve the desired result. Here are some things to consider if you’re thinking about trying this method:
Equipment
As mentioned earlier, you will need a kiln and some basic woodworking tools. Kilns come in several sizes, from small tabletop models to larger, industrial-sized units. If you’re not handy with tools, it might be best to purchase a pre-made kiln to avoid any accidents or mistakes.
Wood type
Different types of wood require different temperature and humidity levels. Hardwoods like oak or maple need higher temperatures and lower humidity levels than softwoods like pine or cedar. Make sure to research the specific requirements for the type of wood you have. You can also mix different types of wood in a single batch, as long as they have similar drying requirements.
Stacking and loading
To ensure even drying, it’s crucial to cut your wood into uniform sizes and stack it properly in the kiln. You can use lumber stickers or spacers to create gaps between the boards for better air circulation. Make sure to leave enough space between the boards for proper airflow.
Monitoring
It’s essential to monitor the drying process closely as over-drying can lead to damage of the wood. Use a moisture meter to check the moisture content regularly. You can also check for cracks or warping of the wood, which may indicate that the drying conditions need adjustment.
Time
Kiln-drying wood can take anywhere from a few days to several weeks depending on the type of wood and its thickness. Be prepared to invest some time in this process. You can speed up the drying by preheating the wood before placing it in the kiln or using a dehumidifier to lower the humidity levels.
How to Speed Up the Drying Process of Firewood
Nothing beats a cozy fire on a chilly winter night, but wet or damp firewood can put a damper on your plans. To ensure your firewood is dry and ready to burn, here are five effective ways to speed up the drying process.
Choose the Right Type of Wood
The type of wood you choose can affect how long it takes to dry. Hardwoods like oak, hickory, and maple have lower moisture content and higher density, making them dry faster than softwoods like pine and spruce. Therefore, select hardwoods to speed up the drying process.

Split Your Wood into Smaller Pieces
Splitting your wood into smaller pieces increases its surface area allowing air to circulate more freely. This helps to remove moisture faster, and your wood dries out quicker. Also, removing the bark from the wood will prevent it from trapping moisture and slowing down the drying process.
Stack Your Wood in a Dry and Well-Ventilated Area
Once you’ve split your wood, stack it in a dry and well-ventilated area, preferably off the ground and covered with a tarp or similar protective covering. Ensure that you leave enough space between each piece of wood to allow for good airflow. This will help speed up the drying process by allowing moisture to evaporate from the wood.
Use a Moisture Meter
Using a moisture meter is an efficient way to determine when your firewood is dry enough for burning. A moisture content of less than 20% is ideal for most types of firewood. If you don’t have access to a moisture meter, you can test the wood by banging two pieces together – if they make a sharp, cracking sound, the wood is likely dry enough for burning.
Use a Kiln or Oven
If you need dry firewood immediately, using a kiln or oven can speed up the drying process. Although this method is expensive and time-consuming, it’s efficient if you have a lot of firewood that needs to be dried quickly. It’s important to follow safety precautions when using an oven or kiln.
Benefits of Dried Wood for Burning
Here are some of the most significant advantages:
- Increased Heat Output: Dried wood burns more efficiently and produces more heat than wet or freshly cut wood. This means that you can use less wood to achieve the same level of warmth, which in turn can save you money on your heating bills.
- Reduced Smoke and Emissions: Wet or green wood produces more smoke and harmful emissions than dried wood, which can be harmful to both your health and the environment. By using properly dried wood, you can reduce the amount of smoke and emissions produced during burning. Breathe easy knowing that you’re doing your part for the planet.
- Longer Burn Time: Dried wood burns slower and more evenly than wet or freshly cut wood, which means that it can provide heat for a longer period of time. This is particularly useful if you are using wood as your primary source of heating during the winter months. No need to constantly tend to the fire when you have properly dried wood.
- Cleaner Chimneys: Burning wet or green wood can lead to a buildup of creosote in your chimney, which can increase the risk of chimney fires. By using properly dried wood, you can reduce the amount of creosote buildup in your chimney and keep it clean. This means less maintenance and worry for you.
- Better Flavor for Cooking: If you are using wood for grilling or smoking food, using dried wood can provide a better flavor than wet or green wood. This is because dried wood burns more cleanly and evenly, which can help to enhance the flavor of your food. Impress your dinner guests with delicious, smoky flavors.
Tips for Storing and Using Firewood
Storing and using firewood may seem like a simple task, but it is an essential aspect of burning wood for heat or cooking. It is crucial to store firewood correctly to ensure that it is dry and ready to burn when needed. Wet or damp wood can be challenging to ignite, burns inefficiently, and produces more smoke and soot. Here are five tips for storing and using firewood that you need to know.
Choose the Right Location
The location where you store your firewood matters a lot. It should be dry, well-ventilated, and protected from the elements. Avoid stacking wood directly on the ground, as it can absorb moisture from the soil. The moisture in the wood can make it difficult to light and cause it to burn inefficiently.
Stack Wood Properly
Stacking firewood properly allows air to circulate around the wood, facilitating faster drying. Arrange the logs in a neat and organized pile with plenty of space between each log. The bark should face up to allow air circulation. Cover the stack with a tarp or other waterproof material to protect it from rain and snow.
Rotate the Wood
Rotating your firewood ensures that you use the older pieces first, keeping the newer ones dry and ready to burn when needed. Wet or damp wood can be difficult to ignite and produce more smoke than heat.
Use Seasoned Wood
Seasoned wood has been allowed to dry out for at least six months, making it more efficient to burn than green or unseasoned wood. It produces less smoke and creosote buildup in chimneys. Test your firewood by banging two pieces together before using it – dry wood will produce a sharp, ringing sound while wet wood will produce a dull thud.
Don’t Overfill Your Stove
Overloading your stove with wood can cause it to overheat, leading to potential damage or a chimney fire. Start with small pieces of kindling to get the fire going before adding larger logs. This allows the stove to heat up gradually, reducing the risk of overheating.
kUJgdXIX-vc” >
Conclusion
In conclusion, drying wood for burning at home is a crucial process that can significantly enhance the quality of your fire and extend the lifespan of your stove or fireplace. Selecting the right type of wood, cutting it to size, and utilizing effective drying techniques are all vital steps in ensuring that your firewood is dry and ready to burn efficiently.
Air-drying and kiln-drying are two popular methods for drying wood, with air-drying being the more economical option. However, if you require dry firewood immediately, kiln-drying may be a better choice.
Properly dried wood provides numerous benefits such as heightened heat output, decreased smoke and emissions, longer burn time, cleaner chimneys, and improved flavor for cooking. Correctly storing and using firewood is also critical to guarantee that it remains dry and ready to burn when needed.
By following these tips and tricks for drying, cutting, storing, and using firewood properly, you can relish cozy fires without having to deal with smoky fires or residue buildup.


