Do you crave the mouth-watering taste of succulent, smoky barbecue ribs? If your answer is a resounding “yes,” then it’s time to introduce you to the ultimate game-changer in barbecuing: the rib rack.
This metal or ceramic contraption, also known as a rib holder, is designed to hold your ribs upright in your grill or smoker. With a rib rack, you can cook multiple racks of ribs at once without taking up too much space on the cooking surface. Plus, it promotes even cooking and prevents the ribs from sticking together or falling apart during the cooking process.
So how do you use a rib rack? Don’t worry; it’s not as intimidating as it may seem. In this blog post, we’ll walk you through all the steps for using a rib rack like a pro. From choosing the right rack to preparing your ribs and positioning them on the device, we’ve got all the details covered.
Whether you’re an experienced grilling enthusiast looking to up your rib game or a newbie just starting out, adding a rib rack to your arsenal is essential. Get ready to learn how to achieve perfectly cooked, tender ribs every time with this must-have tool. So let’s dive in and uncover all the secrets of using a rib rack.
Contents
What is a Rib Rack?
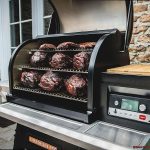
This cooking accessory is specifically designed to hold multiple racks of ribs upright, allowing for even cooking and smoke penetration on all sides of the meat.
Rib racks come in various shapes and sizes, including V-shaped racks, horizontal racks, and even collapsible racks for easy storage. They are typically made of metal, such as stainless steel, and can hold anywhere from two to six racks of ribs depending on the size of the rack.
Using a rib rack not only saves space on the grill or in the oven but also ensures that each rack of ribs is evenly cooked. It’s especially useful for grilling or smoking large quantities of ribs for parties or events. Some racks even come with handles for easy transport to and from the grill.
However, it’s important to note that not all rib racks are created equal. Choosing a high-quality rack can make a significant difference in the cooking process. Look for a sturdy, durable rack with enough space between each rib for proper airflow and circulation.
Before using a rib rack, it’s essential to prepare your ribs properly. Start by trimming any excess fat or meat from the ribs and removing the membrane from the back of each rack. This will help the ribs cook more evenly and allow flavors to penetrate the meat. Next, season your ribs with your favorite dry rub or marinade.
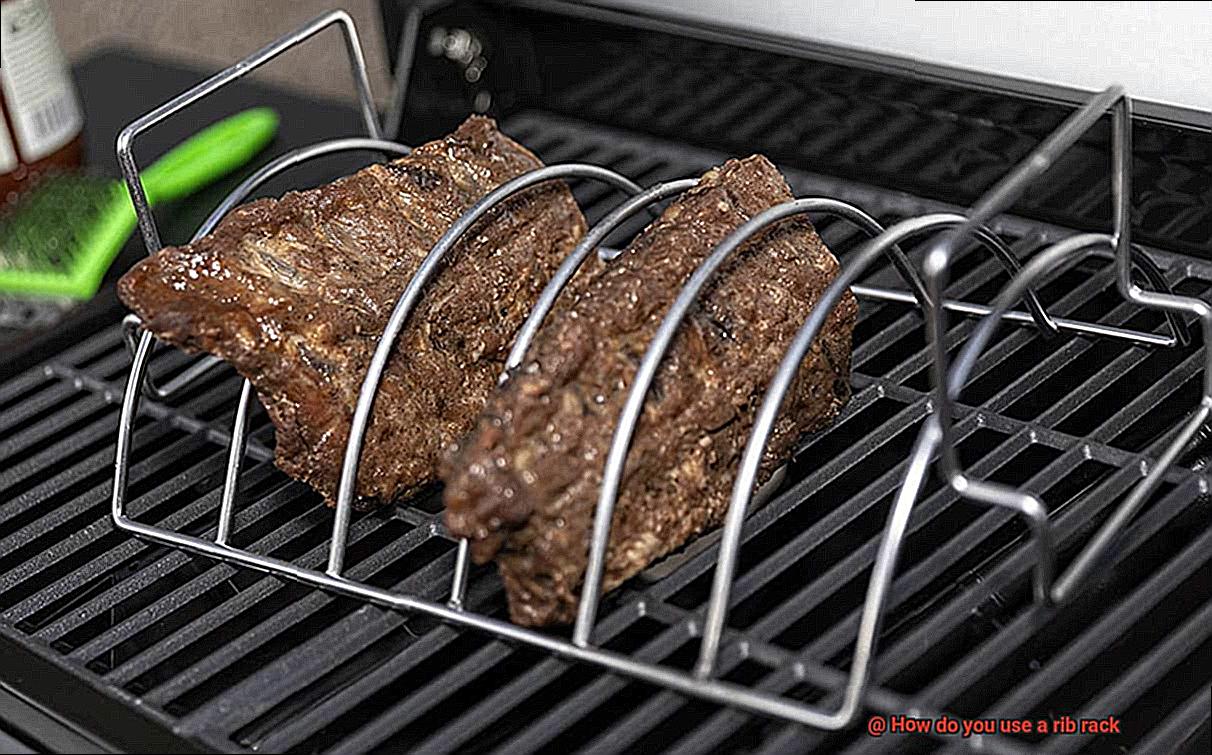
To use a rib rack, place the prepared ribs in the slots of the rack, bone side down. Make sure that each rack is evenly spaced and not touching each other to ensure proper cooking. Once all the ribs are in place, place the rib rack on the grill over indirect heat. Indirect heat means that the heat source is not directly beneath the food but rather on either side of it.
Cooking times will vary depending on the size and thickness of your ribs, as well as your desired level of doneness. A good rule of thumb is to cook the ribs for about 2-3 hours at 225-250°F. Use a meat thermometer to check for doneness – pork should be cooked to an internal temperature of 145°F.
Once your ribs are done cooking, remove them from the grill and let them rest for a few minutes before serving. This allows the juices to redistribute throughout the meat, resulting in tender, juicy ribs that are sure to impress.
Choosing the Right Rib Rack
As the summer months approach, there’s no better time to dust off your grill and start cooking up some delicious ribs. However, if you want to achieve perfectly cooked and evenly grilled ribs every time, choosing the right rib rack is a crucial factor to consider. Here are some tips on selecting the perfect rib rack for your grilling needs.
First and foremost, size matters. A rib rack that is too small won’t hold your ribs securely, resulting in uneven cooking or even worse, falling apart. Conversely, a rack that is too large will not hold your ribs securely, causing them to slide around during cooking. Therefore, it’s essential to choose a rib rack that can accommodate the size of your ribs, ensuring they’re held securely during grilling.
Next up, let’s talk materials. Rib racks come in various materials such as stainless steel, cast iron, and aluminum. Stainless steel is a popular choice due to its durability and rust-resistant properties, making it perfect for long-term use. Cast iron is excellent for heat retention and even cooking. Meanwhile, aluminum is lightweight and easy to clean but may not be as durable as other options.
Lastly, consider the design of the rib rack. Some models have a V-shaped design that allows for better airflow and even cooking. This design also helps reduce flare-ups caused by dripping fat. Others have a flat design that can accommodate larger cuts of meat or spare ribs. Additionally, some rib racks come with handles that make it easier to move them around on the grill.
Preparing the Ribs
Get ready to elevate your grilling game with the most succulent and mouth-watering ribs you’ve ever tasted. But before you start cooking, let’s talk about the essential first step in preparing ribs – getting them ready for the rib rack.
To begin, remove the membrane from the back of the ribs by sliding a knife under it and pulling it off with a paper towel or cloth. This important step allows your seasonings and smoke to penetrate the meat more effectively, resulting in tender, juicy ribs that will leave your taste buds tingling.
Next, generously season both sides of the ribs with your favorite dry rub or marinade. Don’t hold back on the seasoning; this is what will make your ribs stand out from the rest. Let them marinate for at least 30 minutes, but ideally for several hours or even overnight in the refrigerator.
If you’re using a charcoal grill, ensure that your coals are prepared and covered in white ash before placing your ribs on the grill. For gas grills, preheat to medium-high heat to achieve that perfect temperature.
Before placing those delicious ribs on the grill, make sure to pat them dry with a paper towel or cloth. This small step will help create a nice crust on the outside of the ribs, resulting in a perfect texture and flavor combination.
Now it’s time to use that trusty rib rack. By using a rib rack, you’ll be able to cook your ribs evenly and with ease. Simply place them in the rack and let them work their magic on the grill.
Placing the Ribs in the Rack
One of the most crucial steps in achieving succulent, flavorful ribs is properly placing them in a rib rack. Here are some tips and tricks to help you master the art of placing ribs in the rack.
The first step is selecting the right rib rack. There are various types available on the market, from those designed for larger cuts of meat to those with individual slots for each rib. Choose a rack that is appropriate for the size and type of ribs you’ll be cooking.
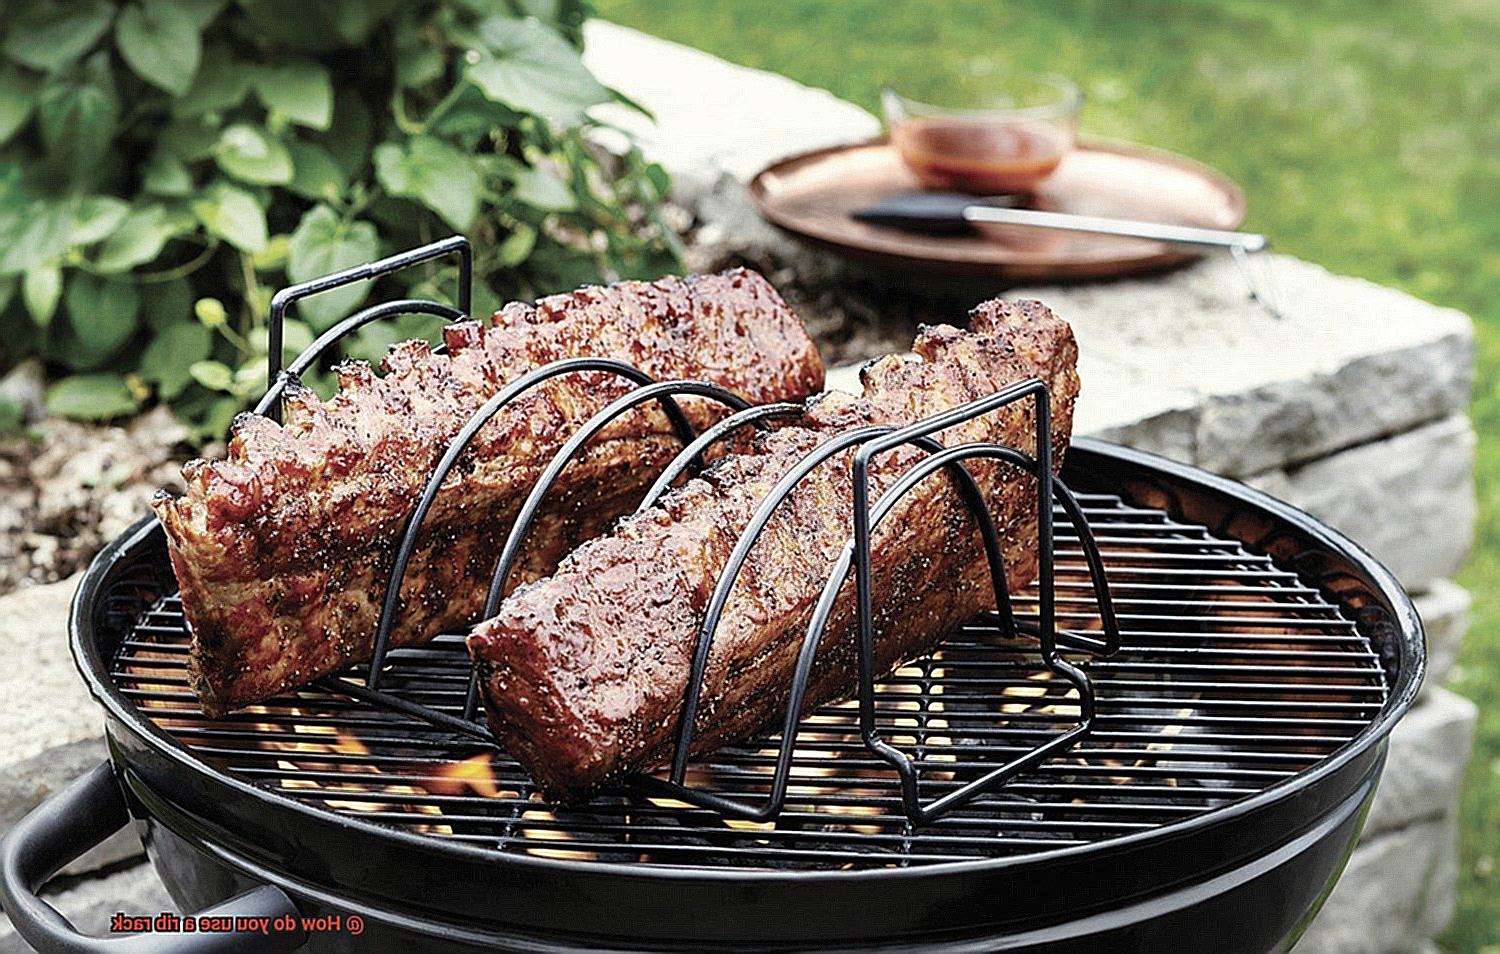
Once you have your rib rack, it’s time to season your ribs with your favorite rub or seasoning. Then, place them in the rack with the bone side facing down and the meaty side facing up. This ensures even cooking and helps keep the meat moist during grilling.
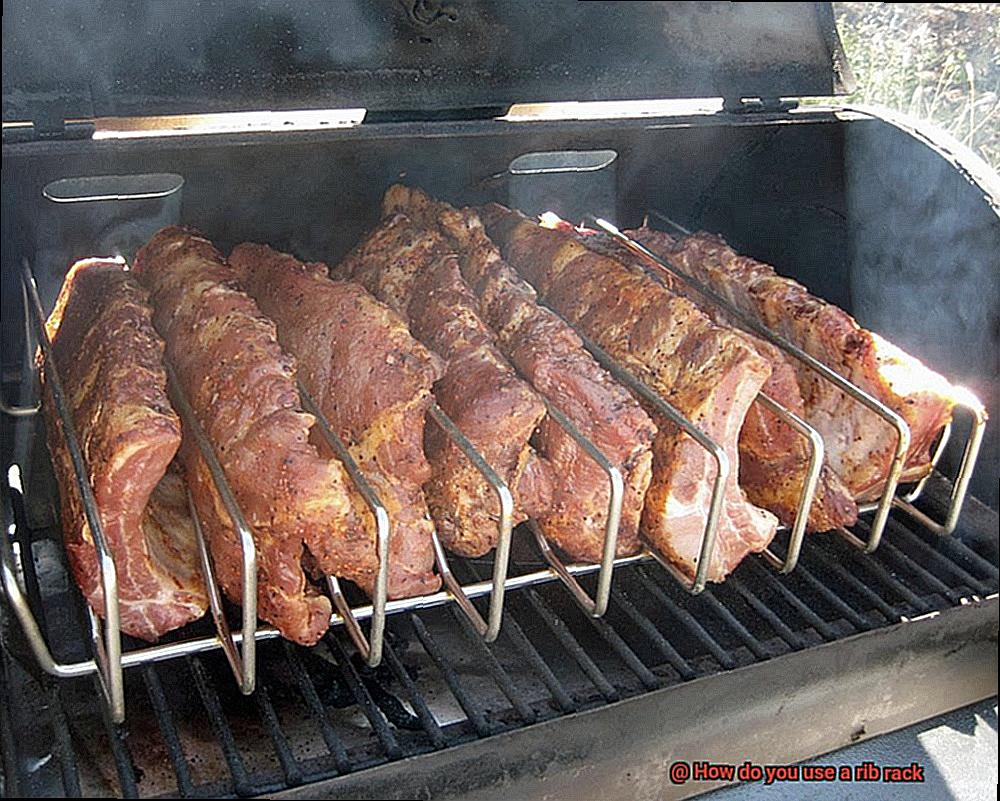
For racks with individual slots, make sure each rib is securely placed in its slot. For larger racks, ensure that the ribs are evenly spaced and not touching each other. Proper spacing allows for even airflow around each rib, resulting in evenly cooked and juicy ribs.
Positioning is also critical when using a rib rack. Place the rack in the center of the grill or smoker to ensure even cooking and prevent burning on one side. In smokers, make sure smoke can circulate around each rib for maximum flavor.
As your ribs cook, keep an eye on them and rotate or reposition them within the rack if necessary. This will ensure that they cook evenly and reach your desired level of doneness.
Cooking with Indirect Heat
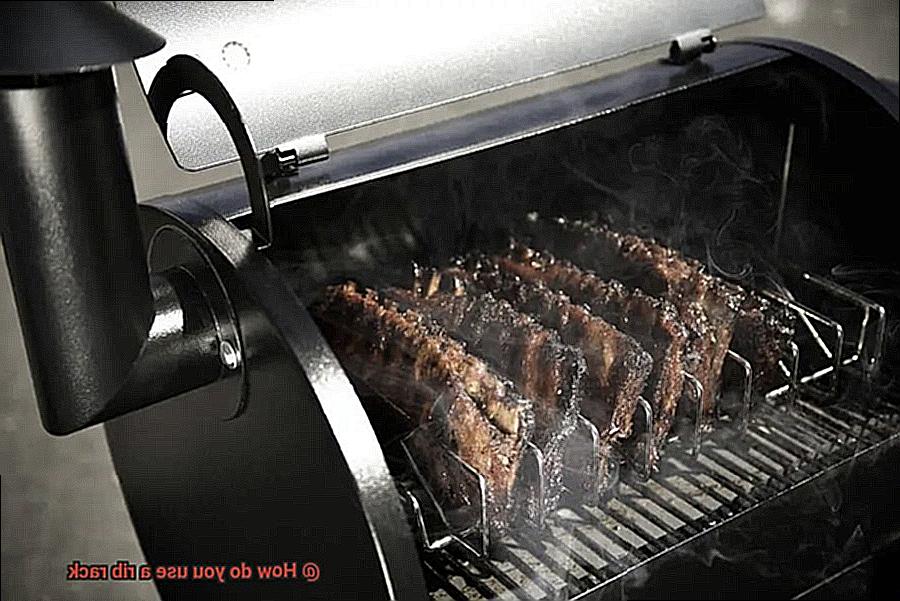
Elevate your grilling game with the tried-and-true method of cooking with indirect heat using a rib rack. This technique ensures that your ribs cook slowly and evenly, resulting in fall-off-the-bone meat that will leave your guests speechless.
To start, preheat your grill to around 250-275°F. Then, position your rib rack in the center of the grill, making sure it’s stable and not wobbling. If you’re using charcoal, spread the coals evenly on either side of the rack.
Close the lid of the grill and let the magic happen for about 1 1/2 to 2 hours. During this time, you can add wood chips or chunks to create a smoky flavor that will have your taste buds dancing. Don’t be afraid to baste your ribs with your favorite barbecue sauce every 30 minutes or so for an extra layer of flavor.
It’s crucial to monitor the temperature of the grill throughout the cooking process to ensure that it stays at a consistent temperature. Adjusting the vents on your grill may be necessary.
Once you’ve reached about 2 hours of cook time, use a meat thermometer to check the internal temperature of your ribs. For fully cooked ribs, they should be around 165°F. If they’re not quite there yet, keep cooking until they reach perfection.
After removing your fully cooked ribs from the grill, let them rest for about 10 minutes before slicing and serving. This extra step allows the juices to redistribute throughout the meat, resulting in even more succulent and flavorful bites.
Checking for Doneness
Now, it’s time for the crucial step of checking for doneness to ensure that your meat is cooked to perfection. Don’t be fooled by the caramelized exterior; it’s what’s inside that counts.
To achieve perfectly cooked ribs, a meat thermometer is your best friend. Be careful when inserting the probe into the thickest part of the meat and avoid touching any bones, as this could give a false reading. For pork ribs, aim for an internal temperature of 145°F (63°C), while beef ribs require a temperature of 160°F (71°C). However, some prefer their ribs cooked to a higher temperature for a more tender result.
If you don’t have a meat thermometer available, don’t worry. There are other ways to check for doneness visually and by touch. Look for the meat to pull back slightly from the end of the bones and for the bones to be exposed at the ends. This is a telltale sign that your ribs are on their way to being done. Use tongs to gently lift up one end of the rack and check for flexibility. If it bends easily without tearing, your ribs are ready to be served.
It’s important to remember that ribs will continue cooking even after they’ve been removed from the heat source. To avoid overcooking, take them off a few degrees before they reach your desired temperature and let them rest for 10-15 minutes before cutting and serving. This allows the juices to redistribute throughout the meat, resulting in tender and juicy ribs every time.
Letting the Ribs Rest
Then it’s time to talk about the often-overlooked step of letting your ribs rest after cooking. As an expert in the art of grilling and BBQ, I can tell you that this step is essential for achieving mouth-watering, succulent, and flavorful meat that will have your guests begging for more.
So why is letting your ribs rest so important? Let me break it down for you. When you cook meat, the juices get pushed towards the center of the meat. But by letting your ribs rest, those juices have time to redistribute throughout the meat fibers, resulting in evenly moist and juicy meat that’s bursting with flavor.
But that’s not all. Resting your ribs also makes them easier to handle. After all, nobody wants to burn their fingers while trying to serve up some delicious ribs. By letting them cool down slightly, you’ll be able to handle them with ease and avoid any kitchen-related injuries.
So how do you let your ribs rest? It’s simple. Once they’re finished cooking, remove them from the grill or oven and place them on a cutting board or platter. Cover them loosely with aluminum foil and let them sit for at least 10-15 minutes before cutting into them. This resting period allows the meat to cool down slightly and lock in those precious juices.

But here’s something you might not know: while your ribs are resting, they will continue to cook slightly due to residual heat. This means that if you take them off the heat source when they’re fully cooked, they may become overcooked if you don’t allow for this additional cooking time during the resting period. So be sure to factor this into your cooking time and temperature calculations.
To summarize, letting your ribs rest after cooking is a simple but effective way to take your BBQ game to the next level. Here are a few tips to keep in mind:
- Let your ribs rest for at least 10-15 minutes before cutting into them.
- Cover them loosely with aluminum foil to keep them warm.
- Factor in the residual heat during the resting period to avoid overcooking.
YpT0SBBaqdI” >
Conclusion
In conclusion, incorporating a rib rack into your grilling routine can revolutionize the way you prepare ribs. This ingenious metal or ceramic device holds multiple racks of meat upright, promoting even cooking and smoke penetration on all sides of the ribs. Not only does it save valuable grill space, but it also ensures that every rack is cooked to perfection.
Selecting the right rib rack is paramount to achieving mouthwatering results. The size, materials, and design of the rack can make or break your grilling experience. Therefore, it’s essential to do your research and choose wisely.
Of course, proper preparation of the ribs is equally important. Removing the membrane from the back of each rack and seasoning with dry rub or marinade are critical steps in achieving optimal texture and flavor. Patting them dry before placing them bone side down in the rib rack will ensure even cooking.
Cooking with indirect heat for 1 1/2 to 2 hours at 250-275°F is recommended for fall-off-the-bone meat. Checking for doneness with a meat thermometer or visually inspecting exposed bones and flexibility is necessary.
Finally, letting your ribs rest after cooking allows juices to redistribute throughout the meat fibers resulting in moist and juicy meat bursting with flavor.