Are you a pork aficionado who loves the rich, fatty taste of this versatile meat? Do you crave new and exciting flavors in your dishes? If so, you might be wondering if it’s possible to make your own salt pork.
Salt pork has been a staple ingredient in many cuisines for centuries. It’s essentially seasoned and preserved pork belly that can be stored for long periods without spoiling. This makes it perfect for hearty dishes like stews and soups.
Making your own salt pork is not only a fun culinary project but also an excellent way to customize the flavor and texture of your dishes. But before you start, there are a few things you need to know.
In this blog post, we’ll guide you through the process of making salt pork from scratch. We’ll cover everything from selecting the right cut of pork to brining and seasoning the meat to perfection. Whether you’re an experienced cook or just starting out, get ready to explore the world of salt pork and elevate your dishes to new heights.
Contents
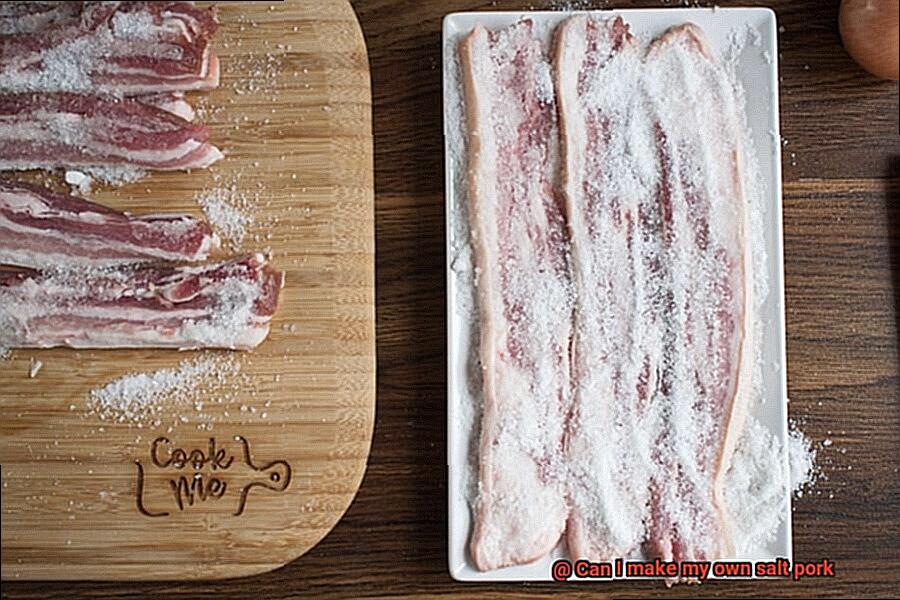
What You Need to Make Your Own Salt Pork
With just a few basic ingredients and some patience, you can create your own delicious salt pork that’s free from any additives or preservatives found in store-bought varieties.
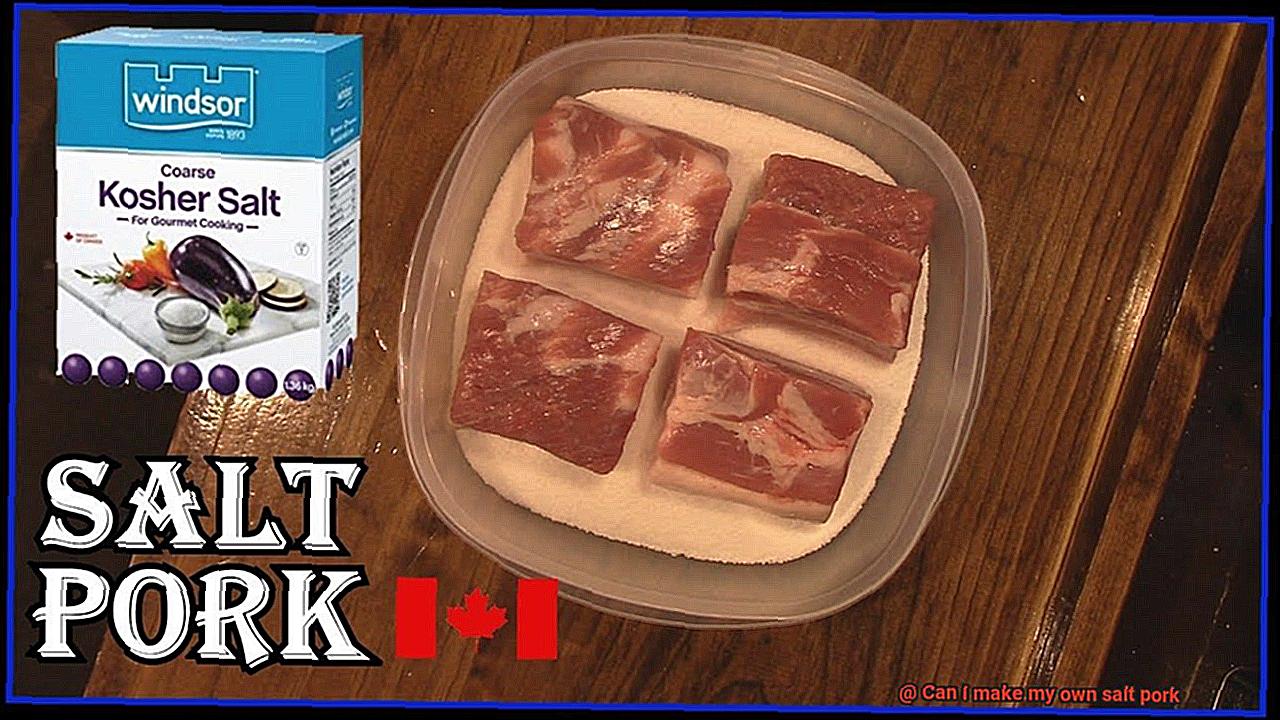
First and foremost, you’ll need pork belly. This cut of meat is typically used for making salt pork and can be purchased from your local butcher or grocery store. Along with the pork belly, you will need the most important ingredient – salt. This helps to preserve the meat and give it its distinct flavor. Many people prefer kosher or sea salt, but feel free to use any type of salt you like.
To add a unique flavor profile, consider adding other ingredients to your curing mixture, such as sugar, herbs, or spices. Get creative and tailor it to your tastes. Make sure to have a large container or plastic bag to cure the pork belly in, along with a scale to measure out the ingredients accurately.
The curing process typically takes 7-10 days, so make sure you have enough space in your fridge during this time. Rub the curing mixture all over the pork belly and store it in the fridge for the allotted time, turning it over every other day.
After the curing period is over, rinse off the curing mixture thoroughly under cold running water. Pat the pork belly dry with paper towels and allow it to air dry for a few hours before smoking or cooking.
Preparing the Pork Belly for Curing
Now, we’ll explore the exciting world of homemade salt pork. But before we dive into the curing process, let’s focus on the star of the show – the pork belly. As an expert in preparing pork belly for curing, I’m here to share my knowledge and guide you through the process.
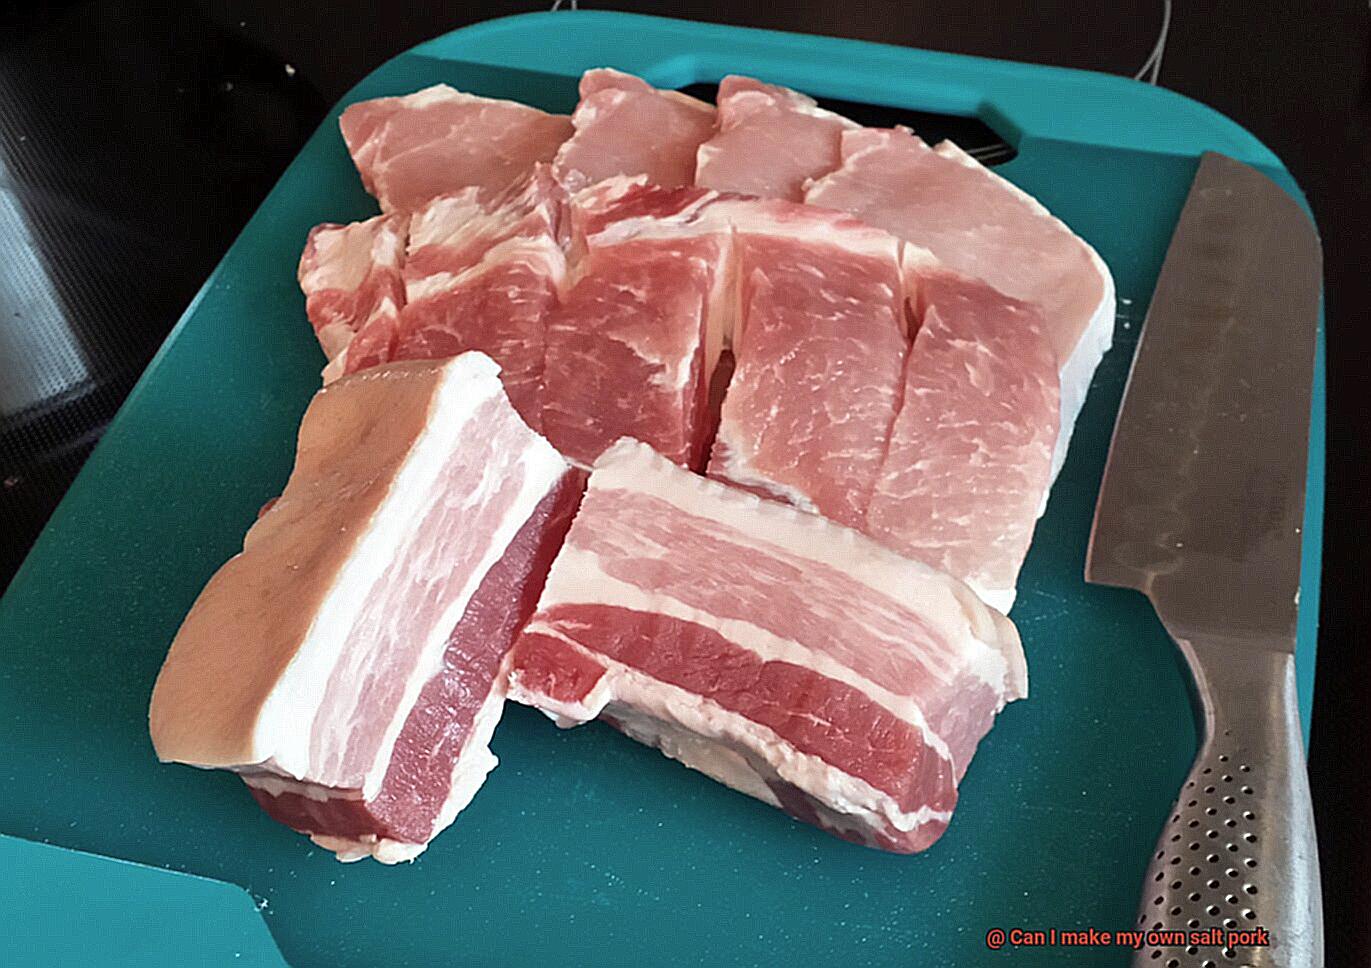
First, let’s start with selecting the perfect pork belly. Opt for a piece of meat that is firm and well-marbled for a more robust flavor. Once you have your pork belly, rinse it under cold water and pat it dry with paper towels.
Now comes the trimming part. Using a sharp knife, trim any excess fat or skin from the pork belly. The goal is to remove enough fat to prevent spoiling during curing, but not too much that it loses its flavor and texture. A quarter-inch of fat is ideal.
Next, prepare the curing mixture by combining kosher salt, sugar, and any desired spices or seasonings in a large bowl. Ensure that all ingredients are evenly distributed. Get creative with your spice combinations – some garlic powder, paprika, or even cayenne pepper for an added kick.
Rub the mixture generously onto both sides of the pork belly to ensure thorough coating. Place it in a large plastic bag or covered container and refrigerate for at least five days. Flip it over every day to ensure even curing.
After five days, remove the pork belly from the curing mixture and rinse it under cold water to remove excess salt. Pat it dry with paper towels and let it air-dry for several hours before cooking or storing in the refrigerator or freezer.
The Curing Process
If you’re a foodie looking to explore new culinary horizons, making your own salt pork is an excellent way to start. The curing process is a crucial step in creating this versatile ingredient, which can add a burst of flavor to many different dishes. But don’t be intimidated by the process – with a bit of patience and attention to detail, you’ll be rewarded with a delicious and satisfying outcome.
To begin, select a high-quality pork belly with enough fat and minimal blemishes. Rinse it thoroughly with cold water and pat it dry with paper towels. Now, it’s time to mix up your curing ingredients. While the most basic mixture consists of salt and sugar, feel free to experiment with other seasonings like black pepper, garlic, or thyme. Rub the curing mixture all over the pork belly, ensuring that every inch of the meat is covered.
Place the meat in a large resealable plastic bag and press out as much air as possible before sealing it shut. Refrigerate for at least five days, flipping the bag over every day to ensure even curing. Depending on the thickness of the meat, you may need to cure it for up to ten days.
Once the curing period is over, remove the pork belly from the bag and rinse it thoroughly under cold water. Pat it dry with paper towels and let it sit at room temperature for an hour or two to dry out further. If desired, you can now smoke your salt pork to add even more flavor. Use a smoker or grill with wood chips and smoke until the pork reaches an internal temperature of 150-160°F.
After smoking, let the salt pork cool completely before slicing it into thin strips or cubes. The possibilities for using your newly created salt pork are endless – add it to soups or stews for an extra burst of flavor, use it to top salads or pizzas, or fry it up for a tasty breakfast side dish.
Benefits of Making Your Own Salt Pork
Then, making your own salt pork might be just what you need. This versatile ingredient offers numerous benefits beyond cost savings. As an expert in this area, I can confidently say that making your own salt pork is a fun and rewarding experience that can enhance your culinary skills.
Firstly, controlling the quality of your meat is one of the primary advantages of making your own salt pork. By choosing high-quality cuts of meat and avoiding additives or preservatives, you can have peace of mind knowing exactly what is going into your food. You can also customize the ingredients and seasonings to suit your taste preferences.
In addition to quality control, making your own salt pork can be cost-effective. Buying pre-made salt pork can be expensive, but when you purchase the meat in bulk and cure it yourself, you can save a significant amount of money. Plus, curing and preparing meat is an excellent opportunity to get creative with flavors and seasoning blends.
Moreover, making your own salt pork can be an exciting experience that allows you to experiment with different techniques and develop your own unique style. By taking the time to cure and prepare the meat yourself, you gain a sense of satisfaction from creating something from scratch that you can then use in your cooking.
Lastly, making your own salt pork can help you connect with your food on a deeper level. By gaining a better understanding of where your food comes from and how it’s made, you develop a greater appreciation for the process behind it. It’s an opportunity to explore new culinary horizons and learn more about the food you eat.
Tips for Making the Perfect Salt Pork
While it may seem intimidating at first, with these tips and techniques, you can create a delicious and cost-effective ingredient for all your favorite recipes.
Choose the Perfect Cut of Pork
The first step in making the perfect salt pork is choosing the right cut of pork. Pork belly is an ideal cut for salt pork because of its balanced fat and meat content. This fatty cut has a rich, meaty flavor that’s enhanced by the curing process.
Use High-Quality Salt
Using high-quality sea salt or kosher salt is important for creating the perfect salt pork. These types of salts are less processed and contain fewer additives than table salt. Make sure to rub the curing mixture into every inch of the meat to ensure even distribution.
Take Your Time
Curing is the process of preserving meat using salt, and it takes time for the salt to penetrate the meat properly. The length of time required for curing depends on the thickness of the meat, but for a 2-inch thick piece of pork belly, it will take about 5-7 days to cure properly. Don’t rush this process.
Store It Properly
After curing your salt pork, it’s important to store it in a cool place to prevent spoilage. The ideal temperature for storing salt pork is between 32-40 degrees Fahrenheit. You can store it in the fridge or in a cool, dark place like a basement or cellar.
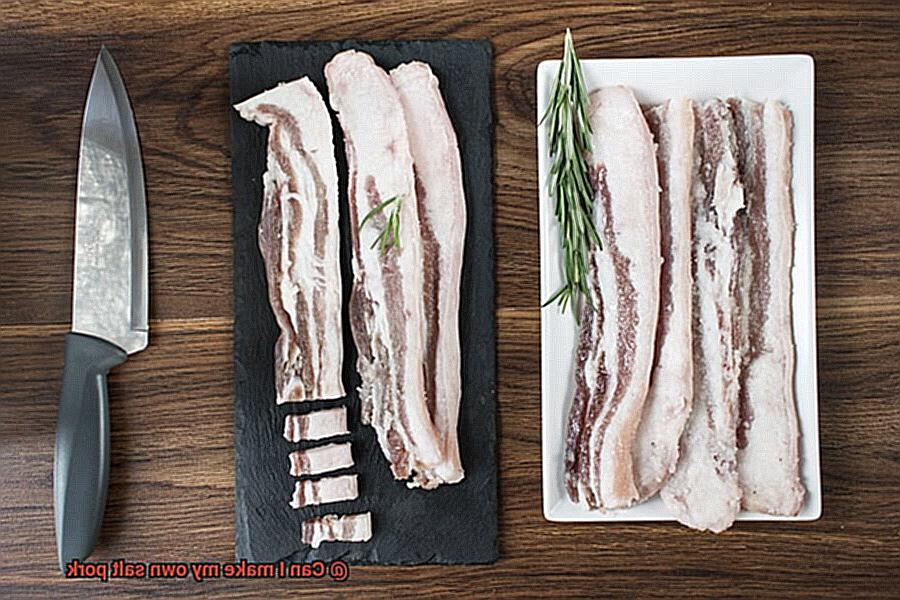
Slice It Thinly
When it’s time to cook your salt pork, make sure to slice it thinly to remove any excess salt and make it easier to cook evenly. You can add herbs and spices like rosemary or thyme for extra flavor or keep it simple with just basic salt cure.
Smoking or Cooking the Salt Pork
Smoking or cooking it can add a smoky and savory flavor that will make your taste buds sing. As an expert in this field, I have compiled some essential tips and tricks to guide you through the smoking or cooking process of your salt pork, and trust me, you won’t be disappointed.
Firstly, it’s important to note that smoking your salt pork is optional, but if you’re looking to add a delicious smoky flavor, then it’s worth taking the extra step. To smoke your salt pork, you’ll need a smoker that can maintain a temperature of around 200-225°F. The smoking process can take anywhere from 2-8 hours, depending on the size of your pork cut and your desired level of smokiness.
Before smoking your salt pork, you’ll need to cure it first. This involves rubbing a mixture of salt and sugar onto the meat and letting it sit in the fridge for several days. The curing process helps preserve the meat and enhance its flavor. Once cured, you can then smoke your pork using your preferred wood chips, such as hickory or applewood. Keep an eye on the temperature and smoke levels throughout the smoking process to ensure that your pork is cooked to perfection.
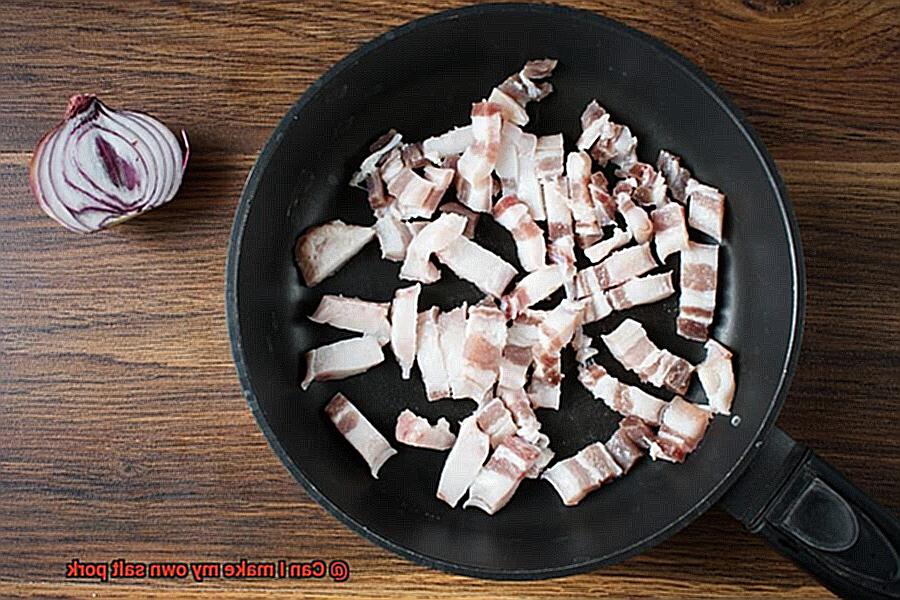
If you’re not interested in smoking your salt pork, don’t worry. You can still cook it by boiling or frying it. To boil salt pork, place it in a pot of water and bring it to a boil. Reduce heat and let it simmer for an hour or until tender. For frying, cut your salt pork into thin slices and fry in a pan until crispy.
To store your salt pork safely, wrap it tightly with plastic wrap and store it in the fridge for up to a week. You can also freeze it for up to six months.
Serving Suggestions with Homemade Salt Pork
Look no further than homemade salt pork, a delicious and versatile ingredient that can add a savory kick to any meal. As an expert in making homemade salt pork, I’m here to share some mouth-watering serving suggestions with you.
Let’s start with breakfast, the most important meal of the day. Fry up some thin slices of salt pork and serve them alongside your favorite breakfast foods like eggs, pancakes, or toast. The salty flavor of the pork will elevate your morning meal to new heights.
If you’re looking for something heartier, add diced salt pork to your favorite soup or stew recipe. The cured meat adds depth to the dish without overpowering the other ingredients. It’s the perfect way to warm up on a chilly day.
For those who love grilling, thinly slice the salt pork and grill until crispy. Serve as a snack or appetizer with your preferred dipping sauces like BBQ or honey mustard. Your guests will be begging for more.
Finally, use diced salt pork as a seasoning in your dishes. Add it to roasted vegetables or sautéed greens for a burst of flavor that will take your dish to the next level. The possibilities are endless with this versatile ingredient.
Storage and Shelf Life of Homemade Salt Pork
Firstly, you need to decide whether you plan on using your homemade salt pork within a week or two, or if you want to store it for longer periods of time. If you plan on using it soon, storing it in the refrigerator is ideal. However, if you want to keep it for a longer period of time, then freezing is the recommended option.
When storing in the refrigerator, wrapping your homemade salt pork tightly in plastic wrap or aluminum foil is essential to prevent air from getting in and causing spoilage. Additionally, placing it on a plate or in a container will catch any juices that may leak out. Taking these steps will ensure that your salt pork stays fresh for up to two weeks.
If you decide to freeze your homemade salt pork, wrapping it tightly in plastic wrap or aluminum foil before placing it in an airtight container or freezer bag will prevent freezer burn and preserve the quality of the meat. Your frozen salt pork can last up to six months.
However, once you’ve cooked your homemade salt pork, its shelf life decreases significantly. Cooked salt pork should be consumed within three to four days if stored in the refrigerator and within two months if stored in the freezer.
To summarize, proper storage and handling are vital to ensuring that your homemade salt pork stays fresh and safe to eat. Here are some key takeaways:
- Store it in the refrigerator for up to two weeks or freeze for up to six months.
- Wrap it tightly in plastic wrap or aluminum foil before placing in an airtight container or freezer bag.
- Cooked salt pork should be consumed within three to four days if stored in the refrigerator and within two months if stored in the freezer.
ZdmPIpQZPRg” >
Conclusion
In conclusion, the process of making your own salt pork is a rewarding culinary adventure that allows you to take control of the flavor and texture of your dishes. By using simple ingredients and a little patience, you can create a delicious salt pork that’s free from any additives or preservatives commonly found in store-bought varieties.
The first step is selecting the right cut of pork, followed by preparing the curing mixture and allowing the meat to cure for 7-10 days. Afterward, rinse off the curing mixture thoroughly under cold running water and let it air dry for a few hours before smoking or cooking.
Beyond cost savings, making your own salt pork offers numerous benefits such as controlling the quality of your meat by choosing high-quality cuts and avoiding additives or preservatives. You can also customize the ingredients and seasonings to suit your taste preferences while getting creative with flavors and seasoning blends.
Once you’ve made your homemade salt pork, there are endless ways to incorporate it into different dishes such as soups, stews, salads or pizzas. Proper storage is essential to ensure that your homemade salt pork stays fresh and safe to eat. You can store it in the refrigerator for up to two weeks or freeze it for up to six months.
Overall, making your own salt pork is an exciting experience that allows you to experiment with different techniques and develop your own unique style. It’s an excellent way to enhance your culinary skills while providing a delicious ingredient for all your favorite recipes.