
Imagine this: juicy, flavorful chicken, coated in a crispy, golden crust that shatters with every bite. The tantalizing smell of hot oil and secret spices fills the air as you gather around your Big Green Egg. That’s right, folks – we’re taking fried chicken to a whole new level.
If you’re a grilling enthusiast like me, you already know that the Big Green Egg is a beast when it comes to smoking and grilling. But did you know it can also work its magic on fried chicken? Oh yes, my friend. This versatile ceramic cooker can turn your backyard into a fried chicken paradise.
In this article, we’ll spill all the secrets and show you how to fry chicken on the Big Green Egg like a pro. From selecting the perfect pieces of poultry to nailing that crispy batter, we’ve got your back every step of the way. So grab your apron and fire up that Green Egg – get ready for an epic journey that will forever change the way you think about fried chicken.
Contents
Benefits of Frying Chicken on the Big Green Egg
The Big Green Egg goes beyond grilling and smoking; it can also fry chicken to perfection. In this article, we will explore the exceptional benefits of frying chicken on the Big Green Egg and how it can take your culinary adventures to new heights.
Unparalleled Flavor and Texture:
Unlock a world of flavor possibilities by frying chicken on the Big Green Egg. The Egg’s ceramic construction retains heat exceptionally well, ensuring even and consistent cooking. As a result, you’ll indulge in crispy golden-brown chicken with a mouthwatering, juicy interior. The combination of direct heat and smoke circulation infuses the chicken with delightful smoky flavors, enhancing both its taste and aroma.
Precise Temperature Control:
One key advantage of using the Big Green Egg for frying chicken is its precise temperature control. With its easy-to-use temperature settings, you can effortlessly maintain a consistent frying temperature throughout the cooking process. This control is crucial for achieving perfectly cooked chicken every time, creating a symphony of flavors and textures that will amaze your taste buds.
Increased Cooking Capacity:
Say goodbye to cooking in batches. The Big Green Egg’s large cooking surface allows you to fry multiple pieces of chicken simultaneously. No more waiting for each piece to cook individually – with the Big Green Egg, you can feed a crowd effortlessly while ensuring that every piece is cooked evenly. Prepare to become everyone’s favorite outdoor chef.
Versatility:
The Big Green Egg is not limited to just frying chicken; it is a multi-functional cooking tool that can grill, smoke, roast, and even bake. Its versatility makes it an all-in-one solution for outdoor cooking enthusiasts who want to experiment with various culinary techniques. From tender steaks to succulent ribs, the Big Green Egg can handle it all with finesse.
Healthier Frying Option:
Indulge in the deliciousness of fried chicken without the guilt. Deep-fried chicken often comes with a heavy dose of grease, but using the Big Green Egg for frying provides a healthier alternative. The Egg’s high heat retention ensures that the chicken cooks quickly, reducing the amount of oil absorbed. This results in less greasy and healthier fried chicken without compromising on flavor. Prepare to satisfy your cravings guilt-free.
Preparing to Fry Chicken on the Big Green Egg
This versatile cooking device not only infuses your chicken with a distinct smoky flavor, but also provides unparalleled cooking capabilities. In this comprehensive guide, we’ll walk you through each step, ensuring your fried chicken is perfectly crispy, bursting with flavor, and cooked to perfection.
Step 1: Prepping Your Big Green Egg
Before embarking on your fried chicken adventure, it’s crucial to prepare your Big Green Egg. Begin by meticulously cleaning the grill, removing any stubborn residue from previous cookouts. With a grill brush in hand, scrape off every last food particle clinging to the grates.
Next, preheat your Big Green Egg to a medium-high heat ranging between 375-400 degrees Fahrenheit. Fill the grill with an ample amount of charcoal and ignite it using either a chimney starter or an electric starter. Patience is key – wait until the charcoal turns a radiant red and is coated with a delicate layer of white ash before moving forward.
Step 2: Gathering Your Tools and Ingredients
To ensure a seamless frying process, gather all the necessary tools and ingredients in advance. You’ll need a trusty frying pan or cast iron skillet, a high-heat cooking oil like vegetable or peanut oil, and, of course, the star of the show – chicken pieces.
Take this opportunity to season your chicken to perfection using a dry rub or marinade of your choice. Allow the chicken to marinate for at least 30 minutes, allowing those flavors to permeate every succulent bite. While you wait, use this time wisely to prepare any delectable side dishes or tantalizing sauces that will accompany your crispy fried chicken.

Step 3: Time to Fry.
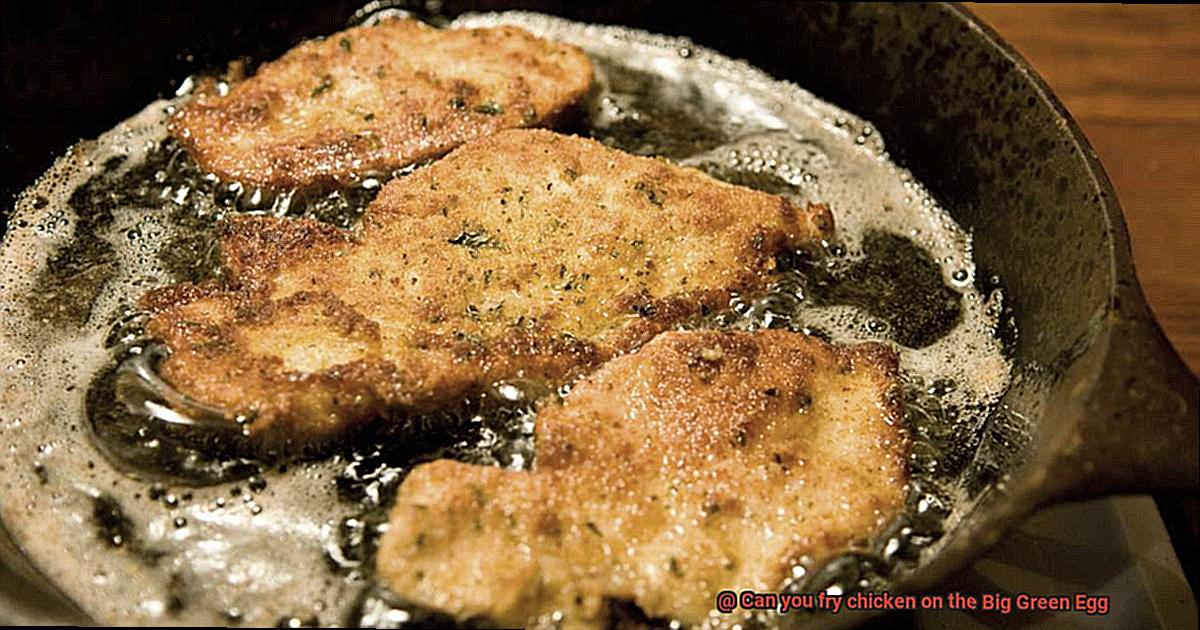
With your grill preheated and your chicken expertly seasoned, it’s time to dive into the world of frying. Place your chosen frying pan or cast iron skillet directly on the cooking grate of your Big Green Egg. Heat the cooking oil until it reaches a sizzling temperature of around 350 degrees Fahrenheit. For precise control, rely on a reliable meat thermometer to monitor and maintain the oil’s temperature throughout the cooking process.
Gently lower each chicken piece into the hot oil, ensuring not to overcrowd the pan. Overcrowding can lead to uneven cooking and a decline in oil temperature. Allow each piece to fry until it reaches an internal temperature of 165 degrees Fahrenheit, as measured by a trusty meat thermometer. This guarantees that your chicken is not only fully cooked but also safe to be savored.
Preheating and Maintaining Temperature for Frying Chicken
Take your grilling skills to the next level with the Big Green Egg, a versatile ceramic grill perfect for frying chicken to crispy perfection. However, achieving mouthwatering results requires mastering the art of preheating and maintaining temperature. In this guide, we’ll uncover the secrets to preheating and temperature control on the Big Green Egg, ensuring your fried chicken is a crowd-pleasing masterpiece every time.
Preheating:
- Start by lighting natural lump charcoal, providing even heat distribution and a delightful smoky flavor.
- Distribute lit charcoal evenly across the grate, allowing proper airflow.
- Open the bottom vent fully and adjust the top vent for ventilation and temperature regulation.
- Aim for a preheating temperature around 350°F (175°C).
Maintaining Temperature:
- Regularly monitor the Big Green Egg’s built-in thermometer and use an external thermometer for accuracy.
- Adjust vents to increase or decrease heat: wider vents raise temperature, partially closing them lowers it.
- Keep the lid closed as much as possible to minimize heat loss.
Monitoring Oil Temperature:
- Use a deep-fry thermometer for consistent oil temperature.
- Adjust heat for a crispy exterior and juicy interior.
Seasoning and Breading the Chicken Before Frying
Get ready to unlock the secrets of seasoning and breading chicken before frying it on the Big Green Egg. Once you master this technique, your taste buds will never settle for plain grilled chicken again.
The first step in this process is to season your chicken with precision. While everyone has their own secret spice blend, I’ll share a tried and true combination that will make your taste buds dance with delight. In a bowl or zip-top bag, mix together paprika, garlic powder, onion powder, salt, pepper, and your choice of dried herbs like thyme or oregano. Make sure to evenly coat the chicken with this tantalizing blend.

Now that your chicken is seasoned to perfection, it’s time to move on to the breading stage. This is where the fun and creativity really kick in. You have several options here – flour, breadcrumbs, cornmeal, or even crushed crackers. To achieve maximum crunchiness, combine dry and wet ingredients. Dip your seasoned chicken into a beaten egg mixture and then coat it in your chosen breading mixture. This will help the breading adhere to the chicken, creating a mouthwatering golden crust that will leave you craving more.
If you prefer a simpler option, seasoned flour can be used as a standalone breading. Just combine flour with the same spices and herbs used in the seasoning blend, and voila. You have an easy yet flavorful coating for your chicken.
Before diving into the seasoning and breading process, take a moment to pat your chicken dry. Excess moisture can hinder the adherence of seasonings and breading, so give it a good pat down before proceeding.
Now that your chicken is perfectly seasoned and breaded, it’s time for the main event – frying on the Big Green Egg. This grill is a true powerhouse when it comes to frying thanks to its ability to maintain a consistent temperature and distribute heat evenly. To fry your chicken on the Big Green Egg, I recommend using a cast-iron skillet or a deep fryer attachment to hold the oil and maintain a stable frying temperature.
Placing the Cast Iron Skillet or Dutch Oven on the Grill Grates
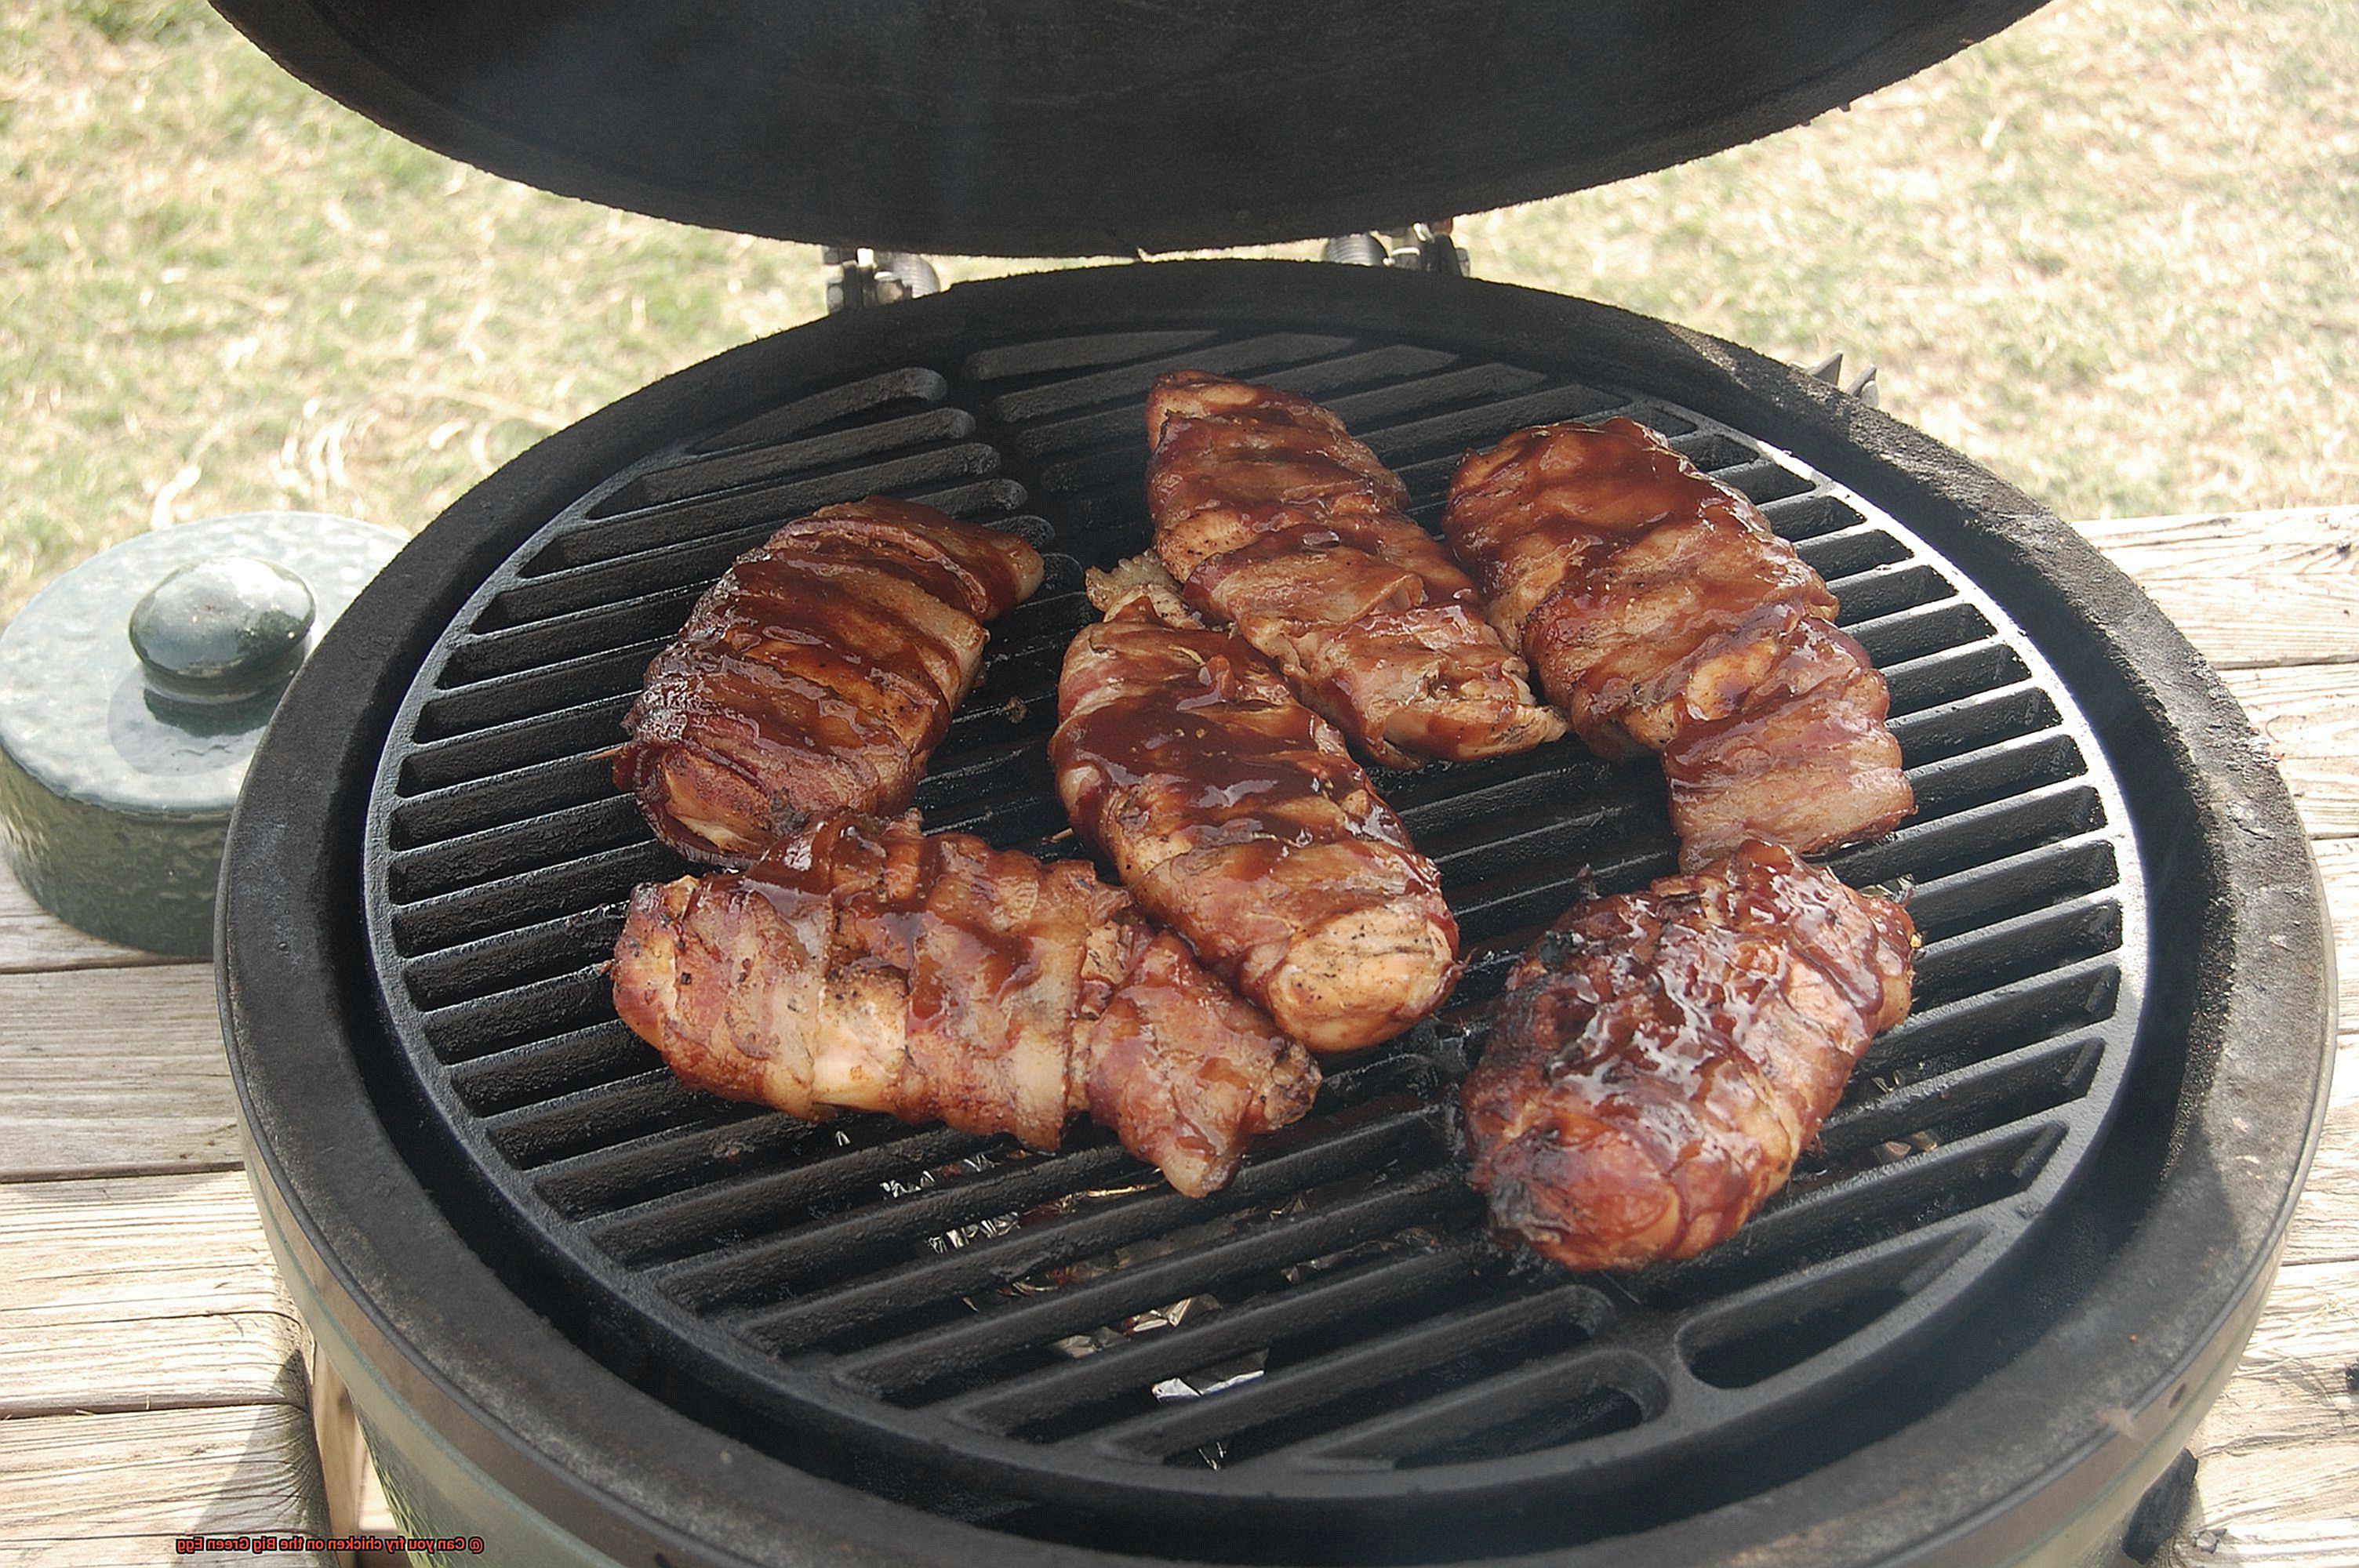
Get ready to discover the world of frying on the Big Green Egg. This versatile grill isn’t just for grilling – it can also help you achieve mouthwateringly crispy fried chicken. The secret? Placing a cast iron skillet or Dutch oven directly on the grill grates.
Here’s a step-by-step guide to help you master this technique:
- Preheat the Big Green Egg: Before placing the skillet or Dutch oven on the grill grates, make sure to preheat the Big Green Egg to your desired cooking temperature. For frying chicken, aim for around 375°F. This ensures that your cookware heats up quickly and evenly.
- Position the skillet or Dutch oven: Once the grill reaches the desired temperature, carefully place the cast iron skillet or Dutch oven on the grill grates. Use heat-resistant gloves or mitts to protect your hands from the hot cookware. Position it in the center of the grill grates for even heat distribution.
- Close the lid: To maintain a consistent cooking temperature and lock in heat and moisture, close the lid of the Big Green Egg. This helps your chicken cook evenly and retain its juicy goodness.
- Monitor the temperature: Keep an eye on the temperature throughout the cooking process and make adjustments as needed to maintain a steady frying temperature. This ensures that your chicken cooks perfectly without ending up overcooked or undercooked.
- Cook and check for doneness: Frying chicken on the Big Green Egg typically takes 15-20 minutes, depending on the size and thickness of the pieces. Use a meat thermometer to check for doneness, ensuring that the chicken reaches an internal temperature of 165°F for safe consumption.
- Remove and rest: Once your chicken is fried to perfection, carefully remove the cast iron skillet or Dutch oven from the grill using heat-resistant gloves or mitts. Let the fried chicken rest for a few minutes before serving to allow the juices to redistribute, resulting in maximum flavor and tenderness.
Cooking Time and Temperature Guidelines for Frying Chicken on the Big Green Egg
This versatile grill not only excels at grilling but also delivers mouthwateringly crispy results when it comes to fried chicken. With a few simple guidelines on cooking time and temperature, you’ll be creating fried chicken masterpieces that will have your taste buds dancing with joy. So, let’s fire up those grills and embark on this flavorful journey.
Preparation is Key:
Before delving into the cooking process, it’s essential to prepare your Big Green Egg for frying chicken. Preheat the grill to a temperature of around 375-400°F, allowing it to reach its full potential for achieving that perfect golden-brown crust.
Temperature Management:
To ensure even cooking and prevent greasiness, monitor the temperature of the oil. Heat it to approximately 350-375°F before introducing your chicken pieces. This careful attention to temperature will guarantee an evenly cooked, crispy exterior without excessive oil absorption.
Cooking Time Guidelines:
While cooking times may vary depending on the size and thickness of the chicken pieces, we’ve got you covered with some general guidelines:
Boneless chicken breasts: Plan for approximately 8-10 minutes per side.
Bone-in chicken pieces: Extend the cooking time to around 12-15 minutes per side.
To maintain food safety standards, use a meat thermometer to confirm that the internal temperature reaches 165°F – indicating that your chicken is fully cooked.
The Perfect Crust:
To achieve that coveted crispy crust, consider coating your chicken in a tantalizing breading mixture. A simple blend of flour, salt, pepper, and spices of your choice can elevate your fried chicken game to new heights. Make sure to coat the chicken thoroughly before placing it in the hot oil.
Turn with Care:
While your chicken sizzles away on the Big Green Egg, it’s crucial to turn it occasionally for even cooking. Use tongs or a spatula to gently flip the chicken, avoiding the temptation to pierce it with a fork. This method keeps the juices locked inside, ensuring moist and succulent bites.
Drain, Rest, and Savor:
Once your chicken is cooked to crispy perfection, carefully remove it from the oil and allow it to drain on a paper towel-lined plate. This step helps eliminate any excess oil, keeping your fried chicken light and delectable. Before diving into your masterpiece, exercise patience and let it rest for a few minutes – this allows the flavors to settle and ensures maximum juiciness.
Monitoring Temperature During Cooking Process
If you aspire to be a master of fried chicken on the Big Green Egg, then you’ve come to the right place. In this article, we will explore the importance of monitoring temperature during the cooking process and provide expert tips to help you achieve chicken perfection.
The Big Green Egg: Your Culinary Ally:
The Big Green Egg is renowned for its exceptional heat retention and temperature control capabilities. This makes it the ultimate tool for frying chicken, ensuring even cooking and that coveted crispy exterior. But achieving chicken perfection requires diligent temperature monitoring.
Preheating for Success:
Before embarking on your culinary journey, preheating your Big Green Egg to the desired temperature is crucial. Charcoal and airflow adjustments will help you reach the ideal heat level. A built-in thermometer will assist in maintaining precise temperature control.
Digital Thermometer: Your Cooking Companion:
Investing in a reliable digital thermometer is a game-changer when it comes to frying chicken. By closely monitoring the temperature of your chicken as it cooks, you can ensure accurate readings, guaranteeing it reaches the recommended internal temperature of 165°F (74°C) for safe consumption.
Avoiding Lid Lifting Frenzy:
Resist the temptation to repeatedly open the lid of your Big Green Egg while cooking. Doing so can cause detrimental temperature fluctuations and disrupt the cooking process. Instead, utilize a digital thermometer with a long probe that can be inserted into the chicken without disturbing its progress. This way, you can monitor the temperature without compromising perfection.
Perfectly Cooked and Full of Flavor:
By vigilantly monitoring the temperature throughout the cooking process, you will ensure that your chicken cooks evenly, avoiding undercooked or overcooked outcomes. Regularly check the internal temperature and make necessary adjustments to cooking time or heat level. Once your chicken reaches the desired internal temperature, allow it to rest for a few minutes. This will enable the juices to distribute evenly, enhancing the flavor and tenderness of your creation.
Removing Fried Chicken from Skillet or Dutch Oven
Sink your teeth into a succulent, crispy piece of fried chicken and experience a culinary delight like no other. Achieving that perfect golden crust requires more than just a great recipe. Today, we’ll unlock the secrets to safely removing fried chicken from a skillet or Dutch oven, ensuring that every piece remains irresistibly crispy and delicious. So grab your tongs and embark on a journey to fried chicken mastery.
The Right Tools for the Job:
Before diving into the process, arm yourself with the right tools. Sturdy tongs or a slotted spatula will be your trusty companions when it comes to lifting the chicken out of the hot oil. These tools help preserve the integrity of the crispy coating while ensuring your safety.
Lift with Precision:
Once equipped with the proper tools, carefully lift each piece of fried chicken out of the skillet or Dutch oven. Hold firm with your tongs or spatula, allowing any excess oil to gracefully drain back into the pan. Approach this step with gentle finesse to avoid shattering that irresistible crunch.
Let It Drip:
After removing the chicken from the skillet, transfer it to a wire rack set over a tray or baking sheet. This ingenious setup allows any remaining oil to elegantly drip off, preventing the dreaded sogginess that can plague fried chicken. The elevated wire rack ensures that all sides of the chicken remain tantalizingly crispy.
The Pitfall of Overcrowding:
To ensure even cooking and maximum crispiness, avoid overcrowding the skillet or Dutch oven when frying a large batch of chicken. Give each piece ample space to dance in the hot oil, allowing it to achieve its full potential. If needed, work in batches to maintain optimal frying conditions.
Keep It Warm:
To keep your cooked chicken warm while frying subsequent batches, place it in a preheated oven set at a low temperature (around 200°F/93°C). This gentle heat preserves the chicken’s juiciness and prevents it from losing its warmth before serving. Say goodbye to lukewarm disappointment.
Give It a Moment:
Once all the fried chicken is removed from the skillet or Dutch oven, resist the temptation to dive in immediately. Allow the chicken to rest for a few minutes and bask in its glory. During this short interlude, residual heat continues to work its magic, ensuring the chicken stays juicy and tender.
QP5HyCnT88o” >
Conclusion
In conclusion, the answer is a resounding yes. You absolutely can fry chicken on the Big Green Egg. This versatile outdoor cooker is not limited to just grilling and smoking. With the right setup and technique, you can achieve crispy, golden-brown chicken that will have your taste buds dancing with joy.
The Big Green Egg’s high heat retention and precise temperature control make it perfect for frying. Its ceramic construction locks in moisture, ensuring juicy chicken with a delectable crunch. Whether you prefer classic fried chicken or spicy wings, the Big Green Egg can handle it all.
To fry chicken on the Big Green Egg, start by preheating the grill to around 375°F (190°C). This will give you the ideal temperature for achieving that crispy exterior while keeping the meat tender and succulent. Use a cast iron skillet or Dutch oven filled with oil to create that perfect frying environment.
Once your oil is hot and shimmering, carefully lower your seasoned chicken pieces into the pan. The sizzle as they hit the oil is music to any food lover’s ears. Cook each piece until it reaches an internal temperature of 165°F (74°C) for safe consumption.
As your chicken fries away, take in the tantalizing aroma that fills the air. The combination of spices mingling with hot oil creates an intoxicating scent that will have your neighbors peeking over their fences in envy.
When your chicken has reached perfection, remove it from the oil and let it rest on a wire rack to drain off any excess grease. Take a moment to admire its beautiful golden hue before digging in.
Whether you’re hosting a backyard barbecue or simply craving some homemade comfort food, frying chicken on the Big Green Egg is a game-changer. It elevates this classic dish to new heights of flavor and satisfaction.