Are you an outdoors enthusiast who prides themselves on being self-sufficient? If so, making your own wood pellets might be the perfect project for you. Not only is it a fantastic way to put your DIY skills to good use, but it can also save you money in the long run.
But, can you really make your own wood pellets? The answer is a resounding yes. All you need are a pellet mill, some raw materials, and a bit of knowledge.
In this blog post, we’ll take an in-depth look at the world of wood pellet production. From exploring the benefits of using wood pellets for heating or cooking to discovering which types of wood make the best pellets.
We’ll even delve into the nitty-gritty details of pellet production, including how to properly store your finished product and the milling process itself. You might be surprised at just how simple it is to create your own pellets once you have all the necessary equipment and information at hand.
So whether you’re an experienced DIYer or simply looking for a new challenge, keep reading to find out how creating your own wood pellets can help you become more self-sufficient as a homesteader or homeowner.
Contents
What Are Wood Pellets?
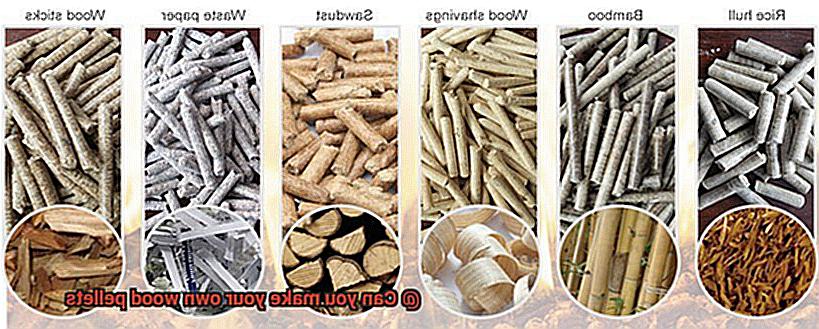
Wood pellets are a fascinating fuel source that has gained immense popularity in recent years. These small, cylindrical pellets are made by compressing sawdust or wood shavings and are used for heating, cooking, grilling, and smoking. They are a renewable energy source and provide an eco-friendly alternative to fossil fuels.
When it comes to heating, wood pellets are an excellent choice. They can be used in stoves and boilers to provide heat for homes and businesses. Unlike fossil fuels, they produce fewer harmful emissions such as carbon dioxide, making them an environmentally friendly option. Plus, they are cost-effective and efficient.
Apart from heating, wood pellets can also be used for cooking. They provide a clean and consistent source of heat that is perfect for slow-cooking meats and vegetables. Wood pellets come in different types, each with its unique flavor profile. Popular options include oak, hickory, maple, and cherry, which can add a smoky flavor to food when used in grilling or smoking.
If you’re interested in making your own wood pellets, it’s important to choose the right type of wood. Softwoods like pine and spruce are commonly used due to their high resin content that helps bind the pellets together. Hardwoods like oak and maple can also be used but may require additional binding agents. The drying process is also important to ensure that the wood is fully dried before use. Once the wood is dry, it can be ground into sawdust or wood shavings before being fed into the hopper of the pellet mill to begin the pellet-making process.
Why Make Your Own Wood Pellets?
While the market offers numerous options, making your own wood pellets can offer distinct advantages that make it worth considering.
First and foremost, producing your own wood pellets gives you full control over the quality of your product. When purchasing pellets from a store, you don’t always know what kind of wood was used, how it was processed, or if any additives were included. By making your own, you can select the type of wood you prefer and ensure that it’s free from any chemicals or contaminants.
In addition to quality control, making your own wood pellets can also be a cost-effective option in the long run. Although there is an initial investment in purchasing a pellet mill and other equipment, once you have everything set up, you can produce your own wood pellets at a fraction of the cost of buying them from a store. This is especially true if you have access to a local source of wood that’s suitable for pellet production.
But it’s not just about cost savings. Making your own wood pellets can also be a fascinating and rewarding hobby. You can experiment with different types of wood and create unique blends to suit your cooking needs. You can also customize the size and shape of your pellets to fit your specific smoker or grill setup.
What You Need to Make Wood Pellets
Making your own wood pellets is a great way to ensure that you have a consistent source of fuel that is free from additives and contaminants. So, what do you need to make wood pellets?
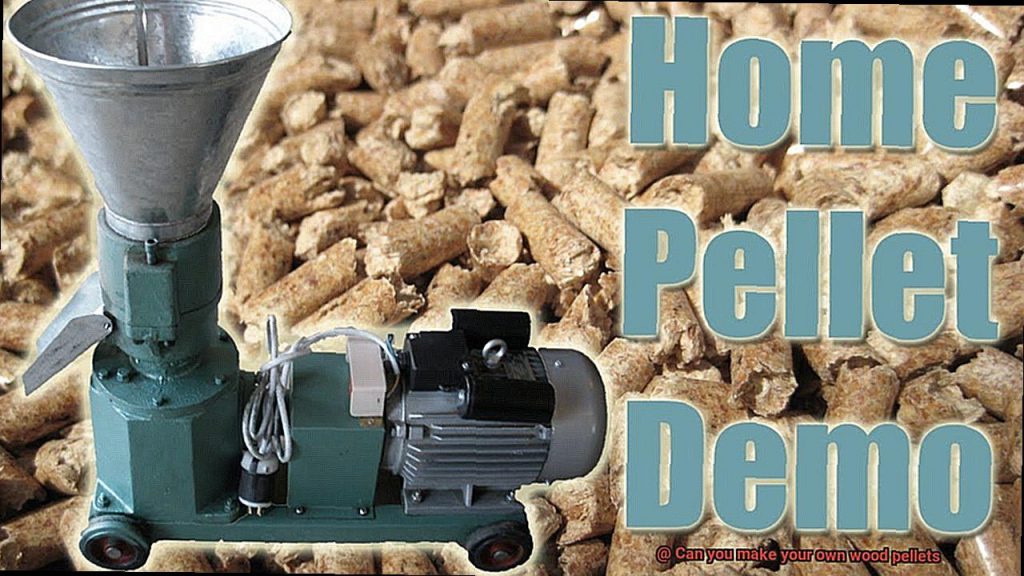
First and foremost, you will need a pellet mill. This machine compresses biomass materials such as wood chips, sawdust, or agricultural waste into small pellets. You can purchase a pellet mill from various manufacturers, but make sure to choose one that fits your production needs.
In addition to a pellet mill, you will also need a source of biomass material. This can include wood chips, sawdust, grasses, and agricultural waste. The amount of material you will need depends on the size of the pellet mill and how many pellets you want to produce.
Now, let’s talk about the process. You will need a drying system to reduce the moisture content of the biomass material to around 10%. A rotary dryer or belt dryer can be used for this purpose. Once the material has been dried, it needs to be ground into a fine powder using a hammer mill or similar equipment.
Finally, you will need a packaging system to store and distribute the finished pellets. Bags or bulk storage containers can be used for this purpose.
Overall, making your own wood pellets requires some initial investment in equipment and materials, but it can be an environmentally friendly and cost-effective way to produce fuel for heating or cooking. Plus, it gives you the freedom to experiment with different blends of wood to suit your cooking needs.
To sum up, what you need to make wood pellets are:
- Pellet mill
- Source of biomass material
- Drying system (rotary dryer or belt dryer)
- Grinding equipment (hammer mill or similar)
- Packaging system (bags or bulk storage containers)
Choosing the Right Type of Wood
Properly choosing the right type of wood is key to creating high-quality, delicious, and long-lasting pellets that will meet your needs.
When selecting the type of wood for your pellets, it’s critical to consider both density and moisture content. Hardwoods like oak, hickory, and maple are excellent choices because of their high density and low moisture content. These types of woods produce a robust, smoky flavor and burn slowly – making them perfect for grilling or heating your home.
On the flip side, softwoods such as pine and spruce should be avoided. These woods have a higher moisture content and lower density, which can lead to poor quality pellets. Additionally, softwoods can produce a harsh flavor that may be unappealing for grilling.
But wait, there’s more. It’s not just about the type of wood – it’s also about the source of the wood. Using wood from construction sites or treated with chemicals can be harmful to both your health and the environment. It’s always best to use clean, untreated wood from a trusted source to ensure safety and environmental responsibility.
Drying the Wood
Then you need to know about the crucial step of drying the wood. This process can make or break the quality of your pellets, so let’s dive into the details.
First off, moisture content is key. Wood used for pellets should have a moisture content between 10-20%. If it’s too wet, you’ll get inefficient burning and potential mold growth. If it’s too dry, you’ll end up with a crumbly mess and excess dust.
So, how do you achieve that perfect moisture level? There are several methods to choose from, each with its own benefits and drawbacks.
Air-drying is the most cost-effective option. It involves stacking the wood in a dry area with good airflow and letting nature take its course. While this method takes several months, it’s a low-energy option that doesn’t require any special equipment.
If time is of the essence, kiln-drying might be more your speed. This method uses a large oven to heat and dry the wood quickly. It can take as little as a few days but is more expensive to set up and operate.
Solar drying is another option that uses the sun’s energy to dry the wood. It works best in sunny areas with low humidity levels but can take several weeks or months to complete.
Regardless of which method you choose, it’s important to monitor moisture content regularly. You can use a moisture meter to check levels and adjust your drying method as needed.
Grinding the Wood
The secret to achieving that unique and delectable smoky flavor in your food lies in making your own wood pellets. But before you begin, it’s essential to understand the process of grinding the wood, which is a critical step in the production of high-quality wood pellets.
There are two types of grinders you can use for grinding the wood: a hammer mill and a wood chipper. A hammer mill uses high-speed rotating hammers to crush and shred the wood into small pieces. It’s a versatile grinder that can handle larger pieces of wood like logs or branches, producing consistent-sized particles that are ideal for pellet production. On the other hand, a wood chipper cuts and chips the wood into small pieces using sharp blades. Although commonly used for landscaping and tree removal, it can also be used for making wood pellets. However, it may not produce consistent-sized particles like a hammer mill.
Once the wood has been ground, it’s important to dry it to reduce its moisture content. This is an essential step because if the wood is too wet, it won’t burn efficiently and can cause problems during the pellet-making process. There are different methods of drying wood such as air-drying, kiln-drying, or solar drying. The ideal moisture content for wood pellets is between 10% and 20%.
Feeding the Ground Wood into the Hopper
Well, before you get too excited, it’s essential to understand the crucial step of feeding the ground wood into the hopper. As an expert in this field, let me guide you through the process.
Firstly, the moisture content of the ground wood is crucial for producing high-quality pellets that will burn efficiently and give you that mouth-watering smoky flavor. To achieve this, you need to ensure that the wood is dry enough with a moisture content of around 10%. A reliable moisture meter can help you check the moisture content of the wood before feeding it into the hopper.
Once you’ve ensured that the wood is dry enough, it’s time to fill the hopper. You can either do this manually or using an automatic feeder. If you choose to do it manually, add small amounts at a time to avoid overflowing the hopper and ensure proper compression of the wood. On the other hand, if you opt for an automatic feeder, make sure it’s calibrated correctly to avoid any overfeeding or underfeeding.
Another critical factor is choosing the right type of wood for your pellets. Different types of wood have different densities and combustion properties that affect the quality of your pellets. Softwoods like pine and fir are ideal for heating and cooking purposes due to their high BTU (British Thermal Units) output. In contrast, hardwoods like maple and oak are better suited for grilling and smoking due to their distinct flavors.
Monitoring Temperature and Pressure Levels During Production
In this section, we’ll be discussing how monitoring temperature and pressure levels during production is essential for creating the perfect pellets.
Wood pellets are made by compressing sawdust, wood chips, or other wood residues under high pressure and temperature. However, if the temperature and pressure levels are not properly maintained, the quality of the pellets may be compromised. This is why monitoring temperature and pressure levels is crucial to ensure that your pellets meet industry standards.
During the pellet-making process, the raw materials are fed into a pellet mill where they are compressed and extruded through a die. However, the die heats up due to the friction caused by the compression of the raw materials, which heats up the pellets. If the temperature gets too high, it can cause the pellets to start smoking or even catch fire. This can be dangerous, which is why monitoring the temperature of both the die and the pellets during production is so important.
Specialized tools such as thermocouples and infrared cameras can be used to keep a close eye on temperature levels and make adjustments as necessary. By using these tools, operators can prevent overheating and ensure that their pellets are safe for use.
But it’s not just temperature that you need to monitor – pressure levels are just as crucial. The compression process requires a specific amount of pressure to create high-quality pellets. Too low a pressure can result in weak and easily breakable pellets while excessive pressure can increase maintenance costs by causing excessive wear on the pellet mill.
To maintain consistent pressure levels, operators can use sensors and gauges that measure the pressure inside the pellet mill. This information can then be used to adjust machine settings to ensure that pressure remains within a safe and effective range.
b7moYXe6YAc” >
Conclusion
In conclusion, creating your own wood pellets is a fulfilling and eco-friendly alternative to traditional heating methods. Not only can it save you money, but it also allows for complete control over the production process, resulting in high-quality pellets free from additives and contaminants.
When selecting the type of wood to use, hardwoods like oak and maple are ideal due to their low moisture content and high density. On the other hand, softwoods such as pine and spruce should be avoided as they have higher moisture content and lower density which can lead to poor quality pellets.
Properly drying the wood is crucial for pellet production with air-drying, kiln-drying or solar drying being viable options. A moisture content of 10-20% is necessary for optimal results.
Feeding the ground wood into the hopper should be done gradually to avoid overflowing and ensure proper compression of the material. This can be done manually or using an automatic feeder.
Monitoring temperature and pressure levels throughout production is essential for creating high-quality pellets that meet industry standards. Utilizing specialized tools such as thermocouples and infrared cameras can prevent overheating while sensors and gauges maintain consistent pressure levels.
In summary, making your own wood pellets offers endless possibilities for experimentation with different blends of wood while promoting environmental responsibility.