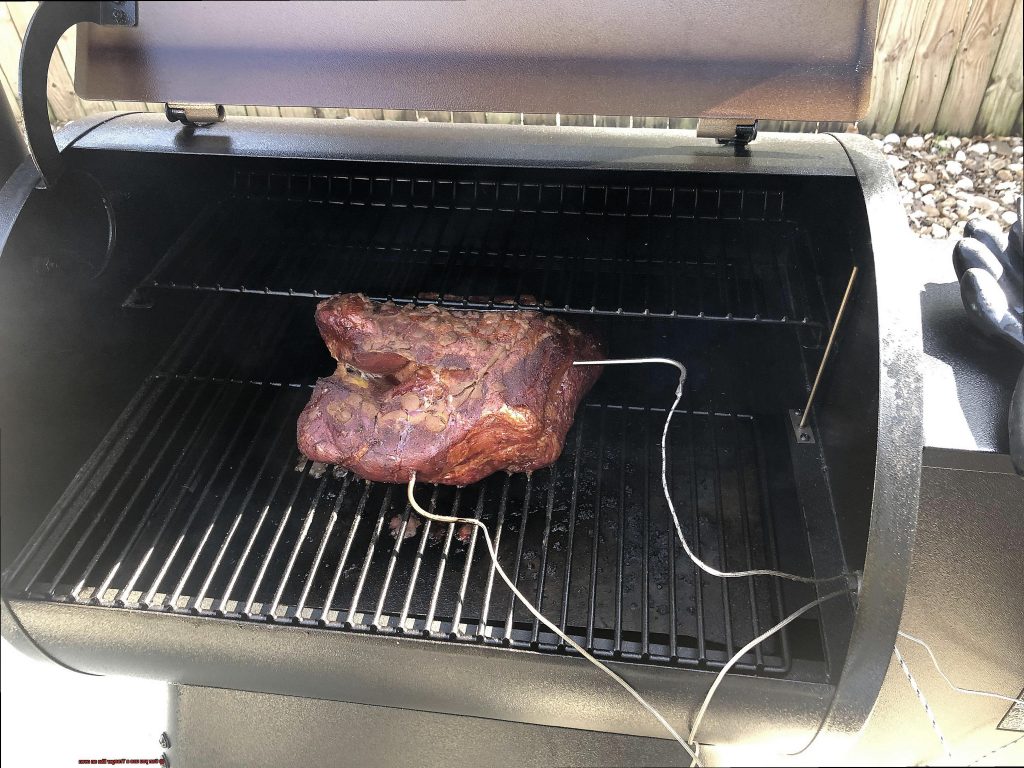
Are you torn between the smoky flavor of barbecue and the succulent taste of meat cooked in a traditional oven? Fear not, as we explore the answer to the burning question on everyone’s mind: Can you use a Traeger like an oven?
First things first, let’s break down what a Traeger grill is. These wood-fired grills use pellets made from wood to create a fire that heats up the cooking chamber. Typically, Traegers are used for low and slow cooking of meats like brisket or ribs, resulting in a deliciously smoky flavor.
But can you bake or roast with a Traeger? Absolutely. With the right accessories such as baking stones or cast iron skillets, Traeger grills can function as an oven or stovetop. In fact, many Traeger enthusiasts use their grills to cook everything from pizzas and casseroles to mouth-watering desserts.
Whether you’re a seasoned pro or new to the world of wood-fired cooking, this post will delve into all the ways you can use your Traeger grill as an oven. We’ll cover topics like temperature control, cooking times and more so that you can get started on your culinary creations in no time.
So, grab your apron and let’s fire up that grill. It’s time to unleash your inner chef and start experimenting with all the possibilities that come with using a Traeger as an oven.
Contents
Advantages of Using a Traeger Grill as an Oven
Consider using a Traeger grill as an oven. This innovative appliance has several advantages over traditional ovens that will change the way you cook.
One of the biggest advantages of using a Traeger grill as an oven is the smoky flavor it infuses into your food. Traeger grills use wood pellets as fuel, which adds a unique taste to baked goods, roasted vegetables, and even pizzas that cannot be achieved with a conventional oven.
Imagine enjoying a homemade pizza with a distinct smoky flavor that will leave your taste buds begging for more.
Moreover, Traeger grills offer precise temperature control, allowing you to cook your dishes to perfection every time. The temperature control on the grill is more accurate than most ovens, ensuring consistent cooking results.
Say goodbye to burnt or undercooked dishes and hello to perfectly cooked meals every time you use your Traeger grill as an oven.
Another advantage of using a Traeger grill as an oven is that it can be used outdoors. This is especially useful during hot summer months when using an indoor oven can heat up the house and make it uncomfortable.
Cooking outside also allows for larger dishes to be prepared without taking up valuable oven space inside. You can enjoy the fresh air while preparing delicious meals for your family and friends.
Traeger grills also have a large cooking surface area, making them ideal for cooking multiple dishes at once. This feature is great for holiday meals or dinner parties where several dishes need to be cooked simultaneously.
Additionally, the convection heat generated by the grill ensures that all dishes are cooked evenly, saving you time and effort.
When using your Traeger grill as an oven, keep in mind that cooking times may differ slightly from what you’re used to with a conventional oven. However, with a little practice and experimentation, you’ll quickly get the hang of it. You’ll be able to cook a variety of dishes with ease, from roasted vegetables to baked bread and even a succulent turkey.
Setting the Temperature on Your Traeger Grill
Then, it’s time to learn the art of setting the temperature on your Traeger grill to use it as an oven. With its digital control panel, you can set the temperature to the exact degree you need, making it perfect for baking delicious treats like bread and pizza.
Getting started is easy. First, turn on your Traeger grill and press the “Mode” button until you reach the “Smoke” setting. Then, adjust the temperature to your desired level by pressing the “Temp” button. With a maximum temperature of 450°F, you can bake, roast, and broil to perfection.
It’s important to note that Traeger grills work differently than traditional ovens. Since they use wood pellets as fuel, they produce smoke and heat simultaneously. This means that you may need to adjust your cooking time and temperature accordingly. For instance, if you’re baking a delicate cake, lower the temperature by 25°F and extend the cooking time by a few minutes.
To ensure that your Traeger grill functions properly as an oven, it’s recommended that you use a ceramic or pizza stone. These stones help distribute heat evenly across the grill and prevent hot spots from forming. They also help absorb moisture, which is critical when baking bread.
Now that you know how to set the temperature on your Traeger grill and use it as an oven, there’s no limit to what you can create. Here are some additional tips to help you get started:
- Experiment with different types of wood pellets to add extra flavor to your dishes.
- Always preheat your Traeger grill before cooking.
- Use a meat thermometer to ensure that meat is cooked to perfection.
- Clean your Traeger grill regularly to maintain optimal performance.
Cooking Times with a Traeger Grill
While this may seem like a simple switch, there are a few important things to keep in mind. As an expert on cooking times with a Traeger grill, I’m here to share my top tips for making the most out of your Traeger’s oven capabilities.
First and foremost, let’s talk about the low and slow cooking style that Traeger grills are designed for. This method is perfect for certain types of food, such as brisket, pulled pork, and ribs. However, if you’re looking to whip up something quickly or at high temperatures, a traditional oven may be a better option.
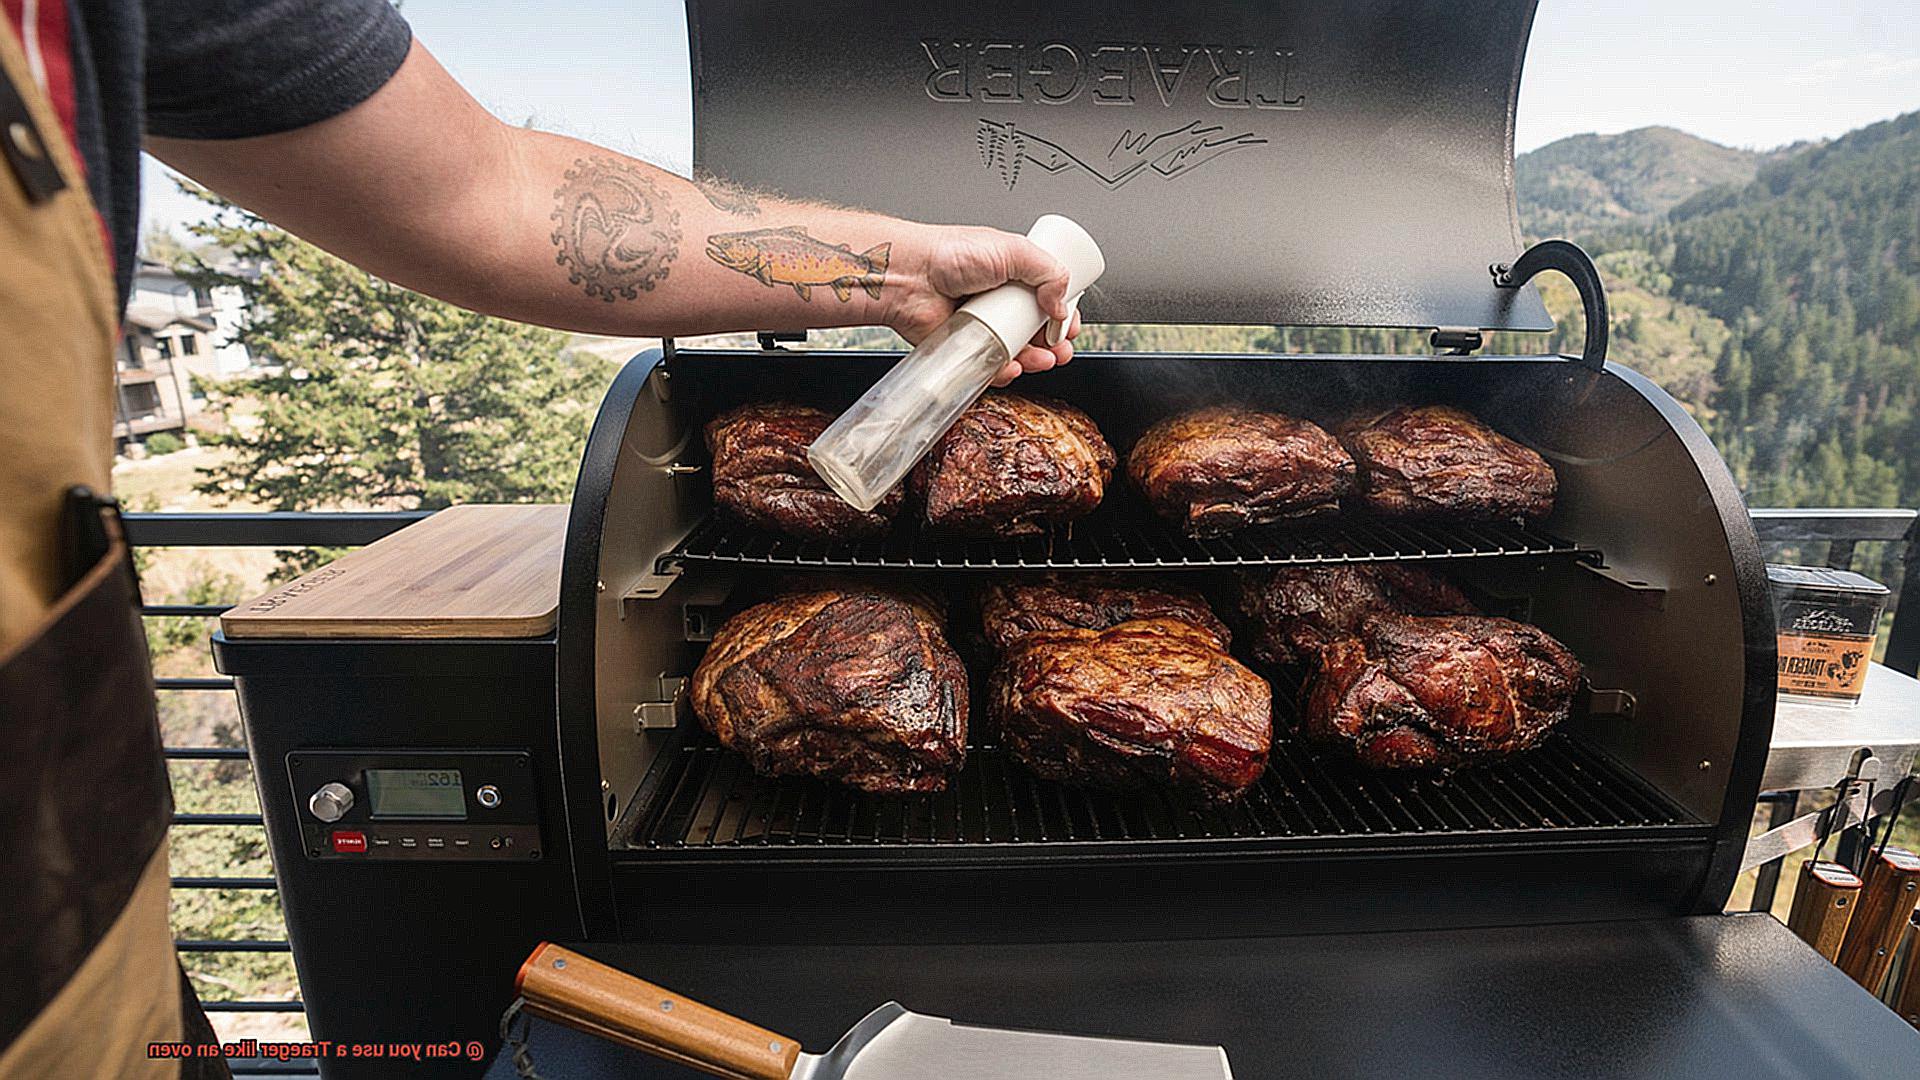
To use your Traeger like an oven, the key is to preheat it to the desired temperature before adding your food. This can take anywhere from 10-15 minutes depending on the model of your Traeger. Once the grill is preheated, you can add your food and get cooking.
But here’s where things may differ from your traditional oven – cooking times. Due to the indirect heat and smoke used in Traeger grills, cooking times may vary compared to a traditional oven. So be patient and keep an eye on your food. It’s always a good idea to use a meat thermometer to ensure that your food is cooked properly and reaches the appropriate internal temperature.
Here are some additional tips for using your Traeger grill like an oven:
- When baking, use a pizza stone or cast-iron skillet to distribute heat evenly.
- For roasting, use a roasting pan or cast-iron skillet with a rack to elevate the food and allow for even airflow.
- Always follow recipe instructions for cook time and temperature as a starting point, but be prepared for variations based on your grill and other factors.
Different Types of Wood Pellets and Their Effects on Cooking Times
When it comes to using a Traeger like an oven, the type of wood pellet you use can make all the difference in your cooking experience. There are various types of wood pellets available, each with its unique flavor profile and burn characteristics.
Some popular options include hardwood pellets like oak, hickory, and maple, as well as fruitwood pellets like apple and cherry.
Flavor Profile
Choosing the right type of wood pellet is crucial for achieving the desired flavor profile in your food. For instance, hickory pellets give a strong smoky flavor to meats, making them ideal for cooking pork and beef. Meanwhile, applewood pellets have a milder, sweeter flavor that pairs perfectly with poultry and fish. By selecting the right type of pellet for your dish, you can elevate its taste and aroma.
Burn Characteristics
The density of the wood pellet can significantly impact its burn time and temperature. Denser wood pellets, such as oak or mesquite, burn hotter and longer than softer woods like fruitwoods. As a result, if you’re using denser pellets, you may need to adjust your cooking times accordingly to prevent overcooking. Knowing how each type of pellet burns is essential in achieving perfectly cooked meals every time.
Moisture Content
One important factor to consider when using wood pellets is their moisture content. Wet or damp pellets can cause fluctuating temperatures and inconsistent cooking results. It’s recommended to store wood pellets in a dry place to ensure optimal performance. Proper storage of your wood pellets ensures that they are ready to use when you need them.
Cooking Temperature and Time
Traegers offer a wide range of cooking options with adjustable cooking temperatures ranging from 180°F to 450°F. Experimenting with different cooking temperatures and times can help achieve the perfect cook for any dish. Whether you’re cooking meats that require longer cooking times or lighter meats like chicken or fish, adjusting the temperature and cooking time can help you achieve optimal results.
How to Use a Traeger Grill for Baking Bread
Baking bread is a timeless tradition that has been around for centuries. It’s a process that requires patience, attention to detail, and the right equipment. But did you know that you can use a Traeger grill to bake bread? That’s right. Your Traeger grill can be used as an oven, and with a little bit of know-how, you can bake delicious loaves of bread with a smoky flavor. Here are five tips on how to use your Traeger grill for baking bread.
Proper Set-Up
Before you start baking bread on your Traeger grill, ensure that it’s set up correctly. This means cleaning the grill grates and making sure that the temperature control is accurate. A clean grill will prevent your bread from sticking to the grates and ensure even baking.
Choose the Right Wood Pellets
Using hardwood pellets like oak, hickory, or mesquite can provide a rich, smoky flavor to your bread. Make sure to choose pellets that burn slowly to ensure even baking. It’s essential to select pellets that complement the flavors of your bread.
Use a Cast-Iron Skillet or Dutch Oven
When using a Traeger grill for baking bread, using a cast-iron skillet or Dutch oven with a lid is ideal. The skillet or Dutch oven creates a moist environment that promotes even baking and ensures the perfect crust. The result is bread that is crispy on the outside and soft on the inside.
Monitor Your Bread Closely
It’s crucial to keep an eye on your bread while it’s baking to ensure that it doesn’t burn. Since every Traeger grill is different, it’s essential to monitor how your bread is cooking and adjust the temperature accordingly. If the top of the bread starts getting too dark before it’s finished baking, cover it with aluminum foil until it’s done.
Let Your Bread Cool Before Slicing
Once your bread is done baking, let it cool before slicing and serving. This will allow the flavors to develop fully and ensure that the texture is just right. Cutting into hot bread can cause it to become gummy and prevent it from developing its full flavor.
Roasting Vegetables with a Traeger Grill
The smoky flavor it infuses in your veggies is unbeatable, and the result is juicy and tender vegetables that will leave your taste buds wanting more. Here’s how you can do it:
To start, preheat your Traeger grill to 375-400°F. While the grill heats up, wash and chop your vegetables into bite-size pieces. Try mixing it up and experimenting with different veggies like carrots, onions, peppers, or even potatoes.
Next, toss your veggies with olive oil, salt, pepper, or any other seasonings you love. You can get creative with your seasoning blends by adding garlic powder, paprika, or fresh herbs.
Once the grill reaches the desired temperature, place your seasoned vegetables on a grill pan or cast iron skillet. Close the lid of the Traeger and let the magic happen for 20-30 minutes. Be sure to stir occasionally to ensure even cooking.
It’s important to keep an eye on your veggies as they cook because Traeger grills tend to run hotter than traditional ovens. If you notice your veggies browning too quickly or becoming charred, lower the grill temperature or move them to a cooler part of the grill.
When your veggies are tender and golden brown, take them off the grill and serve immediately. Roasted vegetables make for a delicious side dish for any meal and can also be used as a topping for salads or sandwiches.
Here are some tips to take your roasted veggies to the next level:
- Experiment with different vegetables and seasoning combinations.
- Use a cast iron skillet for extra smoky flavor.
- Try roasting veggies directly on the grill grates for a charred effect.
- Add some wood pellets to enhance the smoky flavor.
Making Pizza with a Traeger Grill
With its ability to add a smoky flavor and crisp up the crust, you won’t want to make pizza any other way.
First things first, preheat your Traeger to 425-450 degrees Fahrenheit. It may take a bit longer than preheating a regular oven, but trust us, it’s worth the wait. Once your grill is hot, place your pizza on a preheated pizza stone or a cast iron skillet. Avoid placing your pizza directly on the grates as this can cause the crust to burn or become too crispy.
Close the lid and let the magic happen. Cook the pizza for about 10-15 minutes. Keep an eye on it to make sure it doesn’t burn, but don’t open the lid too often or you’ll lose that precious heat. If you notice that the cheese is melting too quickly, adjust the temperature or move the pizza to a cooler part of the grill.
Now comes the best part – slicing and serving. Let your pizza rest for a few minutes before slicing into it. The crust should be crispy and the cheese perfectly melted.
But wait, there’s more. Here are some extra tips to take your Traeger pizza game to the next level:
- Experiment with different toppings to find your perfect combination.
- Use a pizza peel to transfer your pizza onto the grill for a professional touch.
- Add some wood pellets to your Traeger for even more smoky flavor.
- Preheat your pizza stone or cast iron skillet in the Traeger for even better results.
Expanding Your Cooking Capabilities with a Traeger Grill
With its unique pellet-fed heating system and precise temperature control, your Traeger grill can do more than just grill. It can transform into a versatile oven that can handle all your baking needs.
Using your Traeger grill as an oven is simple with the right accessories. A baking stone or pizza stone provides a flat surface for baking bread, pizza, and other pastries to perfection. A cast-iron skillet is great for roasting vegetables or cooking meat dishes such as chicken or steak. And a wire rack is essential for cooling down baked goods.
But what sets a Traeger grill apart from conventional ovens is its ability to infuse natural wood smoke into your dishes. Unlike traditional ovens, Traeger grills use natural wood pellets to generate heat and smoke, adding a unique smoky flavor to your food.
With several smoke flavors to choose from, you can customize the taste of your dishes.
kUd25AumfUo” >
Conclusion
In summary, the answer is a resounding yes – you can indeed use your Traeger grill as an oven. By utilizing the appropriate accessories and some basic knowledge, Traeger grills can function as a versatile cooking tool, enabling you to bake, roast, and broil with ease. The benefits of using a Traeger grill in this manner are numerous.
Firstly, the smoky essence it imparts into your food is unparalleled.
Secondly, Traegers offer precise temperature control that ensures consistent cooking outcomes every time.
Additionally, they can be used outdoors during hot summer months when using an indoor oven can make your home uncomfortably warm.
When employing your Traeger grill as an oven, keep in mind that cooking times may differ slightly from what you’re accustomed to with a conventional oven. However, with some practice and experimentation, you’ll quickly become proficient at it. From roasted vegetables to baked bread and even succulent turkey, you’ll be able to cook various dishes effortlessly.
Overall, expanding your culinary horizons by incorporating a Traeger grill into your kitchen arsenal is well worth considering for those seeking something different than traditional ovens.

