Are you a home cook who loves to whip up delicious chicken dishes? If so, then you know how important it is to make sure your chicken is cooked just right. Undercooked chicken can be a recipe for disaster, while overcooked chicken can be downright unappetizing. That’s why using a food thermometer to measure the internal temperature of your chicken is key.
But here’s the question – do you probe in the thigh or breast? It’s a dilemma that has plagued many home cooks, and there isn’t always a clear answer. Some swear by probing in the thigh, while others argue that the breast is the way to go. So what’s the best method?
In this blog post, we’ll take a deep dive into whether you should be probing in the chicken thigh or breast. We’ll explore all the factors that come into play when cooking chicken – from cooking time and temperature to texture and taste. By the end of this post, you’ll have all the information you need to make an informed decision about which method works best for your cooking style and preferences.
So get ready to become an expert on all things chicken. Whether you’re a seasoned pro or just starting out, we’ve got everything you need to ensure your next chicken dish is a success. Let’s get started.
Contents
What is the Proper Internal Temperature for Chicken?
The proper internal temperature for chicken should be 165°F (74°C) according to the USDA. This temperature ensures that all harmful bacteria, such as salmonella and campylobacter, are destroyed.
To achieve this temperature, it’s crucial to use a meat thermometer to check the internal temperature of the chicken. The thickest part of the chicken, which is typically the center of the breast or innermost part of the thigh, should be probed to ensure that the chicken is fully cooked. It’s better to err on the side of caution when it comes to cooking poultry, so some chefs prefer to cook their chicken to a slightly higher temperature of 170°F (77°C) for added safety.
Different parts of the chicken may require different cooking times. The breast tends to cook faster than the thigh, so it’s important to monitor the temperature in both areas separately. Grilling experts recommend starting by grilling the chicken thighs and then adding the breasts later on to ensure that both parts are cooked evenly.
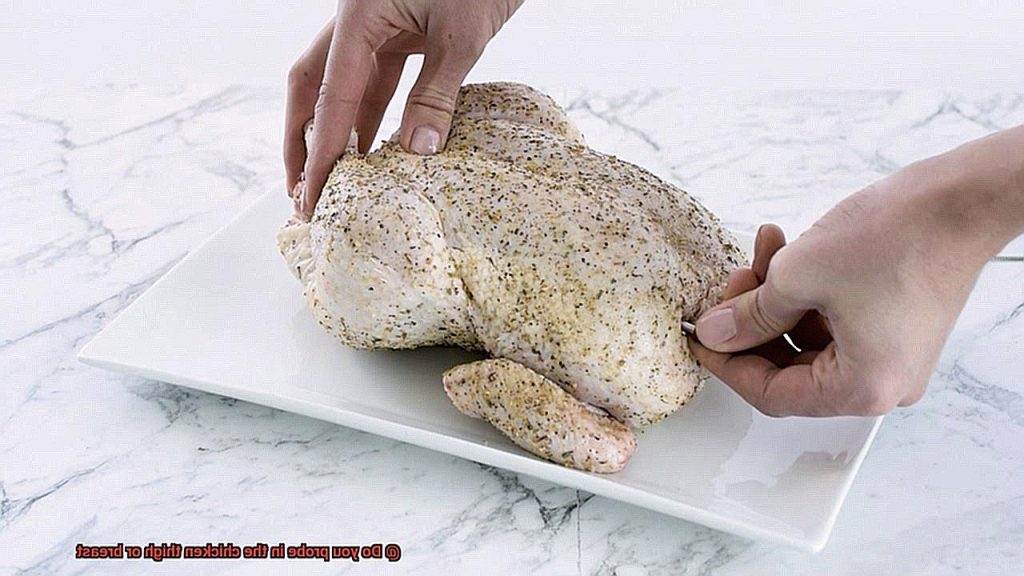
It’s also crucial to insert your meat thermometer into the chicken correctly. The probe should be inserted into the center of the thickest part of the meat without touching any bones, as this can give an inaccurate reading. Taking multiple readings from different parts of the chicken ensures that it has reached a safe internal temperature throughout.
Once your chicken has reached the proper internal temperature, let it rest for a few minutes before serving. This allows the juices to redistribute throughout the meat, leading to a more flavorful and tender bite.
Where Should You Probe the Chicken?
Are you looking to perfect your chicken grilling skills? One of the most critical steps to achieving mouth-watering, fully cooked chicken is by using a meat thermometer. But where should you probe the chicken, you ask? Fear not – we have all the answers.
Firstly, it’s crucial to insert the thermometer into the thickest part of the meat. For chicken, this means the thigh, as breast meat tends to cook faster and can result in dry meat if only probed there. Plus, who doesn’t love juicy dark meat?
But wait, there’s more. When probing the thigh, ensure that you avoid hitting the bone as it can lead to an inaccurate reading. Aim for the thickest part of the meat without touching the bone, and voila – perfectly cooked chicken.
Now, let’s talk about cooking temperatures. The USDA recommends cooking chicken to an internal temperature of 165°F (75°C) to eliminate any harmful bacteria. However, if you’re extra cautious like us, aim for 170°F (77°C). Safety first, folks.
If you’re grilling bone-in chicken, be mindful that bones act as insulators and can slow down cooking times. To ensure an accurate reading, make sure you’re inserting the thermometer into the actual meat and not just touching the bone.
Different Parts of the Chicken Require Different Cooking Times
Then understanding the different cooking times for different parts of the chicken is vital. Trust us, your taste buds will thank you.
Each part of the chicken has a unique thickness and density that affects its cooking time. For instance, breast meat is leaner and less dense than thigh meat, which means it cooks faster. Ignoring these differences can result in undercooked or overcooked chicken, ruining your dinner party.
So how do you ensure that your chicken is cooked to perfection? Knowing the right cooking time for each part of the chicken is critical. Here are some sub-topics to keep in mind:
- Breast Meat: The breast meat’s lower density requires a slightly lower temperature for a more extended period to retain its moistness. For boneless breasts, grill for 6-8 minutes per side over medium heat. For bone-in breasts, grill for 30-35 minutes over low heat.
- Thigh Meat: Thigh meat’s higher fat content makes it more tender and juicy but also means it takes longer to cook than breast meat. For boneless thighs, grill for 5-6 minutes per side over medium heat. For bone-in thighs, grill for 30-35 minutes over low heat.
- Wings: Chicken wings are smaller and require less cooking time than other parts of the chicken. Grill them for 10-12 minutes over medium heat.
To ensure that your chicken is cooked thoroughly, use a meat thermometer to check the internal temperature. The USDA recommends cooking chicken to an internal temperature of 165°F (74°C). Insert the thermometer into the thickest part of the meat without touching any bones.
Inserting the Meat Thermometer Properly
Grilling chicken is a fantastic way to enjoy this protein, but it’s crucial to cook it to the right temperature. Nothing ruins a meal like undercooked or overcooked chicken. To ensure that your chicken is safe and delicious, using a meat thermometer is the best way to go. However, knowing how to insert the thermometer properly is essential for getting an accurate reading.
Firstly, you need to know where to insert the meat thermometer. The ideal location is in the thickest part of the meat, away from any bones. Hitting a bone can give you a false reading and leave you with undercooked or overcooked chicken. If you’re cooking a whole chicken, the thickest part will be in the thigh area since it takes longer to cook than other parts. For chicken breasts, the thickest part will be in the middle.
Once you’ve determined where to insert the thermometer, make sure that it goes in at least halfway into the meat. Avoid touching any bone as this can affect the reading. Leaving the thermometer in for a few seconds until you get a stable reading is vital.
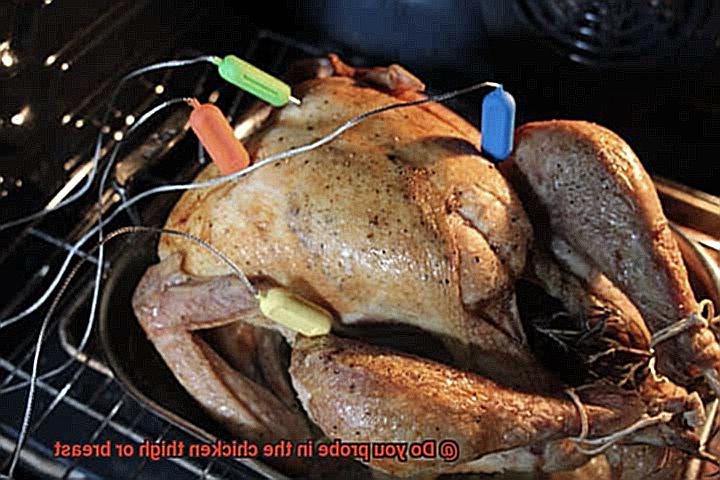
It’s worth noting that different parts of the chicken will have different cooking times. Hence, it’s crucial to check each piece individually using a meat thermometer. This ensures that each piece of chicken is cooked evenly and safe to eat.
In summary, using a meat thermometer when grilling chicken is essential for serving up safe and delicious meals every time. To recap, here are some key takeaways:
- Insert the thermometer in the thickest part of the meat, away from any bones.
- For whole chickens, insert it into the thigh; for chicken breasts, insert it into the middle.
- Make sure it goes in at least halfway into the meat and avoid touching any bone.
- Leave it in for a few seconds until you get a stable reading.
- Check each piece individually since different parts have different cooking times.
Taking Multiple Readings from Different Parts of the Chicken
Cooking chicken to perfection can be a daunting task, but with proper techniques and tools, it can be done effortlessly. Taking multiple readings from different parts of the chicken is a crucial step in ensuring that it is cooked thoroughly and safe to eat.
The two areas to probe are the thigh and breast since their temperature thresholds differ. The United States Department of Agriculture (USDA) recommends an internal temperature of 165°F (74°C). To get an accurate reading, you need a meat thermometer. Insert it into the thickest part of the thigh without touching the bone. Repeat the process with the breast.
Taking readings from different parts of the chicken is also important because heat can vary in different areas of the oven or grill. This guarantees that the chicken is cooked evenly. If you’re cooking multiple pieces, take readings from each piece to ensure they’re all cooked to perfection.
After cooking, let the chicken rest for at least 5-10 minutes before cutting into it. This allows the juices to redistribute throughout the meat, resulting in a juicier and more flavorful finished product.
Grilling Tips for Ensuring Even Cooking
Grilling chicken is a beloved pastime for many, but it can be a daunting task to ensure even cooking. One of the most crucial steps in achieving perfectly cooked chicken is to probe it in the right part of the meat. Here are some important reasons why properly probing your chicken is essential for even cooking and how you can do it like a pro.
Probing the Right Parts of the Chicken:
Probing chicken in the right part of the meat is crucial to ensuring even cooking. The breast and thigh require different cooking times and temperatures for safe consumption and tenderness. The breast is a leaner piece of meat that can dry out if overcooked, so it needs to be cooked to an internal temperature of 165°F (74°C). The thigh, on the other hand, has more fat and connective tissue that requires a higher temperature of 175°F (79°C) for tenderization.
When using a meat thermometer, it’s essential to probe the thickest part of the meat for an accurate reading. For chicken breasts, this means probing in the thickest part of the breast, away from any bones. For chicken thighs, probe at the center of the thickest part of the thigh, near the bone.
Properly Preparing the Chicken:
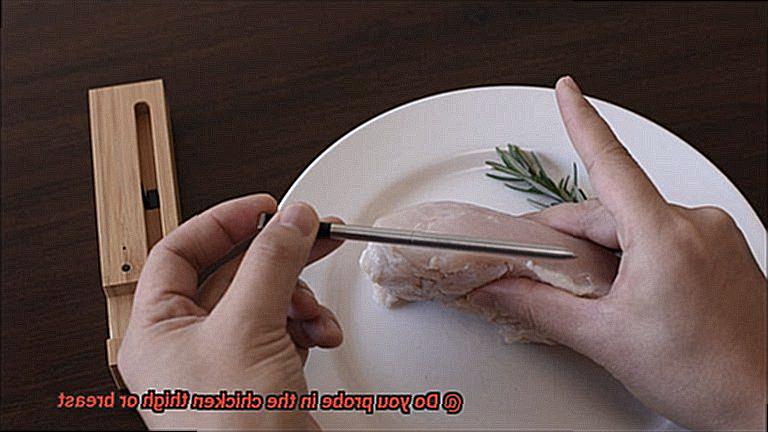
Proper preparation of the chicken is also essential for even cooking. Trimming excess fat and skin before grilling can help avoid flare-ups and uneven cooking. Pounding thicker parts of the meat can also help ensure even thickness and cooking. Marinating or seasoning your chicken not only adds flavor but also helps keep it moist during grilling.
Using Indirect Heat:
Using indirect heat while grilling is another helpful tip for ensuring even cooking. This means placing the chicken on a cooler part of the grill or using a two-zone heat setup to prevent burning and uneven cooking. Indirect heat allows for slower cooking, which ensures that the chicken is cooked through without burning on the outside.
Avoiding Foodborne Illness:
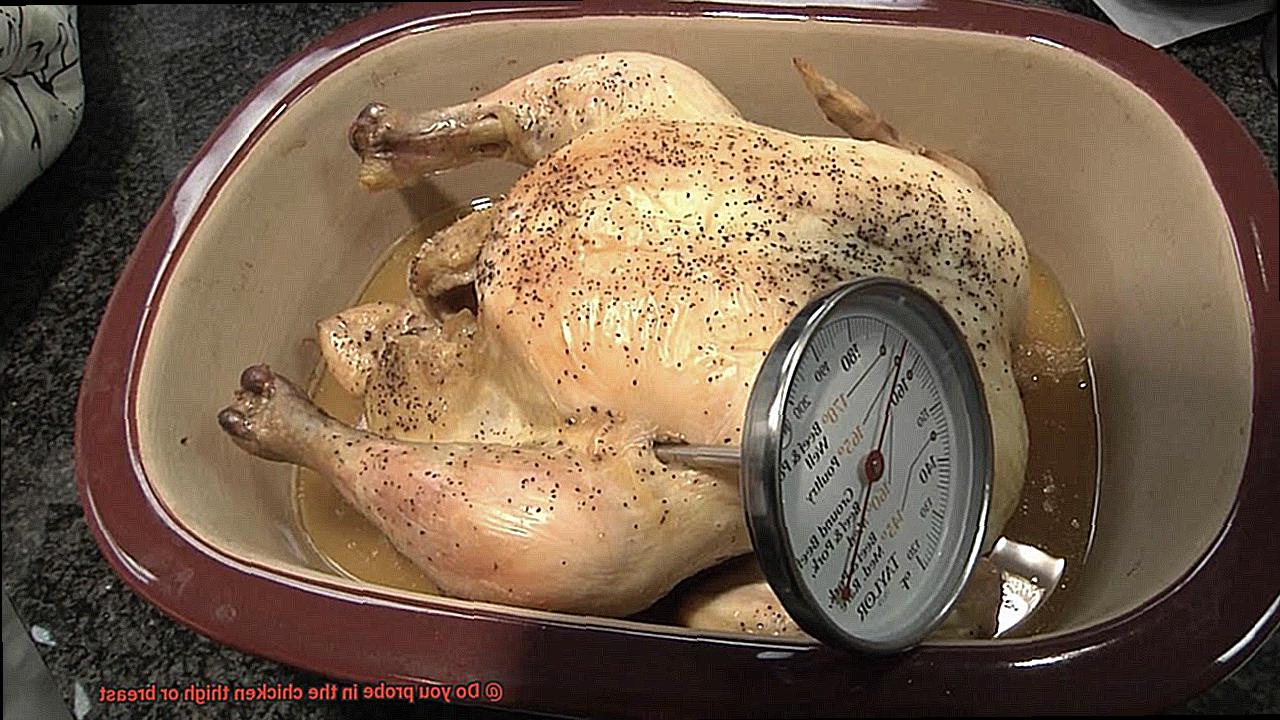
Probing your chicken is not only important for even cooking but also for avoiding foodborne illnesses. Undercooked chicken can contain harmful bacteria that can cause food poisoning. By using an instant-read thermometer and probing in the right spot, you can ensure that your chicken is safe to eat.
How to Ensure Your Chicken is Safe for Consumption
Ensuring that your chicken is safe for consumption is crucial to avoid foodborne illnesses caused by harmful bacteria such as salmonella and E.coli. To help you cook your chicken safely, here are five sub-sections that will guide you through the process.
Proper thawing technique
When it comes to thawing chicken, it’s essential to do it properly. Always thaw your chicken in the refrigerator overnight, rather than on the kitchen counter at room temperature. This method prevents bacteria from growing on the surface of the chicken and ensures even cooking.
Cooking your chicken thoroughly
Cooking your chicken to the correct temperature is a non-negotiable step in ensuring its safety. The recommended minimum internal temperature for chicken is 165°F (74°C). Use a meat thermometer to check the temperature of the thickest part of the chicken, which is usually the breast or thigh.
Meat thermometer placement
Knowing where to place your meat thermometer is important for an accurate reading of internal temperature. Place the thermometer in the thickest part of the chicken without touching any bones. This ensures that you get an accurate reading and that all harmful bacteria are destroyed.
Avoid cross-contamination
To prevent cross-contamination when handling raw chicken, always wash your hands and utensils properly after handling them. Avoid using the same cutting board or utensils for raw and cooked chicken, as this can spread harmful bacteria.
Rest your chicken
After cooking your chicken, allow it to rest for at least three minutes before cutting into it. This resting period allows the juices to redistribute throughout the meat, resulting in a juicier and more flavorful chicken.
aSTSIk1VzQw” >
Conclusion
In the world of cooking, there’s nothing quite like a perfectly cooked chicken. But achieving that level of perfection requires more than just throwing it on the grill or in the oven and hoping for the best. It takes attention to detail, proper technique, and a little bit of know-how.
One essential tool for cooking chicken to perfection is a meat thermometer. Checking the internal temperature of your chicken is crucial for ensuring that it’s safe to eat and cooked just right. But where do you probe – in the thigh or breast? The answer is simple: both. However, it’s important to probe in the thickest part of each without touching any bones.
Different parts of the chicken require different cooking times, so it’s crucial to know how long each part takes to cook thoroughly. Proper preparation techniques such as trimming excess fat and skin, pounding thicker parts of the meat, and marinating or seasoning can also help ensure even cooking.
Grilling enthusiasts should take note that using indirect heat can prevent burning and uneven cooking. And when handling raw chicken, cross-contamination must be avoided at all costs.
But perhaps one of the most critical steps in achieving perfectly cooked chicken is allowing it to rest before cutting into it. This allows juices to redistribute throughout the meat, resulting in a tender and juicy bite every time.
By following these guidelines, you can become an expert at cooking delicious and safe chicken dishes every time.

