If you’re a meat lover, you know that nothing beats the mouth-watering taste of perfectly smoked meat. But if you’re just starting out with a brand new smoker, you might be wondering whether it needs to be seasoned before use. So what exactly does “seasoning” a smoker mean and why is it necessary? Well, let’s find out.
First things first – seasoning a smoker involves burning off any residual chemicals or oils that may have accumulated during the manufacturing process. By heating up the smoker and running it empty, you can ensure that any potentially harmful substances are burned away before you start cooking with it. Not only is this a safety precaution, but it also has some significant benefits.
For starters, seasoning can help condition the metal and create a natural non-stick surface for your meats. This means less sticking and easier clean-up for you. Additionally, it can help create an even temperature throughout the smoker which is crucial for achieving perfect results with your meat.
- Now, onto the big question – does a new smoker really need to be seasoned before use? The answer is YES. Especially if you want to ensure the best possible smoking experience. In fact, skipping this step could result in uneven cooking or even damage to your new investment.
- But don’t worry – seasoning your smoker is easy. In the rest of this post, we’ll dive deeper into how to season your smoker and what you can expect from the process. So get ready to take your smoking game to the next level.
Contents
What is Seasoning?
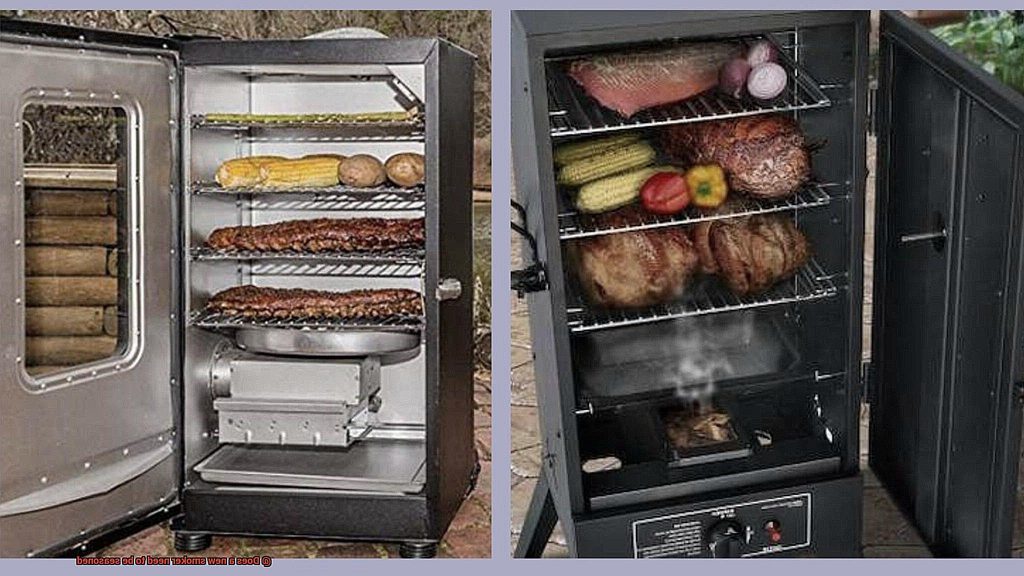
If you’re a novice at smoking meat, you may be curious about what seasoning is and why it’s important. In simple terms, seasoning is the process of preparing your new smoker before its first use. By coating the interior surfaces with oil or fat and heating it to a high temperature for an extended period, you can ensure that your smoker performs optimally and produces mouthwatering smoked meats.
The seasoning process serves multiple purposes that can impact the flavor, safety, and overall quality of your food. Firstly, it removes any manufacturing residues or chemicals that may be present on the smoker’s interior surfaces. These residues can alter the taste of your food or even pose a risk to your health.
Secondly, seasoning helps to seal any gaps or leaks in the smoker, ensuring that smoke and heat are evenly distributed throughout the cooking chamber. This can help to prevent hot spots and ensure that your food cooks evenly. In addition, by creating a non-stick surface that prevents food from sticking to the smoker, cleanup becomes much easier, and you avoid unwanted flavors being imparted onto your food.
To season your new smoker correctly, there are a few simple steps you need to follow. First, make sure that all vents and doors are closed tightly and remove any accessories. Next, choose an oil or fat with a high smoke point such as vegetable oil or lard. Apply a thin layer of oil or fat to all sides of the interior surfaces.
Next, light a small fire using charcoal or wood chips and maintain a temperature of 250-275 degrees Fahrenheit for several hours. During this time, you may notice some smoke or odors coming from your smoker – this is normal and should dissipate after a few hours of use.
Once the seasoning process is complete, allow your smoker to cool down completely before wiping down the interior surfaces with a damp cloth to remove any remaining residue. It’s good practice to perform this process before using your smoker for the first time, even if it comes pre-seasoned.
Pre-Seasoned Smokers
Consider a pre-seasoned option. These smokers come with a layer of seasoning that has been applied during the manufacturing process. This layer helps to create a non-stick surface and protects the smoker from rust and corrosion.
However, it’s important to note that the seasoning applied during manufacturing is not a replacement for proper seasoning before use. The pre-seasoning is designed to serve as a base layer that can be built upon with additional seasoning over time. So, take the time to properly season your smoker with oil or fat and heat it to a high temperature before your first cook.
It’s also essential to do research on the specific brand and model of pre-seasoned smoker you’re interested in. Not all pre-seasoned smokers are created equal. The thickness of the seasoning can vary from brand to brand and even model to model. A thicker layer of seasoning may provide better performance and longer-lasting protection, while a thinner layer may wear off more quickly.
To ensure you get the best bang for your buck, look for reviews from other BBQ enthusiasts who have used the smoker. They can tell you if they’ve had any issues with the seasoning wearing off too quickly or affecting the flavor of their meats.
While pre-seasoned smokers can be a good starting point for beginners, it’s still recommended to season the smoker before use for optimal performance and longevity. Your goal is mouth-watering, delicious smoked meats, so don’t skimp on this crucial step.
Benefits of Seasoning a New Smoker
Or maybe you’re a novice just getting started with smoking meat. Either way, one critical step that you don’t want to overlook is seasoning your new smoker. Not only does this simple process improve the flavor of your meat, but it also has several other benefits that will help protect and extend the life of your smoker.
Let’s explore in more detail why seasoning your smoker is so essential:
Enhanced Flavor
Seasoning your new smoker helps to burn off any impurities or residues that may still be present from the manufacturing process. These unwanted substances can negatively affect the taste and aroma of your meat. By seasoning your smoker, you’ll ensure that your meats come out tasting delicious and free of any unpleasant odors.
Protection and Longevity
Another benefit of seasoning is that it creates a protective layer of oil on the inside of the smoker. This layer helps prevent rust and corrosion over time, which can cause damage and reduce the lifespan of your smoker. By regularly seasoning your smoker, you’ll be able to keep it in tip-top condition for years to come.
Temperature Regulation
Seasoning a new smoker involves heating it up to high temperatures for an extended period of time. This process helps create an even layer of heat throughout the smoker, making it easier to regulate temperature during cooking. A well-seasoned smoker will work more efficiently and produce better results.
Reduced Smoke Production
Finally, seasoning your smoker can help reduce smoke production during cooking. As you use your smoker over time, it will naturally become seasoned, leading to less smoke being produced. However, by seasoning it before use, you can speed up this process and enjoy reduced smoke output during those first few cooks.
How to Season a New Smoker
If you’re a fan of delicious, smoky barbecue, then owning a new smoker is a must-have. But before you start cooking up a storm, it’s essential to season your smoker properly. In this blog post, we’ll walk you through the steps of seasoning a new smoker so that you can enjoy mouth-watering BBQ without any unwanted flavors or chemicals.
Step 1: Thoroughly Clean Your Smoker
The first step in seasoning your new smoker is to give it a thorough cleaning. A new smoker may have dust or debris from the manufacturing process. So, it’s best to clean it using warm soapy water and a sponge or cloth. Rinse your smoker with clean water and dry it completely before moving on to the next step.
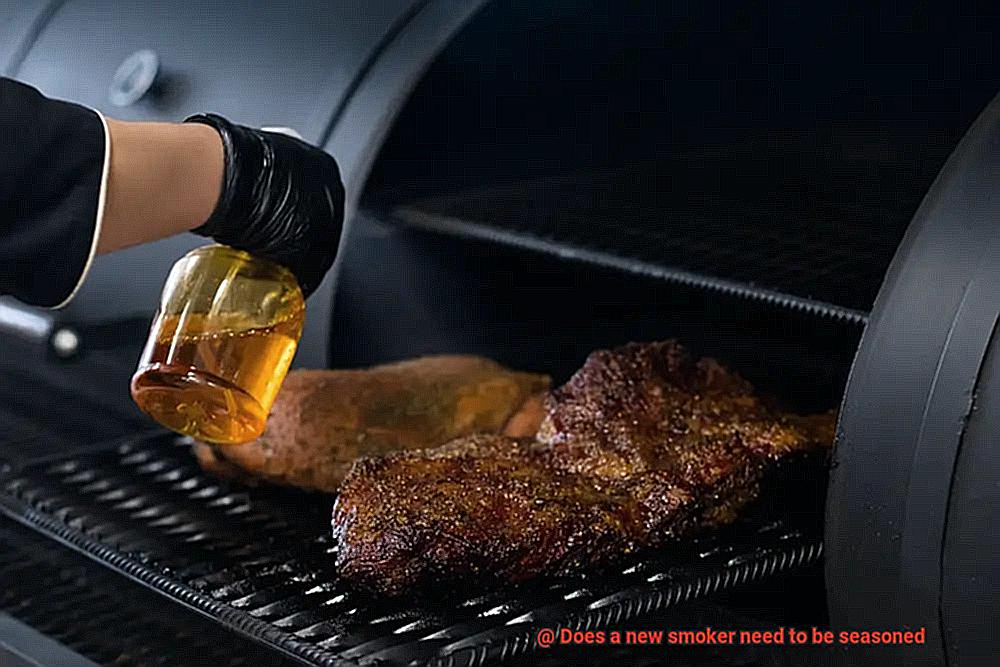
Step 2: Coat with High-Temperature Oil
Next, it’s time to coat the interior surfaces of your smoker with cooking oil. To do this, use a high-temperature oil such as vegetable oil or canola oil. Be sure to apply it evenly and generously over every inch of the interior surfaces, including the grates, walls, and ceiling.
Step 3: Heat It Up
Once you’ve coated your smoker with oil, it’s time to heat it up. Turn on your smoker and set it to a temperature between 225-275°F. Allow it to heat up for at least two hours until it reaches its maximum temperature. During this process, the oil will start to smoke and break down into a thin layer that adheres to the interior surfaces of the smoker.
Step 4: Cool Down
After two hours, turn off your smoker and let it cool down completely. Once cooled down, use a paper towel or cloth to wipe off any excess oil inside the smoker. You may notice that some residue has formed on the surfaces of your smoker. This is normal and should not be removed.
Step 5: Enjoy Delicious BBQ
Congratulations. Your new smoker is now seasoned and ready for use. The process of seasoning a new smoker will help to remove any chemicals or residues from the manufacturing process and create a non-stick surface that will prevent food from sticking. By following these simple steps, you can ensure that your smoker functions correctly and produces delicious food every time you cook with it. A properly seasoned smoker will also prevent rust from forming on its interior surfaces and extend its lifespan.
Temperature Considerations
Today, we’re delving into the critical role that temperature control plays in smoking meat to perfection. If you’re new to smoking, you might think that your brand-new smoker is ready to use right out of the box, but hold on. Before firing it up, it’s essential to season your smoker first.
Seasoning your smoker is a process of heating it to a high temperature for an extended period, which burns off any residual chemicals or manufacturing oils that may be present on the surfaces. Don’t overlook this crucial step. Skipping it could result in subpar results and unpleasant flavors.
During the seasoning process, it’s vital to monitor the temperature closely to ensure that your smoker is reaching and maintaining the desired temperature. Different types of smokers have different optimal temperatures for seasoning. Some manufacturers recommend heating your smoker up to 350 degrees Fahrenheit for an hour or two, while others suggest slightly lower temperatures for longer periods. Follow the manufacturer’s instructions and keep a close eye on the temperature gauge to achieve the desired range.
Besides following the manufacturer’s guidelines, monitoring your smoker’s temperature during seasoning will also help you become familiar with your smoker’s individual quirks and characteristics. This knowledge will be invaluable when you start experimenting with different types of wood chips and adjusting the temperature as needed to achieve the perfect smoke for your meat.
Proper seasoning will also prevent unwanted flavors or odors from being imparted onto your food during the smoking process. That means no chemical or oil tastes ruining your perfectly cooked brisket or ribs.
Smoke and Odor During the Process
Before you dive in, it’s important to understand why seasoning your smoker is essential. If you don’t properly season your smoker, you’ll experience intense smoke and an unpleasant odor during the process, which can negatively impact the taste of your food. So let’s talk about how to get the best results from your new smoker.
First things first, it’s important to note that any manufacturing residues that may be present in the smoker can result in a lot of smoke and a strong odor during the first use. By seasoning your smoker before use, you’ll eliminate these residues and prevent them from affecting the taste of your food.
During the seasoning process, you’ll burn off any chemicals or coatings that may have been used in the manufacturing process. This is a crucial step because it allows oils to penetrate the metal and form a protective layer that prevents rust and corrosion. You’ll want to heat up your smoker to about 250-300 degrees Fahrenheit for at least 2-3 hours. It’s important to do this outside or in a well-ventilated area to avoid inhaling any fumes.
It’s normal for this process to create a lot of smoke and a strong odor, but don’t worry – it’s all part of the process. By properly seasoning your smoker, you become familiar with its individual quirks and characteristics, which will help you get the best results from your cooking.
Skipping this step and going straight to cooking may result in an unpleasant taste in your food due to the chemicals burning off during the first use. Additionally, if you don’t properly clean your smoker after each use, it can lead to a buildup of creosote and other residues that can also affect the taste of your food.
Cooling Down After the Process
You’ve just finished smoking up a storm in your brand new smoker. Your taste buds are still tingling with the flavor of the succulent meat you’ve just cooked, but before you take a well-deserved break, it’s essential to properly cool down and clean your smoker. Not only will this ensure safety, but it will also extend the life of your cooking device.
Let’s dive into the steps for cooling down and cleaning your smoker after each use.
Step 1: Reduce the Temperature and Remove Fuel Sources
First things first, safety is key. Turn off your smoker and remove any remaining fuel sources such as wood chips or charcoal. Let the smoker sit for a few minutes until the temperature drops to a safe level. Avoid any hasty mistakes by giving your smoker enough time to cool down.
Step 2: Clean the Interior
Once your smoker is cool to the touch, it’s time to clean it. Give it some love. Start by removing any leftover ashes, grease, or food debris from the cooking grates and interior surfaces. Use a grill brush or scraper to remove any stubborn debris, and then wipe down the interior with a damp cloth. Avoid using harsh chemicals or abrasives that could damage the smoker’s finish and keep it looking spick and span.
Step 3: Store Your Smoker
After cleaning your smoker, store it in a dry and cool place until your next use. It is essential to keep your smoker covered to protect it from the elements and prevent rust or other damage. Protect your precious investment.
Final Steps for Cleanup
If you’ve just completed a successful smoking session, congratulations. However, before you get too caught up in the afterglow of your delicious meat, it’s essential to give your smoker some love and attention for optimal performance and longevity. Here are the final steps for cleanup after smoking:
Step 1: Let the Smoker Cool Down
Before you begin cleaning, make sure your smoker is completely cool. Attempting to clean a hot smoker can be dangerous and cause harm to both you and your equipment.
Step 2: Remove Ashes and Debris
Once your smoker has cooled, remove any ashes and debris that have accumulated inside. Use a scraper or brush to get rid of all the ash and debris from the firebox, grates, and other areas.
Step 3: Clean the Grates
The grates in your smoker can become coated with grease and burnt-on food particles. Use a grill brush or scraper to clean them thoroughly. If necessary, use warm soapy water to help with the cleaning process.
Step 4: Wipe the Interior
Using a damp cloth, wipe down the interior of the smoker. If there are any stubborn stains or grease marks, use warm soapy water to clean them off.
Step 5: Clean the Exterior
The exterior of your smoker can also become dirty due to smoke and grease buildup. Use warm soapy water to clean and wipe down the exterior of your smoker.
Step 6: Check for Rust
Rust is an enemy of metal equipment like smokers. Check your smoker for any signs of rust or corrosion. If you notice any rust spots, use sandpaper to remove them and apply a coat of high-temperature paint to prevent future rusting.
Step 7: Store Your Smoker
Once you’ve completed cleaning your smoker, make sure it’s completely dry before storing it away. Store it in a dry place where it’s protected from the elements.
m_9OZ1zXADU” >
Conclusion
In conclusion, seasoning a new smoker is an essential step for achieving mouth-watering smoked meat. By burning off any residual chemicals or oils that may have accumulated during the manufacturing process, you can guarantee that your smoker performs at its best and produces delicious results. Additionally, seasoning conditions the metal and creates a natural non-stick surface that makes cleaning up a breeze.
It’s important to note that pre-seasoned smokers are not a replacement for proper seasoning. While they come with a layer of seasoning applied during the manufacturing process, this layer serves as a base that can be built upon over time with additional seasoning.
Properly seasoning your smoker enhances meat flavor, protects and extends the life of your smoker, regulates temperature more efficiently, and reduces smoke production. Monitoring temperature closely during the seasoning process is crucial to ensure it reaches and maintains the desired range.
After smoking, cooling down and properly cleaning your smoker is paramount to ensuring safety and extending its lifespan.