
Are you a meat lover who enjoys cooking at home? Then, you must have a meat grinder in your kitchen arsenal. With this tool, you can grind fresh meat for burgers, sausages, and meatballs with ease. Plus, you can ensure that the ingredients going into your meals are fresh and of high quality. However, before you start grinding your meat, it’s important to know how to assemble your meat grinder properly.
Don’t worry if you’re feeling intimidated by the thought of assembling a meat grinder. With our step-by-step guide, we’ll show you how easy it is to put your machine together. From attaching the grinder head to the body of the grinder to adding the auger, blade, and plate – we’ve got it all covered.
Before diving in, make sure that you have all the necessary parts by taking an inventory of everything included in your package. Once confirmed, let’s get started. Follow these instructions carefully to ensure that your meat grinder is assembled correctly and functions safely.
So if you’re ready to take on this task like a pro and start grinding your own fresh meats at home, keep reading. We’ve got all the information you need right here to assemble your meat grinder with ease.
Contents
What You Need for Assembling a Meat Grinder
Assembling a meat grinder may seem like a daunting task, but with the right tools and steps, it can be a breeze. To get started, you’ll need to have a few essential items on hand. First and foremost, you’ll need the meat grinder itself, along with all the necessary parts. This includes the hopper, auger, blade, grinding plates, and pusher. It’s also helpful to have a screwdriver or wrench to tighten any bolts or screws during assembly.
Before getting started, it’s important to have a clean and dry workspace. Ensure that your work area is free from any clutter or debris that could interfere with the assembly process. You may also want to use a soft towel or cloth to protect your work surface from scratches or damage.
Thoroughly washing all parts before assembly is crucial to prevent contamination from bacteria or other harmful microorganisms. So before you start assembling your meat grinder, give all the parts a good wash in warm soapy water and dry them completely with a clean towel.
Now that you have all the necessary items and a clean workspace, it’s time to start assembling your meat grinder. Begin by attaching the hopper to the top of the grinder body and secure it in place with the screws provided.
Next, insert the auger into the body of the grinder and secure it with the locking ring. Make sure that it is firmly in place and properly aligned.
Attach the blade onto the end of the auger, making sure that it is securely fastened. Then, select the grinding plate that corresponds with your desired grind size and attach it to the end of the grinder body.
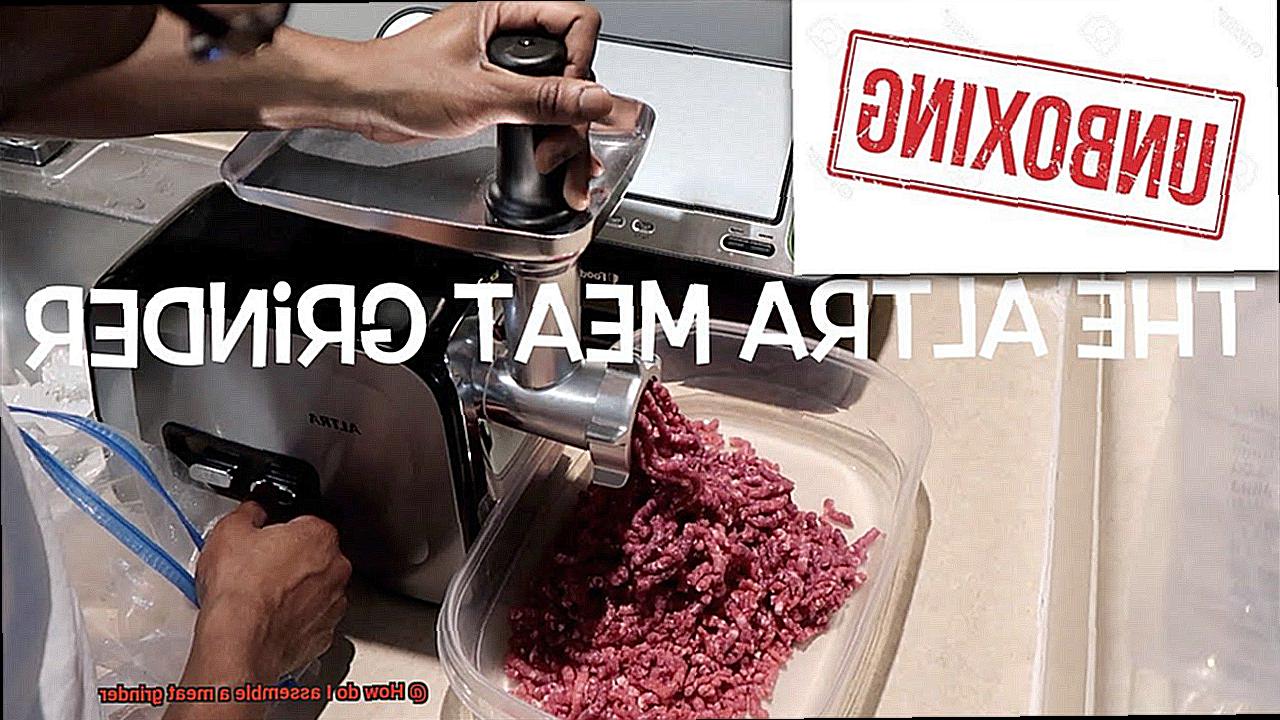
Finally, insert the pusher into the hopper and turn on your meat grinder to test it out. If everything is working correctly, you’re ready to start grinding your own meat at home.
In addition to having all necessary parts and tools on hand and ensuring a clean workspace, there are a few other things to keep in mind when assembling a meat grinder. For example, make sure to follow the manufacturer’s instructions carefully and take your time during assembly to avoid mistakes.
Step-by-Step Guide to Assembling a Meat Grinder
Assembling a meat grinder may seem intimidating, but with our step-by-step guide, you’ll be grinding meat like a pro in no time. Here’s what you need to know:
Step 1: Check Your Parts
Before starting, unpack all the parts and ensure that everything is present. Double-check that you have the blades, plates, hopper, and screw.
Step 2: Attach the Screw and Blade
The first step in assembling your meat grinder is attaching the screw to the grinder body. Insert it into the hole at the top of the grinder body and turn it clockwise until it’s tightly secured. Then attach the blade to the end of the screw, ensuring it fits snugly over the end.
Step 3: Secure the Plate
Next, attach the plate to the body of the grinder. Place it over the blade and secure it in place with a locking ring. Tighten the locking ring until it’s snug against the plate.
Step 4: Install the Hopper
Now, attach the hopper to the top of the grinder body. Place it over the opening at the top of the grinder body and twist it clockwise until it locks into place.
Step 5: Clean Your Meat Grinder
Before using your newly assembled meat grinder, clean it thoroughly by running a few pieces of bread through it to remove any dust or debris that may have accumulated during storage.
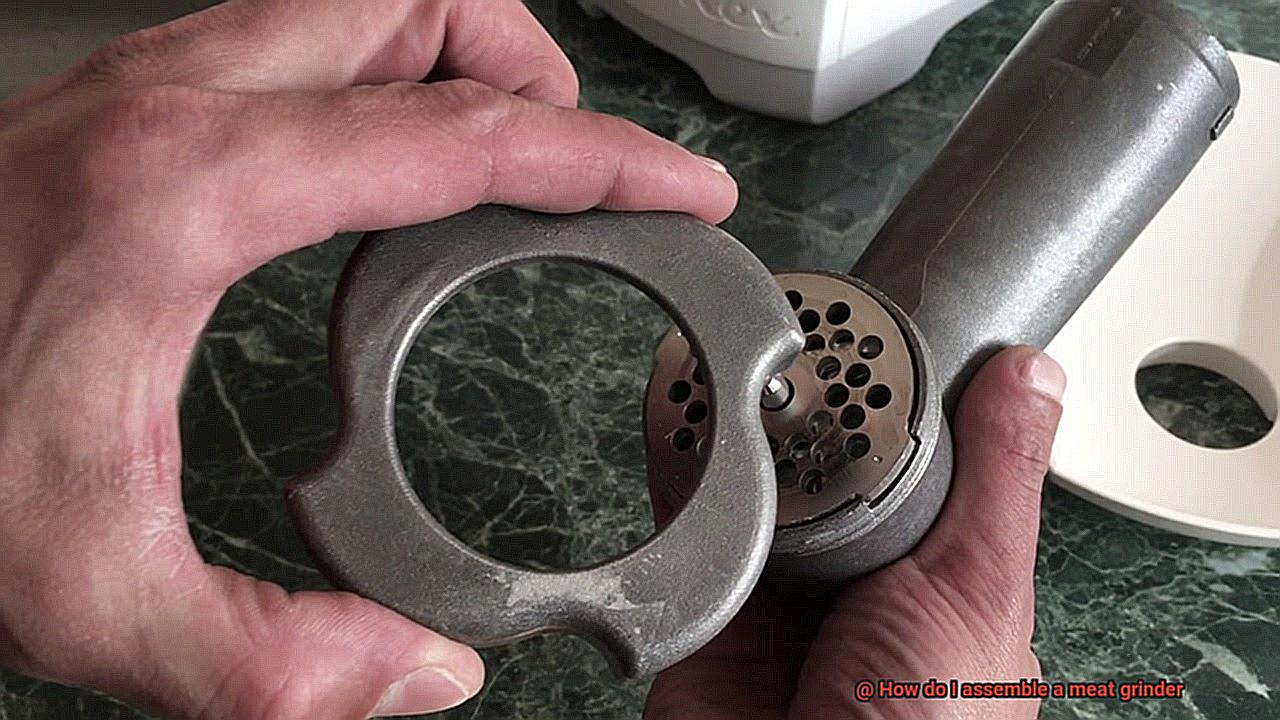
Attaching the Grinding Plates

Then buckle up and get ready to learn how to attach the grinding plates to your meat grinder like a seasoned pro. It’s an easy and straightforward process, but it’s essential to get it right if you want perfectly ground meat every time. Here’s a step-by-step guide on how to attach the grinding plates:
Firstly, ensure that you have the correct grinding plates for your meat grinder. Not all grinders use the same size or type of plate, so it’s crucial to double-check before you start. Once you’ve got the right plates, it’s time to get started.
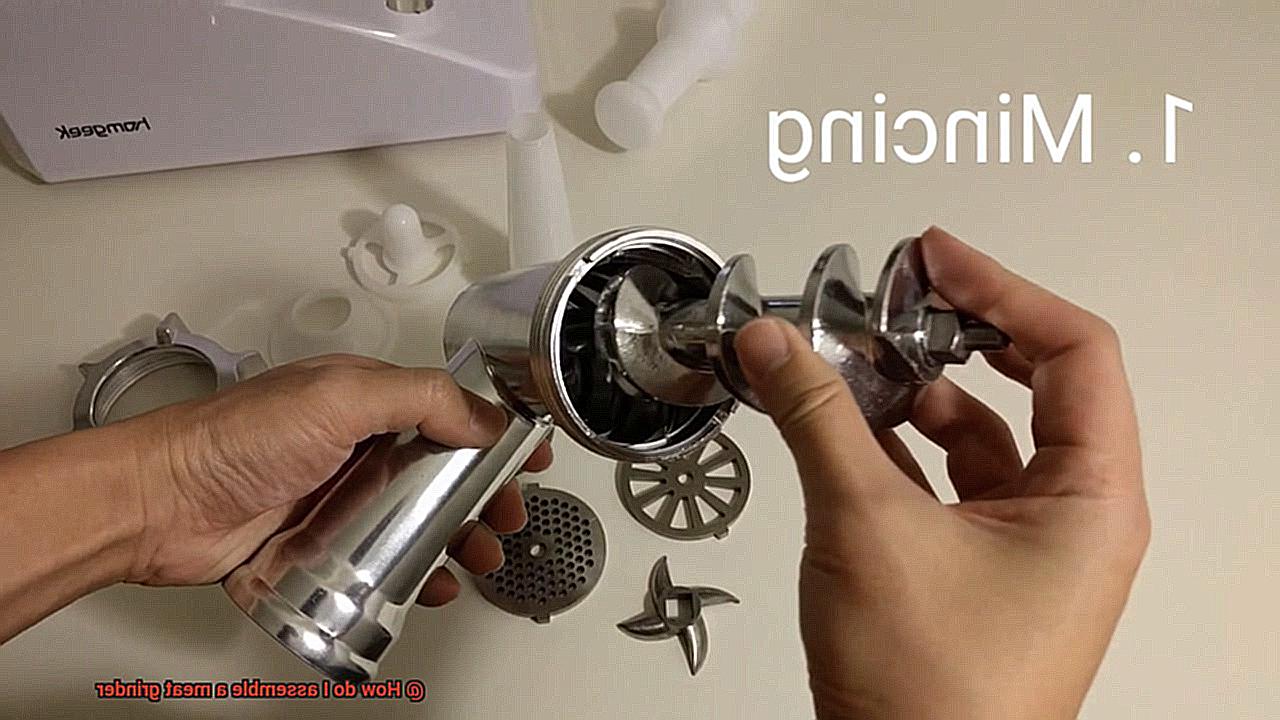
Step one is to take out the auger and place the grinding plate on it. The plate should fit snugly onto the auger, leaving no gaps or spaces that could cause problems later on.
Next up, insert the auger with the attached plate into the grinder head. Push it in all the way and make sure it’s secure. This is critical because if the plate isn’t attached correctly, you’ll end up with unevenly ground meat – and nobody wants that.
With the first plate securely in place, it’s time to add the second one. Place it on top of the first plate, ensuring that the holes line up perfectly. This will guarantee that your meat is ground evenly and consistently.
Finally, attach the retaining ring onto the grinder head to secure both plates in place. Make sure it’s tightened correctly so that the plates don’t move or wobble during use. And voila. You’re all set to start grinding your own meat at home.
But wait, there’s more. To keep your equipment in tip-top shape and prevent any bacteria or debris from contaminating your meat, always clean your grinding plates before and after use. Simply wash them with warm water and soap, then dry them thoroughly before storing them away.
Inserting the Blade
Before you start, it’s important to know how to properly insert the blade into your meat grinder. A crucial step in assembling the grinder, inserting the blade ensures that your meat is ground to perfection while also ensuring your safety.
First and foremost, make sure your grinder is unplugged and disassembled. To access the grinder head and auger, remove the feeder tray and screw ring. The blade will be located in this area.
Identifying the blade and its position is key. Typically, blades have two sides – one flat and one with a raised edge. For optimal performance, ensure that the raised edge side faces outward while the flat side faces inward towards the auger.
Next, carefully slide the blade onto the end of the auger with the raised edge facing outward. Ensure that it’s pushed as far as possible onto the auger to prevent any potential movement during grinding. Once in place, secure it by screwing on the screw ring.
It’s worth noting that some meat grinders come with multiple blades designed for different types of meat. Make sure you use the appropriate blade for your specific type of meat to achieve your desired texture and consistency.
Attaching the Food Pusher
Before you start grinding away, it’s essential to properly attach the food pusher. As an expert on this topic, I’m here to guide you through the process and make sure that you’re grinding your way to deliciousness safely.
Let’s start with safety first. Before attaching the food pusher, ensure that your meat grinder is unplugged and disassembled. This simple step will prevent any accidents from occurring.
Now that we’ve established safety measures, let’s get into attaching the food pusher. The food pusher is a crucial component of your meat grinder as it helps push the meat into the feeding tube. Therefore, it’s crucial to ensure that it fits snugly into place and doesn’t wobble around as you grind away.
To attach the food pusher, first locate the feeding tube on your meat grinder. This is where you will insert the meat to be ground. Next, take the food pusher and insert it firmly into the feeding tube, ensuring that it goes all the way down to the blades of the meat grinder.
It’s important to note that some meat grinders come with different sized feeding tubes. If your machine has this feature, make sure to select the correct size for your food pusher. Using a pusher that is too small won’t work effectively, and using one that is too large may cause damage to your machine.
Once you’ve attached the food pusher, give it a gentle tug to ensure that it’s securely in place. Congratulations. You’re now ready to start grinding up some delicious meats.
Before you begin grinding though, remember to clean all components thoroughly. Proper cleaning and maintenance of your meat grinder will ensure its longevity and keep it in top-notch condition for years to come.
Adding Additional Accessories or Parts
Now, let’s take your culinary game to the next level by adding some additional accessories or parts. Whether you’re a seasoned professional or a beginner, adding these parts can enhance your machine’s functionality and provide you with even more delicious options. However, before you dive in, there are a few things you need to know.
Firstly, not all meat grinders are compatible with additional accessories. To avoid wasting money and frustration, it’s essential to check your product manual or consult with the manufacturer before purchasing any additional parts. This will ensure that you choose the right accessories that work seamlessly with your machine.
Once you have the right accessories in hand, it’s time to disassemble your grinder. Removing the hopper, auger, and grinding plate is crucial to ensure that the new accessory fits perfectly into the opening. This step also prevents any safety hazards and damage to the machine. So take your time and follow the instructions carefully.
When adding new accessories, make sure to insert them securely into the opening and follow any instructions provided by the manufacturer. From sausage stuffing tubes to grinding plates and blades, each accessory has its unique functions that require specific attention.
Choosing the right size and shape of grinding plates and blades is essential for achieving your desired outcome. Smaller holes produce finer grinds, while larger ones create coarser ones. Straight blades are better for tougher cuts of meat, while curved blades are suited for softer meats. So select your accessories carefully based on what you want to achieve.
Finally, maintaining hygiene is essential when using any kitchen appliance. Therefore, cleaning all accessories before and after use is crucial in maintaining your machine’s hygiene and ensuring that it continues to function correctly. Hand-washing with warm, soapy water is always an option, but you can also use a dishwasher if the parts are dishwasher-safe.
Cleaning and Sanitizing Your Meat Grinder
Assembling and using a meat grinder is only half the battle – to ensure the safety and quality of your meat, you also need to know how to clean and sanitize your grinder correctly. Don’t worry, it’s not as complicated as it may seem. Here’s a step-by-step guide to help you keep your equipment in top shape.
Firstly, always remember to unplug your grinder and disassemble it entirely before cleaning. This will allow you to clean every part of the grinder thoroughly. Most parts can be washed with warm, soapy water using a sponge or cloth. Avoid using any abrasive materials that could damage the grinder’s surface.
Suppose there are stubborn stains or residue left behind after washing with soap and water. In that case, you can opt for a specialized cleaner or solution recommended by the manufacturer. Alternatively, you can create a natural solution of water and vinegar or baking soda to effectively clean your grinder.
Sanitizing your grinder is crucial, especially if you plan on grinding raw meat that may harbor harmful bacteria if not handled correctly. You can use a commercial sanitizer or create your solution of water and bleach (1 tablespoon per gallon of water). Allow the sanitizer solution to sit on the parts for at least one minute before rinsing thoroughly with clean water.
After cleaning and sanitizing all parts of your grinder, make sure to dry everything entirely before reassembling it. Moisture can cause rust or other damage, so it’s essential to store your grinder in a dry, cool place until you’re ready to use it again.
To summarize:
- Unplug and disassemble your grinder before cleaning.
- Wash most parts with warm, soapy water using a sponge or cloth.
- Use specialized cleaners or natural solutions for stubborn stains.
- Sanitize your grinder with a commercial sanitizer or a solution of water and bleach.
- Dry all parts completely before reassembling.
- Store your grinder in a dry, cool place until you’re ready to use it again.
-DtFFVVJBtc” >
Conclusion
In conclusion, don’t let the thought of assembling a meat grinder intimidate you. With the right tools and steps, it can be a breeze. But before diving in, make sure you have all the necessary parts and tools on hand and that your workspace is clean and dry. Contamination from bacteria or other harmful microorganisms can ruin your ground meats.
To assemble your meat grinder properly, follow these steps carefully: attach the hopper to the top of the grinder body, insert the auger into the body of the grinder and secure it with the locking ring, attach the blade onto the end of the auger, select your desired grind size by choosing an appropriate grinding plate and attaching it to the end of the grinder body. Finally, insert the pusher into the hopper and turn on your meat grinder to test it out.
Once you’ve assembled your meat grinder correctly, consider adding additional accessories or parts to enhance its functionality. Just make sure they’re compatible with your machine before purchasing them.
Before you start grinding away at those fresh cuts of meat, remember that cleaning and sanitizing your meat grinder is crucial for safety and quality. Always unplug your machine before cleaning it thoroughly with warm soapy water or specialized cleaners. Sanitize it using a commercial sanitizer or solution of water and bleach before drying all parts completely.