Do you cherish your Traeger grill and the mouth-watering taste it brings to your grilled meats? If so, then you understand the importance of keeping it clean to maintain its top-notch performance. But let’s be real, cleaning the inside of your Traeger grill can be a daunting task.
Don’t fret. In this blog post, we’ll walk you through a step-by-step process on how to clean the inside of your Traeger grill. From removing the grates to scrubbing the ash cleanout system, we’ve got all the bases covered.
We understand that cleaning your grill may not be at the top of your to-do list, but did you know that it can enhance the flavor of your meals? A dirty grill can mix yesterday’s flavors into today’s meal and make it difficult to achieve that smoky taste you love. However, with a spotless grill, not only will your meat be healthier but also more flavorful.
So, let’s get started on our journey into Traeger grill cleaning. We’ll provide you with all the tips and tricks you need to make cleaning a breeze.
Contents
Why Cleaning Your Traeger Grill is Essential
It’s not just about appearances – maintaining a clean grill is vital for your health, the longevity of your grill, and even the taste of your food.
Let’s start with taste. A dirty grill can affect the flavor of your food and cause flare-ups. Nobody wants to bite into a burger that tastes like last week’s barbecue. By cleaning your grill after every use, you can ensure that the food you cook on it always tastes its best.
But there are even more compelling reasons to keep your Traeger grill clean. Neglecting to do so can result in rust and corrosion, which can ultimately damage the grill and require costly repairs or replacement. Regular cleaning will extend the lifespan of your grill and save you money in the long run.
Furthermore, a dirty grill is a breeding ground for harmful bacteria. When meat or other foods are cooked on a dirty grill, bacteria can remain on the surface and multiply rapidly. This poses a serious health risk to anyone who eats food that has been cooked on a dirty grill. Cleaning your Traeger grill regularly ensures that it is safe to use, and your food remains free from harmful bacteria.
So, how do you clean your Traeger grill? It’s easy. First, let it cool down completely. Then remove the grates and drip tray to access the inside. Use a grill brush to remove any excess debris or ash that may have accumulated on the walls, floor, and ceiling of your grill. Be sure to brush in all directions to ensure you remove everything. You can also use a vacuum or shop vac to remove any loose debris.
Next, use warm soapy water and a non-abrasive sponge or rag to wash the interior surfaces of your grill thoroughly. Avoid using harsh chemicals or abrasive materials as they can damage the finish of your grill. Rinse with clean water and dry with a clean cloth.
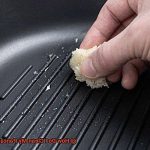
For stubborn stains or grease spots, make a paste using baking soda and water or white vinegar and water. Let the mixture sit for a few minutes before scrubbing with a non-abrasive sponge or rag.
Finally, replace the grates and drip tray back into the grill and wipe down the exterior with a damp cloth to remove any excess dirt or debris. Your Traeger grill is now ready for its next use.

Step 1: Letting the Grill Cool Down Completely
Cleaning your grill is a vital part of this process, and it all starts with letting it cool down completely before you begin.
Why is this step so crucial, you may ask? Well, for starters, it’s a safety issue. Your grill can get incredibly hot during use, and attempting to clean it while it’s still hot can lead to serious burns. That’s why I recommend letting your grill cool down for at least an hour before you start cleaning.
But safety isn’t the only reason to let your grill cool down before cleaning. Here are a few more sub-topics to consider:
- Accessibility: Once your grill has cooled down, you’ll be able to remove the grates and any other removable parts, giving you better access to the interior surfaces. This will allow you to clean more thoroughly and ensure that no debris is left behind.
- Debris Removal: Using a grill brush or scraper to remove any excess debris from the interior surfaces of the grill is essential. Leftover food debris can attract insects and lead to unpleasant odors or flavors in your next meal. Nobody wants that.
- Cleaning Materials: When it comes to actually cleaning the interior surfaces of your grill, it’s important to avoid using harsh chemicals or abrasive materials that could damage the surfaces. Instead, opt for a mild cleaner or warm soapy water.
Step 2: Removing Grates and Drip Tray
As much as we love to cook on our Traeger grills, we know that cleaning them is equally important. To ensure a spotless grill interior, let’s delve into Step 2: Removing Grates and Drip Tray.
First and foremost, prioritize safety by turning off the grill and allowing it to cool completely. Once cooled, remove the grates and set them aside. The drip tray is usually located at the bottom of the grill, and depending on your model, it may slide out or require lifting to remove.
With the grates and drip tray removed, use a spatula or scraper to eliminate any excess grease or debris. This will make cleaning them easier and more efficient. You can either wash them with warm soapy water or place them in the dishwasher if they’re dishwasher safe.
While the grates and drip tray are being cleaned, take a moment to inspect the interior of your grill for any remaining debris or buildup. Use a brush or cloth to wipe down all interior surfaces, paying extra attention to any areas with heavy buildup.
For optimal results, Traeger recommends using their branded cleaning products. However, if you opt for alternative cleaning solutions, ensure that they are safe for use on your specific Traeger grill model.
Once all surfaces have been thoroughly cleaned, reinsert the drip tray and grates back into place. Your Traeger grill is now ready for its next cookout adventure.
Step 3: Brushing Away Excess Debris and Ash
Before starting, make sure your Traeger grill has cooled down completely, and remove the grates. Now, it’s time to arm yourself with a good quality grill brush with sturdy bristles. Don’t skimp on this – investing in a durable brush will save you money in the long run and ensure a deep clean every time.
Using your trusty brush, carefully scrape away any loose debris and ash from the inside of the grill. Pay extra attention to the corners and edges where buildup is most common. Don’t forget to wear protective gear such as a dust mask and safety goggles if you’re dealing with a lot of ash.
If you’re dealing with excessive ash buildup, don’t despair. You can use a shop vac or handheld vacuum cleaner to suck up the ash. Just make sure to protect yourself from inhaling any dust particles.
After removing all debris, take a damp cloth or paper towel and wipe down the inside of the grill to remove any remaining residue. Remember to use a non-toxic cleaner that is safe for use on grills.
Finally, replace the grates back into the grill, and voila. Your Traeger grill is now clean and ready for your next cookout. But don’t forget – cleaning your grill after each use is essential to maintain its longevity.
Step 4: Washing the Interior Surfaces with Soapy Water
Look no further than Step 4: Washing the Interior Surfaces with Soapy Water.
The interior of your Traeger grill is where the magic happens. To ensure that your food tastes its best, it’s crucial to keep these surfaces clean and free of any grease or residue build-up. Soapy water is an effective solution for tackling this task.
Start by removing the grates and drip tray. Then, grab a non-abrasive sponge or cloth and create a soapy water solution. Mix dish soap with warm water in a bucket or large bowl, and consider adding vinegar for extra cleaning power. Dip your sponge or cloth into the solution and begin scrubbing away at the interior surfaces of the grill.
Pay special attention to any stubborn grease or residue build-up around the corners and edges of the grill. Persistence is key here – don’t be afraid to put in the effort for a spotless grill.
Once you’ve thoroughly scrubbed all interior surfaces, it’s time to rinse off the soapy water. Use a hose or bucket of clean water to ensure that all soap residue is removed. You don’t want any unwanted flavors seeping into your food during future grilling sessions.
After rinsing, use a clean towel or cloth to dry off the interior surfaces of the grill completely. This essential step will help prevent rust from forming on metal surfaces and extend the life of your grill.
Step 5: Removing Stubborn Stains or Grease Spots
Stubborn stains and grease spots are inevitable when it comes to grilling, but with the right tools and techniques, you can easily remove these tough stains and keep your grill looking new.
To start, you will need a few essential supplies: a grill brush, a scraper, a bucket of warm soapy water, and a sponge or cloth. Begin by scraping off any large food particles or debris using the scraper. Be cautious not to scratch the surface of your grill.
Next, dip your grill brush into the warm soapy water and scrub the inside of your Traeger grill thoroughly. Make sure to reach all the corners and crevices. Use the sponge or cloth to wipe away any excess soap or dirt.
If there are still stubborn stains or grease spots, don’t worry. You can try using a specialized cleaner designed for grills. Apply the cleaner to the affected areas and let it sit for a few minutes. Then, use the grill brush to scrub away those stubborn stains.
For particularly tough stains, you may need to use a degreaser. Follow the instructions on the degreaser carefully and wear gloves to protect your hands. Apply the degreaser to the affected area and let it sit for a few minutes before scrubbing with the grill brush.
Don’t forget to rinse your Traeger grill thoroughly with clean water once you’ve removed all those pesky stains and grease spots. Make sure there’s no soap or cleaner residue left behind.
In conclusion, cleaning the inside of your Traeger grill is essential for maintaining its performance and prolonging its lifespan. With these tips and techniques, removing stubborn stains and grease spots is a breeze. Remember, a clean grill is a happy grill. Here’s a quick checklist for you to keep track of the steps:
Step 6: Replacing Grates and Drip Tray
If you’re looking to keep your Traeger grill in top-notch condition, then step 6 is a must-do: replacing grates and drip trays. Don’t worry, it’s not as daunting as it sounds. Here are some tips to help make the process a breeze.
First things first, let’s talk about why replacing these parts is so crucial. Over time, even with regular cleaning, grates and drip trays can become worn out or damaged. This can lead to a variety of issues, such as flare-ups during cooking or uneven heat distribution. Plus, a build-up of food particles and grease can affect the flavor of your food. By replacing these parts, you can prevent these issues and ensure that your grill is performing at its best.
Now, let’s dive into the steps for replacing grates and drip trays:
- Start by removing the cooking grates from the grill and setting them aside.
- Next, remove the drip tray located underneath the grates. Be sure to dispose of any excess grease or debris in the tray.
- Using a grill brush, scrub any debris or build-up off the grates. For tougher stains, mix warm water with mild dish soap and scrub thoroughly. Rinse the grates with water and dry them with a clean cloth.
- To clean the drip tray, use warm soapy water and a scrub brush to remove any stuck-on debris. Rinse with water and dry with a clean cloth.
- If either part is damaged or worn-out, order replacement parts from Traeger or an authorized dealer.
- Once your replacement parts arrive, simply place them in your grill.
Step 7: Wiping Down the Exterior of the Grill
You’ve done the hard work of replacing your grill grates and drip tray, now it’s time to give the exterior of your Traeger grill some love. This often-overlooked step is crucial in maintaining the cleanliness and shine of your grill. Over time, dust, grease, and debris can accumulate on the exterior of your grill, creating a breeding ground for harmful bacteria and microorganisms.
Before you start wiping down your grill, make sure it’s turned off and has cooled down for at least 30 minutes. Then grab a damp cloth or sponge and get to work. Avoid using abrasive cleaners or steel wool as they can scratch the surface of your grill.
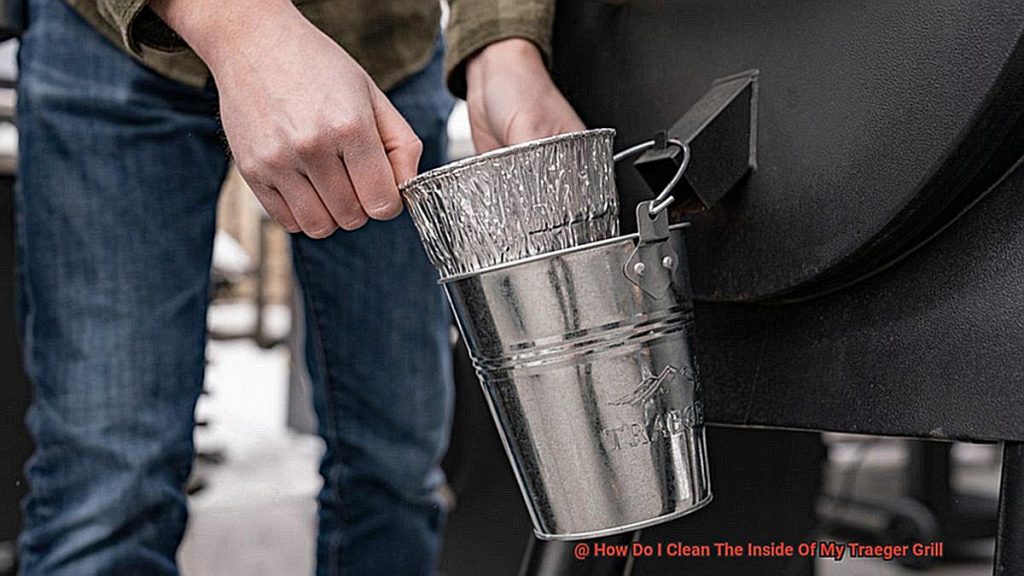
As you wipe down the exterior of your Traeger grill, pay special attention to areas that are prone to grease buildup. The drip tray and grease bucket are hotspots for grime, so be sure to give them a thorough cleaning. Don’t forget about the handles, knobs, and other surfaces that come into contact with your hands during use. They can also accumulate dirt and grime over time.
It’s important to note that different Traeger grill models may require unique cleaning solutions or techniques. Be sure to consult your owner’s manual for specific instructions on how to clean the exterior of your grill properly.
mu_1FUW9rLI” >
Conclusion
In conclusion, maintaining a clean interior for your Traeger grill is essential to ensure optimal performance and longevity. A neglected grill can lead to rust and corrosion, which can result in costly repairs or even replacement. Additionally, a dirty grill can harbor harmful bacteria that pose health risks to anyone consuming food cooked on it.
While cleaning the inside of your Traeger grill may seem like an overwhelming task, our step-by-step instructions make it easy. From removing grates to scrubbing stubborn stains and grease spots, we’ve got you covered.
Prioritizing safety is key when cleaning your grill. Be sure to let it cool down completely before starting the process. Use warm soapy water and non-abrasive materials to thoroughly wash the interior surfaces of your grill. For tougher stains or grease spots, try using baking soda or vinegar paste.
Don’t forget about replacing grates and drip trays regularly as well for optimal performance. And lastly, wiping down the exterior of your grill frequently will prevent harmful bacteria from accumulating.
By following these tips and techniques, you’ll be able to keep your Traeger grill in top-notch condition for years to come.