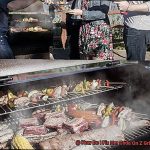
If you’re the proud owner of this flavor-infusing beast, you already know it’s capable of conjuring up succulent meats that’ll make your taste buds tango. But, keeping the heat just right can be a tricky dance.
That’s where I come in. As an experienced pitmaster, I’ve cracked the code on controlling the heat with this bad boy, and I’m here to spill my secrets.
So, grab your apron and let’s get smokin’.
Contents
Managing the Airflow
Grilling on a Weber Smokey Mountain is more than just cooking; it’s an art that requires precision and skill. One of the key elements of this art is managing the airflow to control the heat. In this comprehensive guide, we will explore the secrets to achieving perfect heat control on your Weber Smokey Mountain grill.
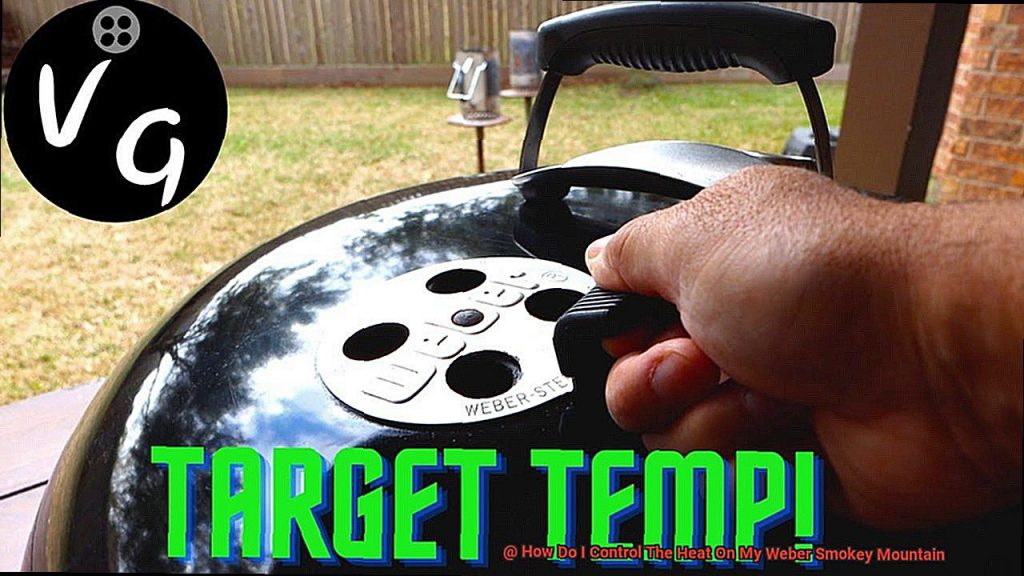
Harnessing the Power of Vents:
The adjustable vents on the bottom and top of your grill are the secret weapons in your arsenal for heat control. By opening the vents, you allow a rush of oxygen to fuel the fire, intensifying it and raising the temperature. Conversely, closing the vents restricts airflow, reducing the oxygen supply and lowering the temperature.
Bottom Vent for Temperature Mastery:
The bottom vent plays a pivotal role in controlling the overall temperature inside the grill. A wider opening invites a surge of airflow, increasing the heat, while a narrower opening limits airflow and lowers the temperature. Experiment with different settings to discover your desired temperature sweet spot.
Top Vent for Smoke Symphony:
While the bottom vent governs overall temperature, the top vent fine-tunes smoke production. By opening it wider, you unleash a billowing cloud of smoke, while partially closing it retains more smoke inside for a bolder flavor profile. Adjusting the top vent allows you to compose your signature smoky masterpiece.
Fuel Management Choreography:
The amount and arrangement of fuel greatly impact heat control. Adding more lit charcoal or wood chunks to the firebox fuels the flames, increasing heat, while reducing or spreading them out tames the fire and lowers it. Begin with a modest amount of fuel and gradually add more as needed to avoid surpassing your desired temperature.
Monitoring and Adjusting:
Keep a vigilant eye on your grill’s temperature gauge or employ a separate digital thermometer for precise readings. Make periodic adjustments to the vents based on your temperature readings, ensuring a consistent heat level throughout the cooking process.
Controlling the Fuel Source
Controlling the fuel source is a crucial skill for any aspiring grill master looking to elevate their grilling game. With the Weber Smokey Mountain smoker, mastering this art is within reach. By understanding the role of fuel, utilizing the Minion method, harnessing the power of adjustable vents, and incorporating a water pan, you can take full control of your grilling experience.
To begin, selecting the right fuel is essential. Opt for high-quality lump charcoal, as it burns hotter and produces less ash than briquettes. This choice will not only enhance the flavor of your food but also provide a more efficient and consistent heat source.
Now that you have chosen your fuel, let’s explore the Minion method. This game-changing technique involves arranging unlit charcoal around a small amount of lit charcoal. As the lit charcoal gradually ignites the unlit charcoal, it creates a slow-burning and long-lasting heat source. This method allows for precise temperature control and ensures that your food is cooked to perfection.
In addition to the Minion method, the adjustable vents on the Weber Smokey Mountain are your allies in controlling temperature. These vents, located at both the bottom and top of the unit, regulate airflow and thereby dictate heat intensity. Opening both vents wider increases heat by allowing more oxygen into the smoker, while partially closing them reduces airflow and lowers the temperature. Remember, even small adjustments to vent openings can make a significant difference in temperature, so make changes gradually and monitor closely.
To further refine your control over heat, utilize a water pan. This simple yet effective tool acts as a buffer between the fire and your food. Fill it with hot water or other liquids to stabilize temperatures by absorbing and releasing heat slowly. The water pan provides an extra layer of control and ensures consistent cooking results.
Monitoring the Temperature
Mastering the art of grilling is more than just having a great grill—it’s about precision and control, and temperature monitoring is key. When it comes to using a Weber Smokey Mountain grill, closely monitoring the temperature is essential for successful grilling. Let’s dive into why temperature monitoring is so important and explore the different methods available.
Maintaining the proper temperature is crucial for achieving the desired results in terms of flavor and tenderness of the meat. Research shows that cooking meat at the right temperature allows it to retain its juiciness while developing a beautiful crust on the outside. This delicate balance can be achieved by closely monitoring the temperature throughout the grilling process.
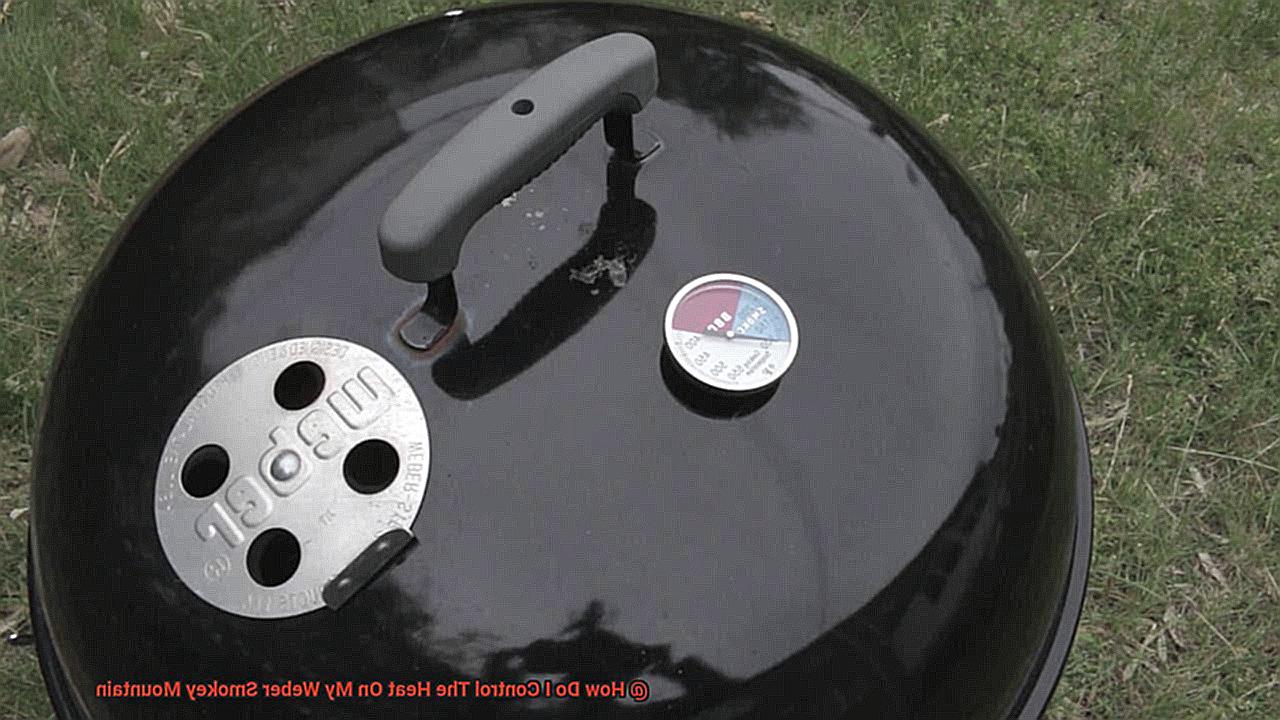
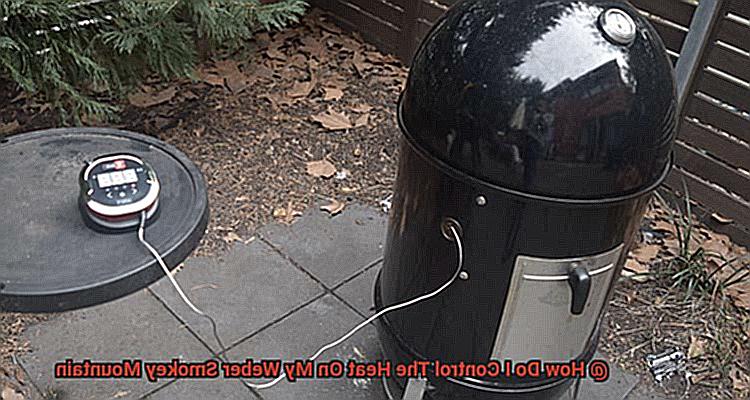
There are several methods available for monitoring the temperature on a Weber Smokey Mountain grill. The first method is using the built-in thermometer. Located on the lid, this thermometer provides a general idea of the internal temperature of the grill. However, it may not always be accurate due to its positioning and limitations in reading specific zones within the grill.
Another method is using wireless thermometers. These handy devices allow you to monitor the temperature without having to constantly open the lid. They come with probes that can be inserted into the meat or placed inside the grill to measure the ambient temperature. Wireless thermometers provide convenience and flexibility, allowing you to keep an eye on the temperature from a distance.
Digital probes are another option for monitoring both the internal temperature of the meat and the ambient temperature inside the grill. These probes can be inserted into the meat to give you real-time readings, ensuring that your meat is cooked to perfection. Additionally, they can be positioned inside the grill to monitor the overall temperature accurately.
To effectively monitor the temperature, it’s important to follow some best practices. Place your thermometer or probe in a central location within your grill for accurate readings. Avoid placing them too close to hot spots or directly above the flame, as this can result in inaccurate temperature readings. Check the temperature regularly to make any necessary adjustments and maintain a consistent heat.
While monitoring the temperature is crucial, it’s not without its challenges. Fluctuations due to weather conditions or incorrect positioning of thermometers or probes can affect the accuracy of your temperature readings. To overcome these challenges, ensure that your thermometer or probe is properly positioned and take into account any external factors that may impact the temperature.
Increasing Heat with Vents
Today, we’re diving into the world of increasing heat with vents on your trusty Weber Smokey Mountain. Buckle up and get ready, because we’re about to unleash some serious heat.
When it comes to controlling the temperature on your Weber Smokey Mountain, the vents are your secret weapon. These small yet mighty openings play a crucial role in regulating airflow, and ultimately, the heat inside your smoker.
So, how do you crank up the heat? It’s as simple as opening those vents wide open. Start by fully opening both the top and bottom vents. This allows for maximum airflow, meaning more oxygen fueling the fire and skyrocketing the temperature inside your smoker. But beware, this method can cause a rapid increase in heat, so keep a close eye on that thermometer and adjust the vents accordingly to maintain your desired temperature.
Now, if you want to kick it up a notch while maintaining control, try partially closing the top vent while keeping the bottom vent fully open. This creates a draft effect that pulls in even more air, resulting in an increased heat level. Remember, small adjustments are key to avoid sudden temperature spikes and maintain that perfect balance.
But wait, there’s more. Every smoker is unique, just like your grilling style. So don’t be afraid to experiment with different vent configurations to find what works best for you. Play around with different combinations until you achieve that ideal heat level for your mouthwatering creations.
Now, here’s a pro tip: increasing heat with vents may also mean increased fuel consumption. More air means more fuel being burned, so make sure you have enough charcoal or wood chunks to keep that fire roaring through your grilling session.
One thing to keep in mind is that increasing heat with vents can affect smoke production. More airflow can lead to a drier cooking environment, potentially reducing the amount of smoky goodness infused into your food. It’s a trade-off, but one worth considering when deciding on your vent settings.
Decreasing Heat with Vents
If you’re looking to tame the heat on your Weber Smokey Mountain and achieve that perfect low and slow cook, you’ve come to the right place. In this comprehensive guide, we will delve into the art of decreasing heat with vents, equipping you with the knowledge to take full control of your grilling experience.
Adjusting the Bottom Vents:
The bottom vents serve as the gatekeepers of airflow inside your smoker. To decrease the heat, begin by partially closing these vents. This strategic move restricts the influx of oxygen, effectively reducing the fire’s intensity and lowering the temperature. Be mindful not to shut them completely; we want to maintain a steady flame that dances with controlled heat.
Fine-Tuning with the Top Vent:
Now let’s turn our attention to the top vent, a powerful tool for precision temperature control. By partially closing this vent, you can limit the escape of smoke and heat from your smoker, resulting in a lower temperature inside. Remember that even slight adjustments here can yield significant impacts, so experiment until you find your personal sweet spot.
Experimentation is Key:
Don’t shy away from experimenting with different combinations of vent adjustments. Each smoker possesses its own unique quirks and characteristics, so it’s essential to discover what works best for you. Embrace gradual changes and closely monitor the temperature to unlock grilling perfection.
Additional Techniques:
In your pursuit of cooler temperatures, consider incorporating a water pan into your setup. Placing a water-filled pan between the charcoal and cooking grate acts as a heat sink, effectively absorbing and dissipating some of the intense heat. This indirect heat method not only helps maintain lower temperatures but also adds moisture to your culinary creations, enhancing their succulence.
Reducing Charcoal and Investing in Thermometers:
If all else fails, resort to reducing the number of charcoal briquettes or arranging them in a smaller pile. Remember, less fuel equates to reduced intensity and lower temperatures. Additionally, investing in a reliable thermometer is an absolute must. A trusty thermometer allows you to make precise adjustments and ensures unwavering control over the heat throughout the grilling process.
Armed with these invaluable tips and techniques, you are well on your way to becoming a master of temperature control on your Weber Smokey Mountain. Remember, practice makes perfect, so don’t be discouraged if achieving your desired heat level requires a few tries. Embrace the journey, explore the realm of vent adjustments, and soon enough, you’ll be creating mouthwatering dishes that leave your guests in awe.
Adding More Fuel for Increased Heat
Prepare to take your Weber Smokey Mountain experience to new heights as we delve into the art of adding more fuel to increase heat. Whether you’re a seasoned pitmaster or a rookie griller, this comprehensive guide will equip you with the knowledge and skills needed to master the flames, creating mouthwatering dishes that will leave your friends and family begging for more.
Creating Space for Optimal Combustion:
Before we embark on our journey to enhance the heat, let’s ensure we have enough space between our existing coals. By allowing for proper airflow, we ignite better combustion, resulting in a more consistent and powerful heat source. So don those heat-resistant gloves and remove the cooking grates and water pan, granting easy access to the charcoal chamber.
Adding Fuel with Finesse:
Now that we have room to work with, it’s time to delicately add more fuel. With tongs or a trusty glove in hand, gently lift the charcoal grate and forge a small opening within the existing coals. This opening acts as a gateway for our unlit charcoal briquettes or wood chunks, infusing our cooking with intensified heat and flavor.
Gradual Fuel Ignition:
To avoid an uncontrollable surge in heat, let us begin with a handful of unlit charcoal. Observe the temperature closely before deciding whether to add more fuel. This gradual ignition technique ensures a steady and consistent rise in temperature, perfect for achieving the coveted low and slow cooking style that imparts tenderness and depth of flavor.
Regulating Airflow:
Like a conductor guiding an orchestra, we must fine-tune our temperature control by adjusting the vents on our Weber Smokey Mountain. Opening them increases oxygen flow, sending temperatures soaring, while closing them restricts airflow, resulting in a gentle heat. Remember, even the slightest adjustments can make a profound difference, so take your time to find that elusive sweet spot.
Patience is Key:
With our fuel added and vents adjusted, it’s time to exercise patience as we wait for the flames to work their magic. The temperature may take a while to stabilize, but trust us, the wait will be well worth it. The symphony of flavors that awaits you is a testament to the artistry of slow cooking.
Monitoring the Heat:
To ensure our culinary symphony stays on track, it is essential to keep a vigilant eye on the temperature. Utilize the built-in thermometer or invest in an external one for precise measurements. Remember, precision is the key to achieving that perfect cook every time.
Spreading Out Fuel for Reduced Heat
I have a game-changing technique that will revolutionize your grilling experience. It’s time to spread out that fuel.
Spreading out the fuel is the secret sauce for achieving reduced heat intensity and improved temperature control when grilling on a Weber Smokey Mountain. Let me break it down for you.
First, arrange the charcoal briquettes in a single layer on the charcoal grate. No more chaotic mountain of fiery fury. By spreading them out, you create a larger surface area for heat distribution, resulting in a more balanced cooking environment.
Next, light up that fuel. Whether you use a chimney starter or trusty lighter cubes, get that fire going until the charcoal is covered with a beautiful thin layer of ash. That’s when you know it’s ready for grilling greatness.
Now, grab your long-handled tongs or grill rake and start spreading out that fiery goodness across the charcoal grate. This simple act disperses the fuel and helps distribute the heat more evenly throughout the smoker. Say goodbye to hot spots and hello to perfectly cooked dishes every time.
But wait, there’s more. Spreading out the fuel not only reduces heat intensity but also gives you greater control over the temperature. If your Smokey Mountain is still producing too much heat, don’t panic. Adjust the vents on the bottom and top of the smoker to regulate airflow. Partially closing the vents restricts airflow and reduces heat output, while opening them wider allows for increased airflow and heat.
Remember, practice makes perfect when mastering temperature control. Monitor the temperature inside your smoker with a reliable thermometer and experiment with different vent positions to find that sweet spot for your desired cooking temperature.
Using Water Pans and Heat Deflectors for Even Heating
Achieving even heating and eliminating hot spots while cooking on a Weber Smokey Mountain smoker can be a game-changer for your grilling experience. One highly effective technique to accomplish this is by using water pans and heat deflectors together. These two accessories work in harmony to distribute heat evenly throughout the smoker, resulting in perfectly cooked dishes that will impress your friends and family.
Let’s start by discussing water pans. These shallow pans filled with water are strategically placed between the charcoal and the cooking grate. Acting as a barrier, they create a gentle, indirect cooking environment by separating the heat source from the food. Water pans not only help regulate the temperature but also add moisture to the smoker, keeping your meat juicy and succulent.
To set up your water pan, simply position it directly above the charcoal. Throughout the cooking process, it’s important to monitor the water level and refill as needed to maintain a consistent temperature. This seemingly small step can make a significant difference in the final outcome of your dishes.
Now, let’s move on to heat deflectors. These remarkable accessories act as bodyguards for your food, shielding it from direct heat and preventing any hot spots. Heat deflectors are typically made of foil or ceramic and are placed on top of the water pan.
Proper positioning of heat deflectors is crucial to ensure maximum heat absorption by the water pan and even distribution across the cooking chamber. While finding the perfect balance of water and charcoal might require some trial and error, once you achieve it, you will be amazed at the results.
By following these steps, you will have complete control over your cooking environment, resulting in evenly cooked, mouthwatering dishes. Say goodbye to uneven heat and hello to grilling perfection.
5Sc9uGx3Eto” >
Conclusion
Controlling the heat on your Weber Smokey Mountain is crucial for achieving that perfect barbecue. To master this art, you need to understand the different factors that influence temperature and how to manipulate them like a pro.
First and foremost, airflow is key. The vents on your smoker play a vital role in regulating heat. Opening the vents will allow more oxygen to flow, increasing the temperature, while closing them will restrict airflow and lower the heat. Think of it as controlling the throttle of a powerful engine – you have complete control over the intensity of your fire.
Another factor to consider is fuel management. The amount and type of charcoal or wood chunks you use directly impact the heat level. Adding more fuel will raise the temperature, while reducing it will bring it down. Experiment with different combinations until you find what works best for you.
Water pans are not just for moisture; they also act as a heat sink. Placing a filled water pan between your fire and food can help regulate temperatures by absorbing excess heat. This technique is particularly useful for low and slow cooking.
Furthermore, keeping an eye on your thermometer is crucial. Invest in a quality thermometer that accurately measures both smoker and meat temperatures. This way, you can monitor any fluctuations and make adjustments accordingly.
Lastly, practice makes perfect. Every smoker has its own quirks and nuances when it comes to heat control. Take note of what works well for you each time you fire up your Weber Smokey Mountain, building upon previous experiences to fine-tune your skills.
In conclusion, controlling the heat on your Weber Smokey Mountain requires attention to detail and understanding of various factors at play. With proper airflow management, fuel manipulation, water pan usage, thermometer monitoring, and practice, you’ll be able to achieve precise temperature control like a seasoned pitmaster.