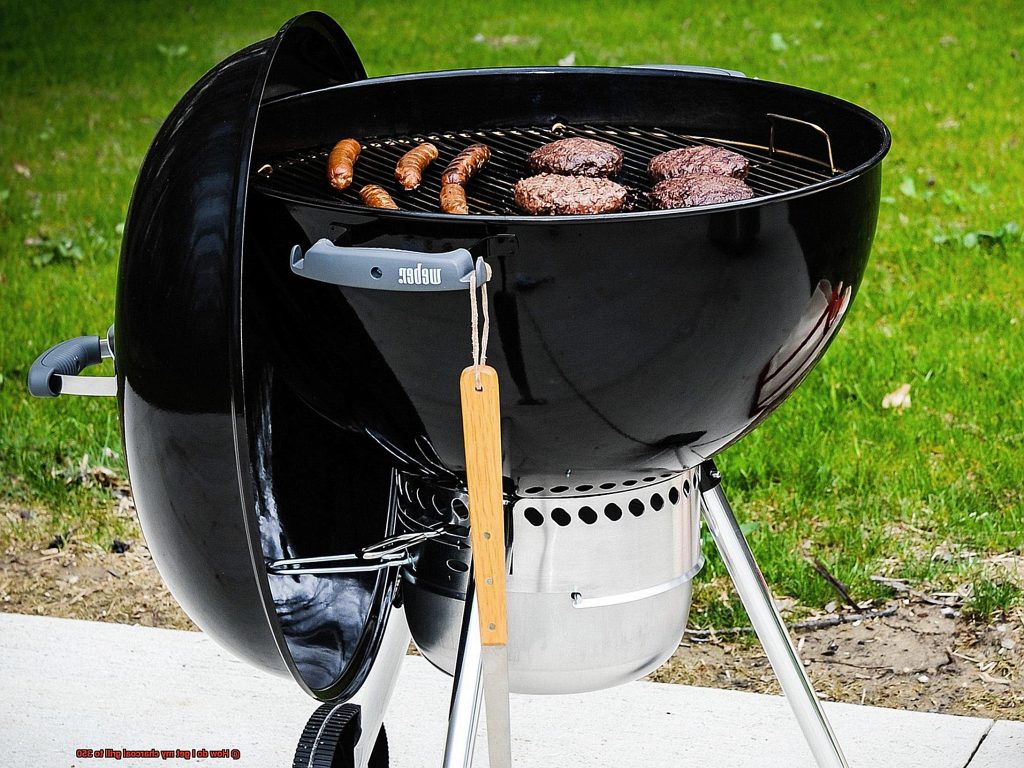
Who doesn’t love the mouthwatering taste of food cooked to perfection on a charcoal grill? The smoky flavor adds an irresistible appeal to any meal, making it a favorite among grill enthusiasts. However, achieving the ideal temperature for cooking is crucial to ensure that your food is safe and delicious.
If you’re wondering how to get your charcoal grill to 350°F, you’re not alone. This temperature range is perfect for grilling chicken, pork chops, and other meats, but it can be challenging to achieve, especially if you’re a beginner.
But don’t worry. In this post, we’ll cover everything you need to know about getting your charcoal grill up to 350°F. From lighting methods to choosing the right charcoal and controlling airflow in your grill – we’ve got you covered.
Whether you’re planning a summer barbecue or craving some juicy chops for dinner, this guide will help take your grilling game to a whole new level. So sit back, relax, and let’s get started on mastering the art of grilling at 350°F.
Contents
Cleaning the Grill
A clean grill is the cornerstone of any great cookout. Not only does it help maintain the longevity of your grill, but it also ensures that your food won’t have any unwanted flavors from previous cookouts. As an expert in cleaning grills, I’m here to share with you some tips on how to clean your grill and get it ready to cook at 350 degrees.
Firstly, it’s important to turn off and cool down your grill before cleaning. Safety first. Once it’s completely cooled down, remove the grates and any other removable parts, such as the drip pan or heat deflectors. These parts can be cleaned with hot soapy water or a grill brush, be sure to check the manufacturer’s instructions for any specific recommendations.
Next, tackle the grates which are often the dirtiest part of your grill. Use a scraper or grill brush to remove any stuck-on debris. To remove tough stains, you can use a mixture of baking soda and water to create a paste that will do wonders. Rinse and dry the grates with a towel once you’re done.
Now it’s time to tackle the outside of the grill. To remove any grease or grime, use a mixture of vinegar and water or a specialized grill cleaner. Apply the cleaner with a soft cloth or sponge and rinse it off with water.
Regularly cleaning your grill is critical for maintaining its longevity and ensuring that your food tastes great every time you use it. So don’t forget to clean your grill before every cookout. To make things easier, you can also invest in a grill cover to keep your grill protected from the elements.
Lighting the Charcoal
But with so many methods out there, it can be tough to decide which one is right for you. Fear not, for I am here to break down the different methods and give you the scoop on lighting your charcoal safely and efficiently.
Let’s start with the classic method of using lighter fluid. While this can be effective, it’s important to use caution and follow safety guidelines. You should only use a small amount of fluid and never add more once the coals are already lit. Waiting until the fluid has soaked into the charcoal before lighting it will prevent any flare-ups, keeping you and your food safe.
If you’re looking for a safer and more efficient way to light your charcoal, consider using a charcoal chimney. This nifty device allows you to fill the chimney with charcoal and place crumpled newspaper or lighter cubes in the bottom. Once lit, wait for the coals to become hot and ashy before pouring them into the grill. This method eliminates the need for lighter fluid altogether, making it a great option for those who are environmentally conscious.
Finally, we have the electric starter method. This option eliminates the need for lighter fluid or paper altogether. Simply place the starter on top of the charcoal and plug it in. Wait for the coals to become hot and ashy before removing the starter and spreading out the charcoal in the grill. This method is great for those who are short on time or don’t want to fuss with lighting materials.
No matter which method you choose, always remember to leave enough time for your coals to become hot and ashy before adding any food to the grill. This will ensure that your grill is at the desired temperature of 350 degrees Fahrenheit and that your food cooks evenly.
Arranging the Coals for Indirect Heat
Then it’s time to master the art of arranging coals for indirect heat on your charcoal grill. This method of cooking is perfect for larger cuts of meat and allows for slower, more even cooking. Plus, it’s easier than you might think.
To create the perfect setup for indirect heat, start by pouring your charcoal into one side of the grill. This creates a hot zone and a cooler zone, which is essential for this cooking method. You can light your coals using a charcoal chimney starter or lighter fluid, but always prioritize safety and wait until they’ve turned gray before arranging them.
Next, add a drip pan filled with water or other liquids such as wine or beer to the cooler zone. This not only adds extra flavor to your food but also helps regulate the temperature while preventing flare-ups from dripping fat. Who doesn’t love extra flavor?
Now it’s time to get grilling. Place your food on the grates in the cooler zone opposite from the hot coals. Don’t forget to put the lid on the grill and adjust any vents to control the airflow and maintain a consistent temperature of 350 degrees Fahrenheit. This ensures perfectly cooked meats and veggies every time.
So, here’s a handy checklist for arranging coals for indirect heat:
- Pour charcoal into one side of the grill.
- Light coals using a chimney starter or lighter fluid.
- Wait until coals turn gray before arranging for indirect heat.
- Add a drip pan filled with water or other liquids to the cooler zone.
- Place food on grates in cooler zone opposite from hot coals.
- Put lid on grill and adjust vents for consistent temperature.
Using 20-25 Briquettes or Lumps of Charcoal
Using 20-25 briquettes or lumps of charcoal is a great place to start. But before you dive in, let’s go over some tips to ensure your grill reaches the perfect temperature of 350 degrees Fahrenheit.
First, make sure your grill is clean and free of any debris or ashes from previous grilling sessions. This will not only help your food taste better but also ensure that the coals burn evenly. Once your grill is clean, place 20-25 briquettes or lumps in the center of the grill and stack them in a pyramid shape. This will concentrate the heat in the center of the grill and evenly distribute it throughout.
Next, it’s time to light those coals. Whether you prefer to use a chimney starter or lighter fluid, be sure to follow the safety instructions carefully. Once your coals are lit, let them burn for about 10-15 minutes until they’re glowing red-hot.
Now comes the fun part – spreading out the coals evenly across the grill grates using a pair of tongs. This will help ensure that there are no hot spots on the grill and that your food cooks evenly. Don’t forget to check the temperature of the grill using a thermometer placed in the center of the cooking grate.
If your grill isn’t quite at 350 degrees yet, don’t panic. Simply add more briquettes or lumps until you reach your desired temperature. If it’s too hot, remove some of the coals with tongs to bring down the temperature. Remember, adjusting the temperature of a charcoal grill takes practice, so don’t get discouraged if it doesn’t work perfectly on your first try.
Adjusting the Vents to Control Air Flow
Grilling is a skill that requires precision and patience, especially when it comes to controlling the temperature. To achieve the perfect temperature of 350°F on your charcoal grill, you must master the art of adjusting the vents to control the air flow. As an expert on this topic, I’m here to guide you through this process and help take your grilling game to the next level.
The vents on your grill play a crucial role in controlling the temperature. By adjusting them, you can increase or decrease the amount of oxygen that fuels the charcoal, ultimately affecting the temperature inside the grill. So, if your goal is to hit 350°F, proper vent adjustment is key.
If you’re using a Weber kettle grill, adjusting the bottom vents to be halfway open and leaving the top vent fully open is recommended. This allows for enough air to reach the charcoal without causing it to burn too hot. However, if you’re using a different type of charcoal grill, consult the manufacturer’s instructions for specific recommendations on adjusting the vents.
It’s essential to keep in mind that external factors such as wind and ambient temperature can affect your grill’s temperature. So, if you notice that your grill isn’t reaching 350°F, make sure to adjust the vents accordingly and wait a few minutes before checking again. Avoid making sudden adjustments as they can cause fluctuations in temperature.
Using a thermometer is another essential tool in monitoring the temperature inside your grill. It’s recommended that you use one throughout the cooking process to ensure that your grill is at the desired temperature. If you find that your grill is not reaching 350°F, adjust the vents accordingly and wait for a few minutes before checking again.
To summarize, mastering vent adjustment is vital in achieving 350°F on your charcoal grill. By controlling airflow with your vents and using a thermometer to monitor temperature, you can perfect your grilling skills and impress your guests with perfectly cooked dishes every time. So, grab your apron, fire up the grill, and start practicing your vent adjustments. Happy grilling.
Monitoring Temperature Throughout Grilling Process
And one of the most crucial elements in grilling is temperature control. Whether you’re a seasoned pro or a novice cook, monitoring the temperature throughout the grilling process is essential to achieving the desired cooking results.
Why is temperature control so important when it comes to grilling? Simply put, if your grill is too hot, you risk burning your food, and if it’s not hot enough, your food will take much longer to cook. Therefore, it’s essential to monitor the temperature throughout the grilling process to ensure that your food is cooked perfectly.
So how can you ensure that your grill stays at the perfect temperature throughout the grilling process? Here are some tips:
Use a thermometer: One of the easiest and most popular methods of monitoring temperature is by using a thermometer. There are two types of thermometers that you can use: a probe thermometer and a grill thermometer. A probe thermometer is inserted into the meat and reads the internal temperature of the meat. On the other hand, a grill thermometer is attached to the lid of the grill, and it reads the temperature inside the grill.
Place thermometer in the right location: When using a thermometer, it’s important to place it in the right location. For example, if you’re grilling a steak, you should insert the thermometer into the thickest part of the meat, away from any bones or fat. If you’re using a grill thermometer, make sure that it’s placed at the same level as your food.
Hand test method: Another way to monitor the temperature of your charcoal grill is by using the hand test method. This method involves holding your hand over the grill and counting how many seconds you can keep it there before it becomes too hot. For example, if you can hold your hand over the grill for three seconds before it becomes too hot, then your grill is at medium-high heat.
Adjust airflow: It’s important to remember that charcoal grills have hot spots and cool spots. Therefore, you should move your food around on the grill to ensure that it cooks evenly. If you notice that one side of your grill is much hotter than the other, then you can adjust the airflow by opening or closing the vents.
Adding More Lit Coals and Adjusting Vents for Low Temperatures
Fear not, because with the right techniques, you can master the art of grilling in no time. In this article, we will explore how adding more lit coals and adjusting vents can help you increase the temperature of your charcoal grill to 350°F.
When the temperature inside your grill is too low, adding more lit coals can help raise the heat output. But before you do that, make sure to use high-quality charcoal that is dry and free from chemicals or additives that could affect the taste of your food. A chimney starter will come in handy to light additional briquettes or lump charcoal which you can add to the existing coals on the grill.
Once you have added the new lit coals, it is crucial to give them adequate time to reach maximum heat output before placing any food on the grill. Depending on the type of charcoal used, this can take anywhere from 10-20 minutes. Remember, patience is key.
In addition to adding more lit coals, adjusting the vents on your charcoal grill can also help regulate the temperature. The vents control the flow of oxygen needed for combustion and can be adjusted to increase or decrease the amount of oxygen entering the grill.
If you want to increase the temperature of your charcoal grill, open the vents wider to allow more oxygen in and generate more heat. Conversely, partially closing the vents will reduce the amount of oxygen entering the grill, resulting in a lower temperature.
It is essential to note that adjusting the vents may take some trial and error to find the right balance for your specific grill and cooking needs. It is recommended that you make small adjustments and wait a few minutes before making any further changes.
Closing off Vents and Removing Coals for High Temperatures
You know how to reach 350°F with the addition of lit coals and vent adjustments, but sometimes you need even more heat. Fear not, because we’re about to discuss two essential techniques for achieving sizzling temperatures: closing off vents and removing coals.
Think of your grill as a living thing; it needs oxygen to thrive. By closing off the vents, you reduce the oxygen flow, which in turn decreases the temperature and slows down coal burning. This technique is perfect for quickly bringing down a too-hot grill.
On the other hand, removing coals can also regulate the temperature. The more coals present, the hotter it will become. By taking out some coals, you decrease overall heat output and prevent burning food. This technique is useful when you accidentally add too many coals or need to maintain a steady temperature for a longer period.
But like any skill, mastering these techniques requires experimentation and monitoring. You must find the right balance between closing off vents and removing coals to achieve your desired temperature. Keep track of how these actions affect your grill’s temperature and make adjustments accordingly.
Safety should always come first when grilling. Remember to use heat-resistant gloves or tongs when handling hot coals.
Closing off vents and removing coals are two essential techniques that every griller should have in their arsenal. Combine these with other techniques like adjusting coal placement and using a thermometer for precise temperature control and mouth-watering grilled dishes.
ieRNhjBIN_M” >
Conclusion
In conclusion, achieving the perfect temperature of 350°F for your charcoal grill is a must to ensure that your food is not only safe but also packed with flavor. Whether you’re a seasoned grilling pro or a beginner, mastering the art of cooking at this temperature requires practice and patience.
From cleaning your grill thoroughly to lighting methods, arranging coals for indirect heat, adjusting vents, and monitoring the temperature throughout the grilling process – we’ve got you covered. Remember to prioritize safety when handling hot coals and follow manufacturer instructions carefully. Regularly cleaning your grill and using high-quality charcoal will help maintain its longevity and ensure that your food tastes fantastic every time.
But why stop there? By experimenting with techniques like closing off vents or removing coals, you can regulate the temperature of your grill even further. The key is finding the right balance between these techniques to achieve your desired temperature.
So don’t be afraid to get creative. Grab your apron, fire up the grill, and start practicing with these tips in mind. With a little bit of effort and experimentation, you’ll be well on your way to impressing your guests with perfectly cooked dishes every time.