Got a bunch of old plastic oil drums gathering dust in your backyard? Instead of tossing them out, why not give them a new lease on life? With a bit of elbow grease and know-how, you can easily clean and repurpose these versatile containers for all sorts of projects, from storing rainwater to building custom furniture.
But before you get started, it’s important to make sure your drums are free from any hazardous residue. In this blog post, we’ll guide you through the process of cleaning plastic oil drums using a simple yet effective method.
First things first: gather up the necessary equipment. You’ll need protective clothing and respiratory gear to keep yourself safe from toxic fumes. Once you’re geared up, it’s time to start scrubbing. We’ll walk you through the steps involved in washing the drums with hot, soapy water and rinsing them with a high-pressure hose.
And don’t worry about what to do with any leftover waste products – we’ve got that covered too. We’ll provide valuable tips on how to safely dispose of any remaining materials.
By the end of this post, you’ll have all the knowledge and tools you need to turn those old plastic oil drums into valuable resources for your DIY projects. So let’s dive in and get those drums cleaned up.
Contents
Why is it Important to Clean Plastic Oil Drums?
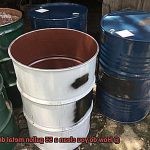
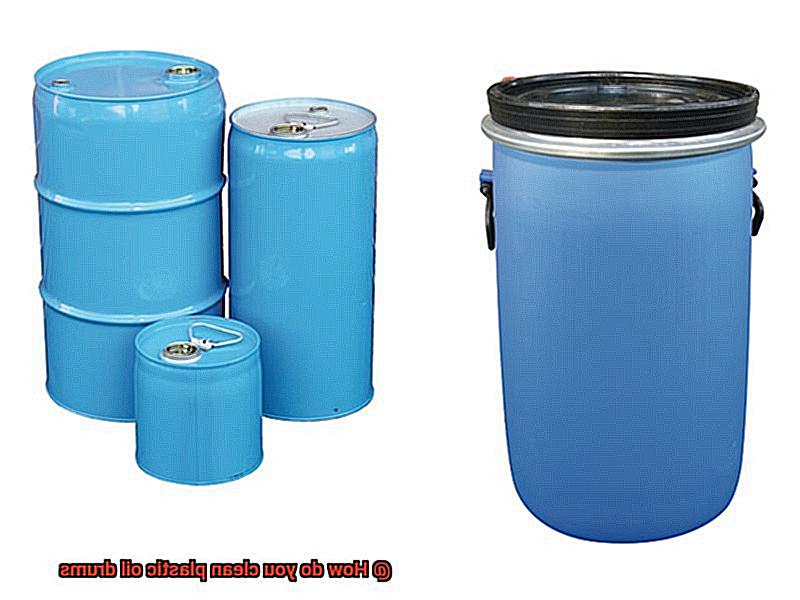
In industries that store and transport liquids such as oils, chemicals, and hazardous waste, plastic oil drums are indispensable. These drums are made of high-density polyethylene (HDPE) plastic, which makes them durable and resistant to corrosion. However, over time, these drums can become contaminated with residue from the stored liquids, posing serious health risks to workers handling or transporting them. That’s why it is crucial to clean plastic oil drums regularly.
There are several reasons why cleaning plastic oil drums is of utmost importance. Firstly, failure to clean these drums properly can result in the accumulation of hazardous materials that can cause fires, explosions, or other dangerous situations. Moreover, residue buildup can damage the drum’s interior walls, leading to leaks or spills that could compromise the quality of the stored liquids. To prevent such occurrences, it is essential to keep these drums free from contaminants.
Secondly, regulatory requirements are another reason why cleaning plastic oil drums is vital. Many industries are subject to strict regulations governing the storage and transportation of hazardous materials. Companies that fail to comply with these regulations risk hefty fines, legal liability, and reputational damage. Therefore, regular cleaning and maintenance of plastic oil drums are crucial for ensuring compliance with industry standards and regulations.
Lastly, cleaning plastic oil drums can help companies save money in the long run. Properly maintained drums last longer and are less likely to require frequent repairs or replacements. This means that companies can avoid the cost of purchasing new drums frequently or paying for expensive repairs due to damage caused by residue buildup or corrosion.
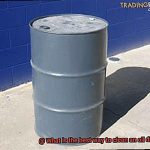
To clean a plastic oil drum thoroughly, start by emptying it completely and rinsing it with water to remove any remaining residue. Next, apply a suitable cleaning solution and scrub the drum thoroughly with a brush or sponge. After scrubbing, rinse the drum again with water to remove any remaining cleaning solution before disinfecting it using a suitable disinfectant solution. Finally, allow the drum to dry completely before using it again.
Step One: Empty the Drum

The first step to success is a simple yet crucial one: emptying the drum. While it may seem like an obvious step, it can make all the difference in ensuring that the cleaning process is effective, safe, and environmentally friendly.
Let’s dive deeper into why properly emptying the drum is so important.
- Safely dispose of contents: Whether you’re dealing with water or hazardous chemicals, it’s essential to dispose of the drum’s contents safely and in an environmentally friendly manner. Not only does this prevent pollution and harm to wildlife, but it also keeps you in compliance with regulations.
- Avoid spills and leaks: Emptying a drum can be messy if not done correctly, leading to spills or leaks that pose a risk to workers and the environment. By taking precautions and using proper techniques, you can avoid these potential hazards altogether.
- Inspect for damage: After emptying the drum, it’s crucial to inspect it for any damage or signs of wear and tear. This is especially important for drums that have held hazardous materials. Addressing any damage or defects before beginning the cleaning process will minimize complications and ensure safety.
Step Two: Apply a Cleaning Solution
Now that we’ve covered the importance of emptying and inspecting the drum, it’s time to move on to step two: applying a cleaning solution.
To begin, it’s essential to choose a cleaning solution that is specifically designed for plastic surfaces. There are many options available on the market, but one of the most effective and popular choices is a mixture of hot water and mild detergent. For an extra boost, you can add baking soda or vinegar, both known for their ability to break down grease and dirt. If you’re dealing with stubborn stains, a degreaser can work wonders. These solutions come in various forms such as liquid, gel, or spray and are readily available in hardware stores or online.
Once you have your solution of choice, follow the instructions carefully. Some solutions may require dilution with water while others may require direct application. Always wear protective gloves and eyewear to avoid skin irritation or eye damage.
After applying the solution, let it sit for a few minutes to allow it to penetrate and loosen any remaining dirt or grease on the surface. Now it’s time to scrub. Use a soft-bristled brush or sponge to thoroughly scrub every inch of the surface, including crevices and corners.
Rinse off the cleaning solution with clean water and inspect the drum for any remaining stains or residue. If there are still visible stains, repeat the process until the surface is completely clean.
Step Three: Scrub the Drum Thoroughly
You’ve made it to the most important step in cleaning your plastic oil drum – Step Three: Scrub the Drum Thoroughly. This step is essential to ensure that your drum is spotless and free from any leftover debris or chemicals. So gear up and let’s dive into the nitty-gritty of this crucial step.
First, use a stiff-bristled brush or scraper to remove any remaining debris from the inside of the drum. If you encounter stubborn residue, apply some elbow grease and don’t give up until it’s all gone.
Next, fill the drum with hot water and add a cleaning solution. You can use plain dish soap or vinegar, or try mixing baking soda and vinegar for a magical concoction. With a new stiff-bristled brush, scrub every nook and cranny of the drum. Make sure you pay extra attention to any areas that might have been missed during the initial cleaning process. Don’t forget to scrub the sides, bottom, and corners of the drum.
After you’ve finished scrubbing, rinse out the drum several times with hot water to ensure that no cleaning solution residue remains. You don’t want any leftover soap or vinegar contaminating your oil or chemicals. Finally, allow the drum to air dry completely before use. Patience is key here; make sure there is absolutely no moisture left in the drum before using it.
It’s important to note that if you’re dealing with particularly stubborn residue, you may need to use a specialized cleaning solution or hire a professional cleaning service to ensure that the drum is completely safe for reuse.
Step Four: Rinse the Drum with Water
Let’s roll up our sleeves, grab our hoses and pressure washers, and get ready to rinse this baby out.
The fourth step in the process requires us to rinse the drum with water. It may seem like a simple task, but it is crucial to remove any remaining cleaning solution or debris from the previous steps. Here are some key points to keep in mind while rinsing your drum:
- First and foremost, make sure you have access to a sufficient amount of water. Depending on your resources, you can use a hose, pressure washer or even fill the drum with water and dump it out multiple times. The goal is to ensure that all surfaces of the drum are thoroughly rinsed.
- Secondly, use high-pressure water to dislodge any lingering debris or particles that may have escaped your previous cleaning efforts. This will help ensure that the drum is completely clean and ready for its next use. Be diligent and wash both the inside and outside of the drum, as well as any crevices or corners that may be difficult to access.
- Finally, after rinsing the drum with water, inspect it closely for any remaining debris or residue. If you spot any traces of oil or other substances, don’t fret. Simply repeat the cleaning process until your drum is completely free of contaminants.
Step Five: Disinfect the Drum
We’re nearing the end of our drum cleaning journey and it’s time to tackle a crucial step that often gets overlooked – disinfecting the plastic oil drum. Let’s face it, drums can get pretty nasty, and disinfecting is vital to eliminate harmful bacteria and germs.
So, buckle up and let’s dive into the steps needed to get your drum disinfected and safe for future use.
Firstly, prepare a solution of water and bleach. Aim for a concentration of 10%, which means mixing one cup of bleach with every ten cups of water.
Secondly, pour the solution into the drum ensuring it coats every nook and cranny inside. You can roll the drum around or use a brush to scrub the inside thoroughly.
Thirdly, leave the solution in the drum for a minimum of thirty minutes. This allows enough time for the solution to penetrate and kill any bacteria or germs present.
Fourthly, drain the solution from the drum and rinse it thoroughly with clean water. A high-pressure hose works wonders in removing all traces of bleach.
Lastly, allow the drum to dry completely before using it again. Never use a plastic oil drum until it is entirely dry as any remaining moisture could promote mold or bacterial growth.
By following these simple steps, you can be confident that your plastic oil drum is disinfected and free from harmful bacteria and germs. Don’t overlook this crucial step in ensuring your drums are squeaky clean and safe for future use.
Step Six: Allow the Drum to Dry Completely
This step is just as crucial as the cleaning process itself, and it’s essential for preventing contamination and ensuring safe storage of materials.
To start, any remaining moisture in the drum can lead to the growth of harmful bacteria or other microorganisms, which can then contaminate any materials stored inside. This poses serious health risks, making it necessary to take drying seriously.
The best way to ensure complete and even drying is by placing the drum upside down on a flat surface. This allows any remaining moisture to drain out and ensures that all surfaces are exposed to airflow. It’s also vital to avoid direct sunlight and high temperatures during the drying process, as these can cause warping or deformation of the drum.
If you’re in a hurry, using a fan or air compressor can speed up the drying process. However, it’s essential to check that there are no remaining cleaning agents or chemicals in the drum that could react with the air being blown through. If you’re unsure, it’s better to let the drum air dry naturally.
Once your plastic oil drum is completely dry, inspect it thoroughly before using it again. Look for any damages or defects that could cause leaks or spills, as these can be dangerous when storing certain materials.
zoM2wWXMkxo” >
Conclusion
In conclusion, the process of cleaning plastic oil drums is a critical step in ensuring worker safety, regulatory compliance, and the longevity of the drum itself. With the right tools and techniques, anyone can transform their old oil drums into versatile containers for all sorts of projects.
The first step in cleaning plastic oil drums is to empty them completely and dispose of any contents safely. Next, apply a suitable cleaning solution and scrub the drum thoroughly with a brush or sponge. Rinse the drum with high-pressure hoses to dislodge any lingering debris or particles before disinfecting it with a suitable disinfectant solution.
Allowing the drum to dry completely before use is crucial for preventing contamination and ensuring safe storage of materials. By following these simple steps, you can be confident that your plastic oil drum is free from harmful bacteria or other microorganisms.
Cleaning plastic oil drums may seem like a daunting task at first, but it’s an important one that shouldn’t be overlooked. Proper care and maintenance of these containers ensure compliance with industry standards while providing valuable resources for DIY projects.