Are you ready to unleash the smoky, mouth-watering flavor of your Oklahoma Joe Bronco? Before you start throwing charcoal around like a madman, let’s take a moment to learn the proper way to light your grill. Trust us, it’ll be worth it. The right technique not only makes lighting a breeze, but also leads to better-tasting food that will have your friends and family begging for seconds.
Don’t worry if you’re new to grilling – this guide is perfect for beginners and experienced grill masters alike. Our expert-approved methods are tried-and-true, so you can trust that you’re getting the best advice out there.
First things first: let’s talk equipment. We’ll cover everything from charcoal to chimney starters so that you know exactly what you need before firing up your grill. Then we’ll dive into the different methods of lighting your Oklahoma Joe Bronco, including the traditional method and the fast-lighting method. We’ll help you decide which one is right for you based on your preferences and time constraints.
But wait, there’s more. We’ve got some pro tips up our sleeves for taking your grilling game to the next level. You’ll learn how to control the temperature like a boss, set up your fuel for optimal cooking, and ensure food safety every step of the way.
By the time you finish reading this guide, you’ll be confident in your ability to light up your Oklahoma Joe Bronco like a pro. So grab some charcoal and get ready to impress everyone with your newfound grilling skills.
Contents
What You Need to Light a Oklahoma Joe Bronco
Before you ignite the flames, make sure you have all the essential tools at hand to ensure a successful cookout.
The first item on your list should be high-quality charcoal briquettes or lump charcoal. Choose a brand that burns evenly and provides consistent heat to ensure your food is cooked to perfection.
To start the fire, invest in a chimney starter. This nifty tool allows you to light your charcoal quickly and evenly without any need for lighter fluid or other chemicals. Simply fill the chimney starter with charcoal, light it from the bottom using a piece of newspaper or a lighter, and wait for the coals to heat up.
Moving on, don’t forget to equip yourself with a set of grilling tools. Tongs, spatulas, and grill brushes are all essential for handling hot coals and moving your food around on the grill. Look for durable materials that can withstand high heat and frequent use to avoid any mishaps.
Last but not least, make sure you have a reliable lighter or matches on hand to get your chimney starter started. A long-handled lighter is ideal as it keeps your hands away from the hot coals.
Positioning the Grill
Before you light up your Oklahoma Joe Bronco grill for your next cookout, it’s crucial to position it correctly to ensure a safe and successful lighting process. Here are some important factors to consider:
First and foremost, the grill should be placed on a flat and stable surface. This may seem obvious, but it’s a crucial step to prevent accidents or mishaps during the lighting process. You don’t want to risk the grill tipping over and causing damage or injury.
Next, take a look at the surroundings of the grill. Make sure it’s placed in an open area that’s free from any flammable materials such as dry grass, leaves, or branches. This will help prevent potential fires from occurring. Safety should always be your top priority.
Another factor to consider is the direction of the wind. You want to avoid placing the grill in a spot where the wind blows directly into it, as this can make it difficult to light and control the flames. It’s also important to note that strong winds can quickly turn your cookout into a disaster.
Lastly, make sure there’s enough space around the grill for you to move around comfortably and access all areas of the grill when needed. This will make cooking much more enjoyable and efficient.
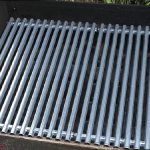
Removing the Cooking Grates
You’re all set up with your Oklahoma Joe Bronco smoker, but before you can dive into your next barbecue masterpiece, it’s crucial to know how to properly remove the cooking grates.
Firstly, you’ll need to open the lid of your smoker and ensure that there’s no residual food or debris left on the grates. You don’t want any unwanted flavors lingering around, do you?
Once you’ve cleared the grates, locate the handles on each side and lift them out of the smoker. Voila. However, if your grates are caked with remnants from your last cookout, grab a wire brush and give them a good scrub-down before setting them aside.
It’s worth mentioning that some smokers come with multiple cooking grates, so be sure to remove all of them if necessary. Moreover, if you’re planning on using a water pan in your smoker, place it on the bottom rack now before adding charcoal to the basket.
Adding Charcoal
Before you can get cooking, there’s one crucial step you need to master: adding charcoal. But fear not – with our expert tips and techniques, you’ll be a pro in no time.
First things first, remove the cooking grates and access the charcoal basket at the bottom of your grill. Now it’s time to choose your fuel source. While both lump charcoal and briquettes will do the job, keep in mind that briquettes take longer to light and burn slower than lump charcoal.
To light your charcoal, we highly recommend using a chimney starter. This simple tool is a game-changer when it comes to getting your coals up to temp. Simply place the starter on the bottom rack of your grill and fill it with charcoal. Light a few pieces of paper underneath the chimney and wait for the charcoal to turn ash gray – this should take about 15-20 minutes.
Once your charcoal is ready, use heat-resistant gloves to carefully pour it into the basket. Be sure not to overfill the basket with too much charcoal, as this can block airflow and cause temperature inconsistencies. Spread the charcoal out evenly and create a well in the center for placing wood chunks or chips to add some extra flavor.
With the charcoal added, it’s time to replace the cooking grates and adjust the air vents accordingly. Open them wide for high heat or close them partially for lower heat depending on what you’re cooking. Give your grill a few minutes to reach your desired temperature before adding food to the grates.
Remember these key points when adding charcoal:
- Choose your fuel source wisely
- Use a chimney starter for quick and easy lighting
- Be mindful not to overfill the basket
- Adjust air vents for optimal heat
Lighting the Charcoal
Then you must master the art of lighting the charcoal. This critical step sets the foundation for your cookout, ensuring that your food is cooked evenly and has that smoky flavor we all crave. So, let’s dive into some expert tips and tricks to light up your grill like a pro.
First and foremost, safety comes first when it comes to grilling. Therefore, make sure that your grill is in a secure location away from any flammable materials before proceeding. Once you’ve done that, it’s time to fill the charcoal basket with the right amount of charcoal. Be cautious not to overfill it and use an appropriate amount, depending on your cooking needs.
Now let’s talk about different methods of lighting the charcoal. There are various options available, including using lighter fluid, a chimney starter, or an electric starter. Each method has its unique advantages and disadvantages.
If you opt for lighter fluid, ensure that you follow the manufacturer’s instructions carefully and only use a small amount of fluid. This will prevent any flare-ups from ruining your cookout.
A chimney starter is another popular choice for lighting up your charcoal. Fill the chimney with charcoal and place it on the grill grates. Then light a piece of newspaper or fire starter cube beneath the chimney and wait for the charcoal to ignite. Once it’s glowing and covered in ash, carefully pour it into the charcoal basket.
An electric starter is yet another option for lighting up your grill. Place it on top of the charcoal and plug it in. Wait for the charcoal to ignite and then remove the starter before placing your cooking grates on top.
No matter which method you choose, wait until the charcoal burns completely until it’s covered in white ash before adding your food to the grill. This ensures that your food will cook evenly and have that delicious smoky flavor we all love.
Pouring the Charcoal onto the Charcoal Grate
Well, before you dive into the cooking, let’s talk about the crucial first step: pouring the charcoal onto the charcoal grate. This step sets the foundation for your cookout, ensuring that the charcoal burns evenly and provides the right amount of heat. So, let’s break it down step by step and make sure you get it right.
First things first – clean that charcoal grate. Any debris or build-up can restrict airflow, leading to uneven burning of the charcoal. So, take a moment to give it a good scrub before you start.
Next up, arrange your charcoal in a pyramid shape. This shape allows for better airflow and helps the charcoal burn more evenly. You can also use lighter fluid or a chimney starter for an extra boost.
Now comes the crucial moment – pouring the charcoal onto the grate. But don’t just dump it all on one spot. Carefully pour the charcoal onto one side of the grate, leaving some space between each briquette. This space ensures there is enough airflow between each briquette for even burning.
Once all of the charcoal is on there, start arranging it into a single layer with tongs or a spatula. Make sure each briquette is in contact with the grate to ensure even heat distribution. Don’t forget to leave some space between each briquette for proper airflow.
Finally, light that charcoal up using a lighter or match and let it burn for 10-15 minutes until it turns gray and ashy. This indicates that the charcoal is ready for cooking.
Replacing the Cooking Grates and Closing the Lid
Before you start cooking, let’s go over the essential steps of replacing the cooking grates and closing the lid.
Firstly, it’s crucial to ensure that your cooking grates are clean and free of any remnants from previous use. Using a wire brush or scraper, remove any sticky food particles that may cause your meat to stick. A clean grate is key to achieving those perfect grill marks on your food.
Once the grates are spotless, carefully replace them onto the grill making sure they’re securely in place. A loose grate is not only frustrating but can be dangerous too. Make sure your grates are firmly seated before proceeding to cook.
Now it’s time to close the lid before lighting up the charcoal. The lid serves multiple purposes in achieving the perfect sear on your meat. Firstly, it helps distribute heat evenly throughout the grill which is essential for cooking food properly. Secondly, it prevents flare-ups and keeps the fire from getting out of control. Lastly, it regulates the temperature inside the grill by controlling the amount of air that enters and exits. This allows you to adjust the heat levels to achieve your desired cooking temperature.
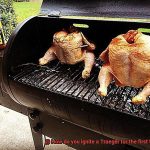
Preheating Your Grill
Are you ready to take your grilling to the next level? Then don’t skip the crucial step of preheating your Oklahoma Joe Bronco. It might seem like a small detail, but taking a few extra minutes to preheat your grill will make all the difference in the world when it comes to the flavor and texture of your food.
Let’s get started. First things first, ensure that your grill is clean and free of debris. This simple step will prevent any unwanted flavors from transferring to your food. Next, open the lid and all ventilation ports to allow for proper airflow.
Now it’s time to add your charcoal. Spread it out evenly in the firebox and be sure to follow the manufacturer’s instructions carefully if you’re using lighter fluid or starters. Safety always comes first.
Once your charcoal is lit, close the lid and wait for the temperature to reach your desired level. Keep in mind that this can take anywhere from 10-30 minutes, depending on the amount of charcoal used and weather conditions. While you wait, crack open a cold one and enjoy some sunshine.
To check if your grill is ready, you can use a thermometer or simply hold your hand over the grates. If you can only keep your hand there for a few seconds before it gets too hot, then congratulations – your grill is good to go.
Now comes the fun part – cooking. Before diving into that juicy steak or succulent chicken breast, remember to use proper grilling tools and techniques to ensure that everything turns out perfectly. And most importantly, have fun and enjoy the delicious results of all your hard work.
6KN6LoWOqNQ” >
Conclusion
In conclusion, don’t let the idea of lighting an Oklahoma Joe Bronco grill intimidate you. With the right tools and techniques, it can be a straightforward process. To start, ensure that you have quality charcoal or lump charcoal, a chimney starter, grilling utensils, and a reliable lighter or matches. Before igniting your grill, it’s crucial to position it in a secure and stable location for safety.
To light your charcoal effectively, you’ll need to master the art of removing the cooking grates and adding charcoal. There are several methods to ignite your fuel source, such as using lighter fluid, a chimney starter or electric starter. When pouring the charcoal onto the grate, make sure to do so carefully in a pyramid shape to allow for optimal airflow. Replacing the cooking grates and closing the lid will help distribute heat evenly while preheating your grill.
By following these expert-approved tips and methods, you’ll be able to control your grill’s temperature like a pro and set up your fuel for optimal cooking. Remember always to prioritize safety when grilling. With patience and practice, you’ll soon be wowing friends and family with perfectly cooked food on your Oklahoma Joe Bronco grill.