Smoking meat is an age-old tradition that requires patience, dedication, and craftsmanship. If you’re an outdoor cooking enthusiast, you know that a good smoker is a must-have. But what if your trusty smoker is looking drab and needs a face-lift? Don’t worry. Painting your smoker is a simple and effective solution that will give it a fresh new look while also protecting it from the elements.
However, painting a smoker isn’t like painting any ordinary object. You need to take certain steps and precautions to ensure that the paint adheres properly without negatively affecting the quality of your food. In this blog post, we’ll delve deep into the world of smoker painting – covering everything from preparation to finishing touches. We’ll discuss what kind of paint to use, how to prepare your smoker for painting, and how to apply the paint correctly.
By the end of this post, you’ll have all the knowledge you need to give your smoker a new lease on life without compromising on quality or taste. So let’s dive in and learn how to paint a smoker like a pro.
Contents
The Benefits of Painting Your Smoker
Painting your smoker is the perfect solution for you. Not only does it give your smoker a fresh, new look, but it also has numerous benefits that can help prolong its life.
First and foremost, painting your smoker protects it from rust and corrosion. A smoker that is left unattended or exposed to the elements can quickly become a rusted mess. By adding an extra layer of protection through painting, you can ensure that your smoker will last for years to come. Plus, a well-maintained and painted smoker can increase its resale value.
But did you know that painting your smoker can also help regulate the temperature inside? Depending on the color of the paint job, you can either absorb more heat or reflect more heat. This means you can choose a paint color to suit your cooking needs and preferences. For instance, a black paint job will absorb more heat while a lighter color will reflect more heat.
Painting your smoker can also make it easier to clean. A smooth, painted surface is much easier to wipe down than bare metal. You’ll save time and effort when it comes to cleaning up after a cookout.
When painting your smoker, be sure to follow the proper steps for preparation and use a high-heat paint specifically designed for grills and smokers. This will ensure that the paint job lasts longer and doesn’t peel off easily.
To summarize, here are some of the benefits of painting your smoker:
- It protects your smoker from rust and corrosion.
- It helps regulate the temperature inside depending on the color of the paint job.
- It makes cleaning it much easier.
- It increases its resale value.
Cleaning the Smoker Before Painting
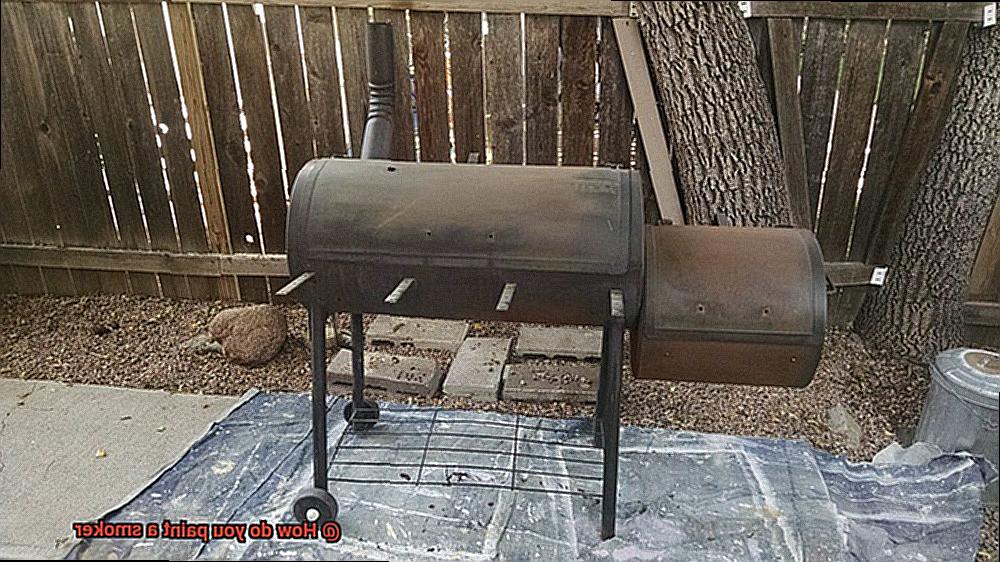
Before you start applying that shiny new coat of paint, take note: cleaning your smoker is crucial to ensure the paint adheres correctly and lasts for years. A dirty surface will cause the paint to peel, flake, or bubble, ruining all your hard work. So, let’s explore the essential steps to properly clean your smoker before painting.
Step 1: Strip Off The Old Paint
To start, remove all old paint using a wire brush or sandpaper. Be careful not to damage the metal while removing the old paint.
Step 2: Wash With Warm Soapy Water
After removing the old paint, wash the smoker with warm soapy water to remove any grease, grime, or dirt. Rinse thoroughly and let it dry completely.
Step 3: Remove Any Rust Spots
Next, remove any rust spots on the smoker’s surface using a wire brush or sandpaper. Then, wipe down the smoker with a clean cloth to remove any dust or debris.
Step 4: Scrub The Interior
Clean the inside of your smoker with hot soapy water, ensuring every nook and cranny is scrubbed free of grease and debris. Rinse thoroughly and let it dry completely.
Step 5: Let It Dry Completely
After cleaning your smoker inside-out, let it dry completely before painting. Consider leaving it in a well-ventilated area overnight to ensure it is entirely dry.
Choosing the Right Paint for a Smoker
Howdy, fellow grill masters. If you’re looking to give your smoker a fresh coat of paint, then it’s important to choose the right one. As an expert in this field, I’ve compiled some research notes to help you make the best decision.
Firstly, heat resistance is of utmost importance. Smoking involves exposing your smoker to high temperatures for hours on end, so you need a paint that can handle the heat without peeling or flaking off. It’s imperative to look for high-temperature paints that are specifically designed for use on grills and smokers. This will ensure that your smoker remains in great condition for years to come.
The type of paint is another critical factor to consider. You have two choices: oil-based or water-based. While oil-based paints are more durable and longer-lasting, they emit harmful fumes during application and require harsh chemicals for cleanup. On the other hand, water-based paints are easier to clean up and emit fewer fumes, but they may not be as durable or long-lasting as oil-based paints. So, if you’re willing to make a trade-off between durability and environmental impact, choose wisely.
Lastly, the color of the paint you choose can affect the longevity of your smoker. Darker colors absorb more heat than lighter colors, which can cause warping or damage to your smoker over time. So if you fancy a darker color, make sure you choose a paint that is specifically designed for high-temperature applications. This will ensure that your smoker remains in tip-top condition even after several years of use.
Preparing the Surface of the Smoker for Painting
As a true grill master, your smoker is more than just a cooking tool – it’s a representation of your love for the art of grilling. When it’s time to give your smoker a fresh coat of paint, you want to ensure that it looks as good as new. Preparing the surface of your smoker for painting is a critical step that cannot be skipped.
To get started, you need to consider the type of paint you will be using as different paints require different preparation methods. Once you have selected your paint, the first step is to clean the surface of your smoker thoroughly. This can be done by using a wire brush or sandpaper to remove any rust or loose debris. After sanding, wipe down the surface with a clean cloth to remove any dust or debris.
Next, you will need to apply a degreaser to the surface to remove any grease or oil residue. You can use a commercial degreaser or create your own by mixing dish soap and water. Allow the degreaser to sit on the surface for several minutes before rinsing it off with water.
Once your smoker is clean and free of debris, it’s time to fill any holes or cracks in the surface. Use high-temperature silicone caulk or high-temperature epoxy putty to fill in any gaps or holes and allow it to dry completely before moving on to the next step.
After filling any holes or cracks, sanding is next on the list. Sand the entire surface once again with a fine-grit sandpaper. This will help to smooth out any imperfections and create an even surface for painting.
Finally, before painting your smoker, it’s essential to ensure that the surface is completely dry. Allow your smoker to air dry for at least 24 hours before applying any paint. This will ensure that the paint adheres correctly and provides a long-lasting finish.
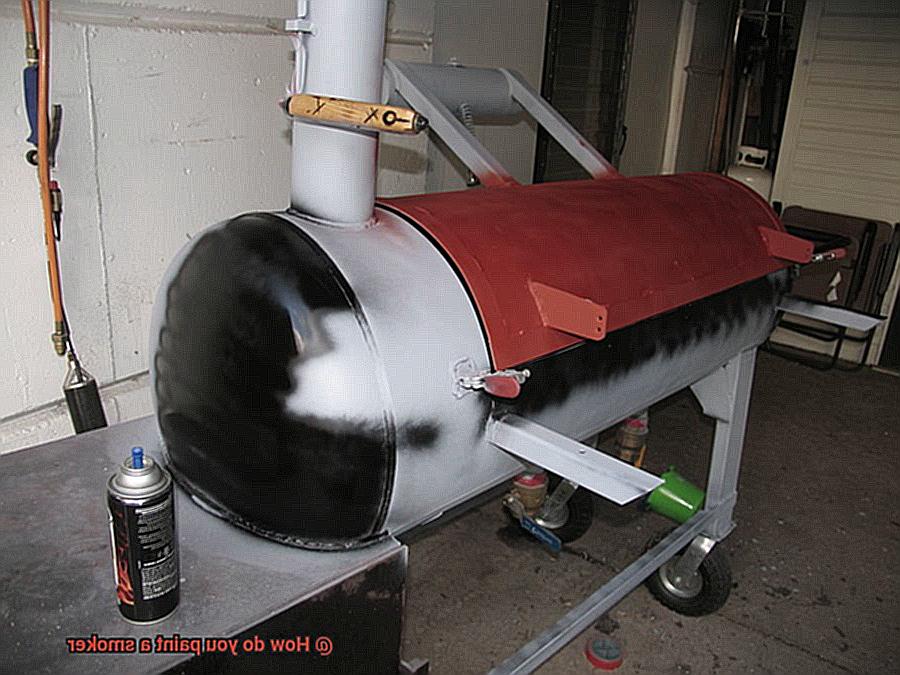
Applying Paint in Thin, Even Coats
Whether you want to add some personality or protect it from the elements, applying paint is a great way to enhance your smoker’s appearance. However, applying paint in thin, even coats is essential to achieving a smooth and professional-looking finish.
To start, make sure your smoker is free of rust, debris, and loose paint by using a wire brush or sandpaper. Then, wipe it down with a clean rag to remove any dust. Once your surface is clean, choose a high-temperature paint specially formulated for grills and smokers. These paints are designed to withstand high temperatures without cracking or peeling.
When it comes to painting, invest in high-quality brushes with synthetic bristles or spray guns with proper safety equipment like a respirator and protective goggles. Applying thin coats of paint will help ensure even coverage and proper drying. Start by applying one thin coat using long, even strokes and overlap each stroke slightly. Wait for the first coat to dry completely before applying additional coats. Repeat the process until you achieve the desired color and level of coverage.
Lastly, allow your smoker to dry completely before using it. This final step ensures that the paint has fully cured and can withstand high temperatures without cracking or peeling. By following these steps for applying paint in thin, even coats, you can achieve a professional-looking finish on your smoker that will last for years to come.
In summary, here are the tips that will help you apply paint in thin, even coats:
- Clean your smoker first
- Choose high-temperature paint
- Invest in high-quality brushes or spray guns
- Apply multiple thin coats
- Allow the smoker to dry completely before using it
Letting Each Coat Dry Completely Before Moving On to the Next
If you’re looking to give your smoker a fresh coat of paint, it’s important to remember one critical step – let each coat dry completely before moving on to the next. This one step can make all the difference in achieving a professional-looking finish.
Why is it so crucial? Firstly, allowing each coat of paint to dry fully ensures that it adheres correctly and evenly to the surface of your smoker. Rushing through the process and applying a new coat of paint before the previous one has dried completely can cause the paint to bubble or peel, resulting in an uneven finish that will require starting over from scratch.
Secondly, the drying time for each coat varies depending on several factors such as humidity levels, temperature, and the type of paint used. In general, waiting at least 24 hours before applying another coat is advisable. So be patient and avoid rushing through the process.
Thirdly, applying thin and even layers of paint is key to achieving a professional-looking finish. Overloading your brush or roller with too much paint can result in drips and uneven coverage. Take your time and apply each layer carefully.
Lastly, painting in a well-ventilated area can help speed up the drying process and ensure that each coat dries correctly. Also, consider using a fan to circulate air around the painted surface for faster drying.
Finishing Touches After Painting is Complete
Before you fire up your smoker, there are a few finishing touches that will ensure that it looks its best and lasts for years to come.
Start by removing any masking or painter’s tape that you used during the painting process. Use a gentle pull at a 45-degree angle to avoid any paint damage. If any paint does come up, don’t worry, simply use touch-up paint to fix the area.
Inspect your smoker for any spots that may need touch-up paint. It’s normal for some areas to chip or scratch during the painting process. Use a small brush and touch-up paint to cover those areas and make them look flawless.
Once you’re satisfied with your touch-ups, it’s time to protect your smoker with a clear coat of sealant. This will help prevent fading or chipping caused by exposure to sunlight and other outdoor elements. A clear coat will also give your smoker a glossy finish that will make it stand out like a work of art.
Lastly, add some personalized finishing touches to make your smoker unique. Consider adding new handles or decals that reflect your personal style and taste. These small details will make your smoker truly yours and add to its aesthetic appeal.
Tips and Tricks for Successfully Painting a Smoker
Painting a smoker is an excellent way to protect it from the elements and give it a fresh new look. However, to ensure that the paint job lasts for years to come, it’s important to follow some tips and tricks. Here are five sub-sections that will guide you through successfully painting your smoker.
Choose the Right Paint
Picking the right kind of paint is essential when it comes to painting a smoker. High-temperature paint designed specifically for grills and smokers can withstand high temperatures of up to 1200°F or more without peeling or cracking. This type of paint is available in various colors, so choose one that complements your smoker’s design.
Prep the Surface
One crucial step in painting a smoker is prepping the surface. Before painting, clean the surface thoroughly with soap and water. This removes any dirt, grease, or rust that may interfere with the adhesion of the paint. Sanding the surface lightly can also create a more porous surface for the paint to adhere to.
Use a High-Quality Primer
Using high-quality primer is vital in creating a smooth and even surface for the paint to adhere to. It also helps the paint bond better and last longer. Apply the primer evenly, making sure to cover every nook and cranny.
Apply Multiple Thin Coats
Instead of applying one thick coat of paint, it’s best to apply multiple thin coats. This prevents drips and ensures an even finish. Wait for each coat to dry completely before applying another coat. This gives you a chance to check for any flaws and correct them before applying more paint.
Protect Your Painted Surface
Once you’ve painted your smoker, protect the painted surface by covering it with a grill cover or storing it in a dry place when not in use. This prevents scratches and fading caused by exposure to sunlight, rain, or snow.
SzgHZPub0-o” >
Conclusion
In conclusion, painting your smoker is a fantastic way to revamp its appearance and shield it from the harsh outdoor elements. However, it’s crucial to take certain precautions and follow specific steps to ensure that the paint adheres correctly without compromising the quality of your food. Not only does painting your smoker protect it from rust and corrosion, but it also helps regulate its temperature depending on the color of the paint job, simplifies cleaning, and boosts its resale value.
To achieve a professional-looking finish when painting your smoker, you must start by meticulously cleaning it. This involves stripping off old paint, washing with warm soapy water, removing any rust spots, scrubbing the interior, and allowing it to dry entirely before applying any paint. It’s essential to select high-temperature paint specially formulated for grills and smokers and apply thin, even coats using top-quality brushes or spray guns. Each coat should be allowed to dry completely before proceeding to the next one.
Finally, once you’ve finished painting your smoker like a pro, remove any masking or painter’s tape used during the process. Inspect for touch-up areas that may need fixing with touch-up paint while protecting your smoker with a clear coat of sealant to prevent fading or chipping caused by exposure to sunlight or other outdoor elements. You can also add personalized finishing touches such as new handles or decals.