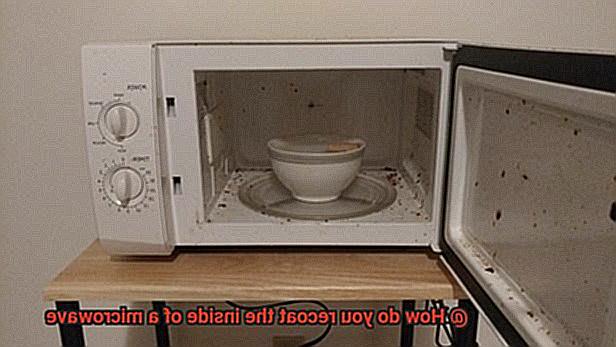
Have you noticed that your microwave isn’t performing as well as it used to? Or maybe the inside is starting to look a little worse for wear? If you’re nodding your head in agreement, then it’s time to show your microwave some love and give it a little makeover.
One way to get your microwave back in tip-top shape is by recoating the interior. Over time, the finish inside can become damaged and worn, leading to decreased efficiency. But don’t worry; recoating can help restore your microwave’s performance and appearance.

Now, where do you start with something like this? Don’t fret; we’ve got your back. In this post, we’ll walk you through everything you need to know about recoating the inside of your microwave. From the tools required and step-by-step instructions to helpful tips and tricks, we’ll make sure the process is a breeze.
So if you’re tired of feeling like your trusty microwave is on its last legs, keep reading for a fresh start.
Contents
What are the Benefits of Recoating a Microwave?
If you want to revive your microwave without breaking the bank, recoating the interior is the way to go. A fresh coat of paint can make a world of difference, from improving its performance to extending its lifespan. Here are some of the benefits of recoating a microwave:
- Prevent further damage and improve performance
- Make your microwave look brand new
- Ensure food safety
- Environmentally friendly option
Regular use can take a toll on your microwave’s interior, leading to damage and reduced efficiency. Acidic or sugary foods, as well as spills, can cause uneven heating and longer cooking times. Recoating the interior can help prevent further damage and restore your microwave’s performance.
Scratches, chips, and stains can make your microwave look worn out and unappealing. Recoating the interior can cover up these imperfections and give your microwave a fresh, new look. It’s also a cost-effective alternative to buying a new appliance.
When the interior coating is damaged, harmful chemicals can be released into your food while it’s being cooked. Recoating prevents this from happening and ensures that your food is safe to eat.
Repairing and maintaining appliances instead of replacing them reduces waste and saves resources. Recoating your microwave is an eco-friendly choice that extends its lifespan and reduces your environmental impact.
Safety Precautions to Consider Before Recoating
It’s an excellent way to save resources and reduce waste, not to mention improving its performance and appearance. However, before you get started on this exciting DIY project, it’s essential to consider some crucial safety precautions to ensure that you and your microwave stay safe.
Firstly, unplug the microwave before beginning any work on it. This may seem like common sense, but it’s a crucial step in avoiding the risk of electrocution. Once unplugged, allow the microwave to cool down entirely before attempting any repairs or recoating. Microwaves can get scorching hot during use, which is why it’s vital to let them cool completely before handling them.
Wearing gloves and protective eyewear is another critical safety precaution to take when recoating the inside of your microwave. This will protect your hands and eyes from any debris or harsh chemicals that may be produced during the process. Additionally, make sure that the area where you will be working is well-ventilated. Recoating the inside of a microwave involves using chemicals that emit fumes, which can be toxic if inhaled.
Proper ventilation is key to avoid any respiratory issues resulting from inhaling these fumes. You can open windows or use fans to ensure that there is enough air movement in the room.
Lastly, it’s crucial always to follow all instructions carefully and read the labels on any chemicals or products used during the process. Ensure that you are using the right products for your specific microwave model and follow all safety instructions provided by the manufacturer.
Step-by-Step Guide to Recoating a Microwave
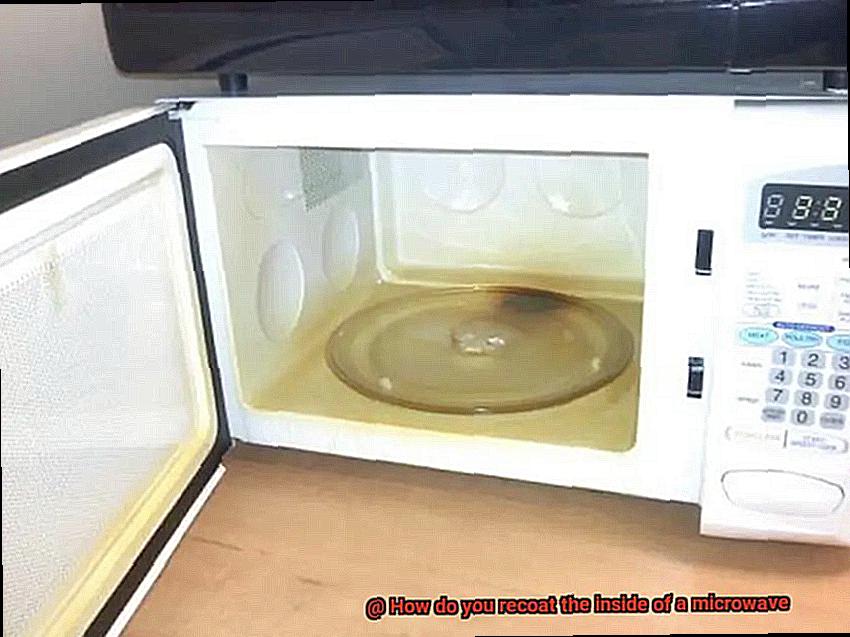
If you’ve been using your microwave for a while, you may have noticed that the inside is looking a little worse for wear. Chipped paint and rust can not only be unsightly but also affect the performance of your appliance. Fortunately, there’s a solution – recoating the inside of your microwave. But before you start, it’s important to know that this is not a simple DIY task and should only be done by a professional. Here is a step-by-step guide to recoating your microwave:
Step 1: Preparation is Key

To get started, make sure your microwave is unplugged and completely cool. Use sandpaper or a wire brush to remove any loose paint or rust from the inside of the microwave. Once you’ve cleared away debris, give it a thorough clean with soap and water to remove any grease or dirt.
Step 2: Masking
Protect any areas that you don’t want to be coated with painter’s tape, such as the door gasket and interior light.
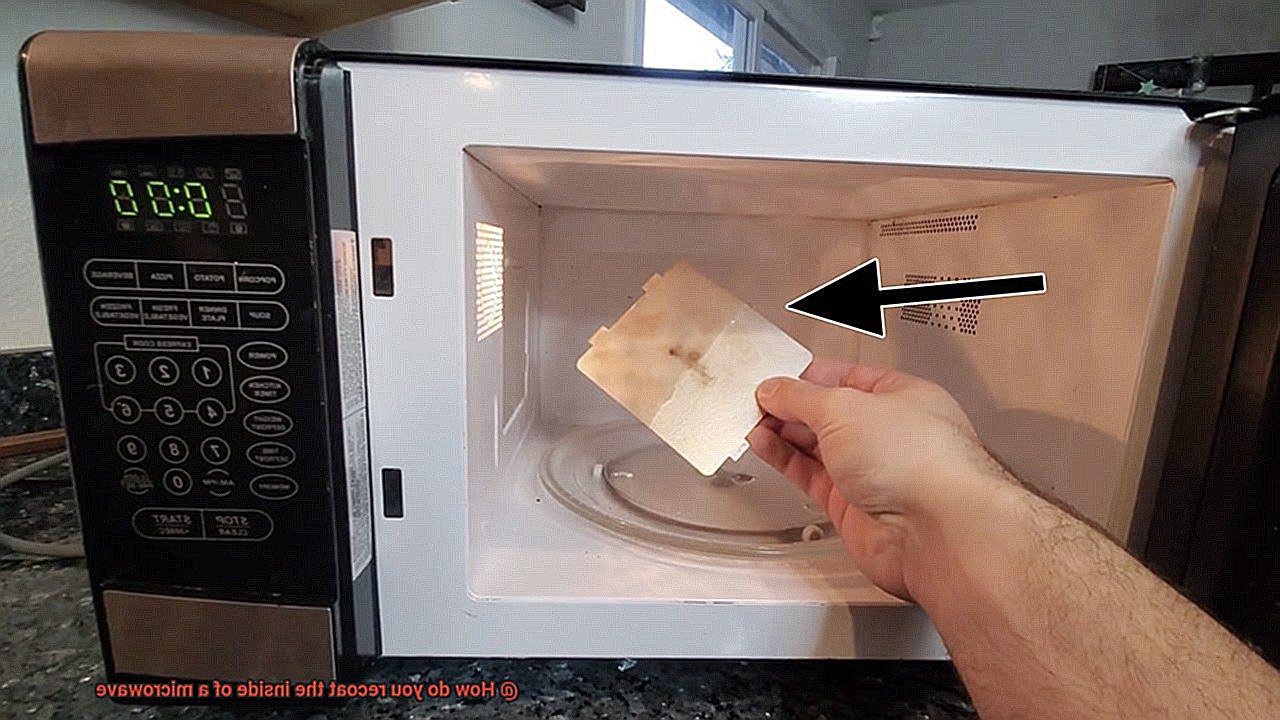
Step 3: Coating Application
Choose a spray-on coating specifically formulated for microwaves. Apply an even coat to the interior of the microwave, following the manufacturer’s instructions carefully. It’s important to note that multiple coats may be required for optimal coverage.
Step 4: Drying and Curing
Allow the coating to dry according to the manufacturer’s instructions before removing any masking tape. To ensure that the coating is fully cured and safe for use, run the microwave on high for several minutes with a bowl of water inside.
Step 5: Cleaning
After curing, wipe down the interior of the microwave with a damp cloth to remove any residue or debris. And voila – your newly recoated microwave is now ready for use.
It’s important to reiterate that recoating a microwave should only be done by a professional. Attempting to do it yourself can result in damage to your appliance or even injury. Always consult with a qualified technician before attempting any repairs or maintenance on your microwave.
Cleaning the Interior
Before you even think about recoating the interior, you need to give it a thorough cleaning to ensure that the new coating adheres properly and lasts longer.
First things first, unplug your microwave and remove any loose debris or food particles with a damp cloth or sponge. Next, grab a microwave-safe bowl, add a few drops of dish soap or vinegar to it, and place it in the microwave. Heat it on high power for 5 minutes, allowing the steam from the water to work its magic by loosening any stubborn stains or grime.
After 5 minutes, use oven mitts or a towel to carefully remove the hot bowl from the microwave. Then, grab a damp cloth or sponge and wipe down the interior of your microwave. Pay special attention to areas with stubborn stains and use baking soda mixed with water if needed to form a paste and apply it to tough stains with a soft cloth. Allow the paste to sit for a few minutes before wiping it away.
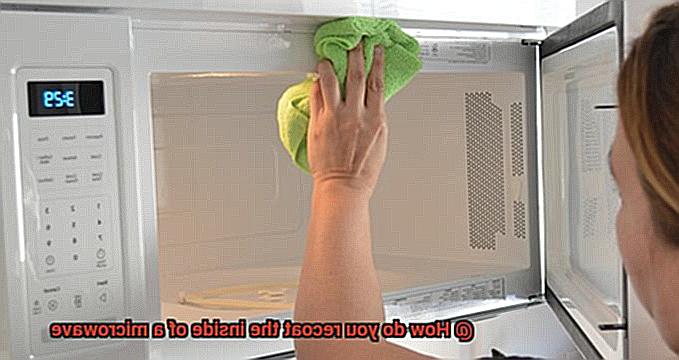
Once you’ve thoroughly cleaned your microwave’s interior, wipe it down with a dry cloth to remove any excess moisture. It’s crucial to ensure that there is no moisture left behind as it can interfere with the adhesion of the new coating. So, let your microwave air dry completely before proceeding with recoating.
To recap, here’s a list of steps to follow when cleaning the interior of your microwave:
- Unplug the microwave
- Remove loose debris
- Add dish soap or vinegar to a bowl of water
- Heat the bowl in the microwave for 5 minutes
- Remove the hot bowl carefully using oven mitts or a towel
- Wipe down the interior of your microwave with a damp cloth or sponge
- Use baking soda mixed with water for tough stains
- Wipe down the interior with a dry cloth
- Allow your microwave to air dry completely
Sanding Down Rough Areas
You stand in front of your microwave, trying to ignore the rough and uneven areas staring back at you. You know that giving it a fresh new look means taking an essential step: sanding down those rough areas. But what makes sanding so crucial? And how can you do it like a pro?
To begin, gather the necessary materials for sanding: high grit count sandpaper and a sanding block or sponge. Choosing sandpaper with a higher grit count will give you the smooth finish you’re looking for.
The next step is to remove any loose paint or rust from the inside of the microwave. You can use a scraper or wire brush for this purpose. Once you’ve removed all debris, start sanding the surface using circular motions and even pressure throughout. Pay close attention to any rough or uneven areas and continue sanding until they are smooth. Remember, being thorough is essential because any imperfections left on the surface can affect the final outcome of the recoating process.
After you’ve finished sanding, wipe down the inside of the microwave with a damp cloth to remove any dust or debris. The surface should now be smooth and ready for recoating.
Sanding down rough areas is an essential step in recoating the inside of a microwave. It helps to create a surface that’s smooth and even, giving the new coating something to adhere to. So, make sure to use high grit count sandpaper, apply even pressure, and be thorough during this step for best results.
In summary, here are some key takeaways for sanding down rough areas:
- Gather high grit count sandpaper and a sanding block/sponge
- Remove any loose paint or rust using a scraper or wire brush
- Sand in circular motions with even pressure
- Be thorough and pay close attention to rough or uneven areas
- Wipe down with a damp cloth after finishing
Applying Primer Coat
The first step is applying a primer coat, which is essential for ensuring proper adhesion and coverage of the paint. Here’s how to do it right.
Firstly, you need to clean the inside of your microwave thoroughly. Don’t miss any grease, grime, or food residue. Once you have cleaned the surface, make sure it is completely dry before moving on to the next step.
Now that your microwave is clean and dry, it’s time to choose a high-quality bonding primer specifically designed for metal surfaces. Using a paintbrush or sprayer, apply thin, even coats of the primer. Make sure each coat dries completely before applying the next one. This can take anywhere from 30 minutes to several hours, depending on the primer and environmental conditions.
After the final coat of primer has dried completely, it’s time to sand the surface lightly with fine-grit sandpaper. This step will ensure a smooth finish and remove any bumps or imperfections that may have formed during the application of the primer. Wipe the surface with a clean cloth to remove any dust or debris.
Choosing the Right Coating
You’re ready to upgrade your microwave’s look with a fresh coat of paint. But before you start painting, it’s essential to choose the right coating for the inside of your appliance. Not all coatings are created equal, and there are several factors to consider when choosing the best one for your needs.
Safety is the first and foremost consideration when choosing a coating for the inside of your microwave. You want to ensure that the coating is non-toxic and free from harmful chemicals, making it safe for use in food preparation areas.
Enamel paint is a popular option for coating the inside of a microwave due to its durability and ease of cleaning. However, it’s crucial to select an enamel paint that is specifically designed for use on appliances. These paints are more resistant to heat and wear over time, ensuring your microwave’s new look lasts longer.
Ceramic coatings are another excellent option known for their excellent insulation properties. They can help improve your microwave’s efficiency by retaining heat and distributing it evenly. While ceramic coatings may be more expensive than other options, they offer superior durability and require professional installation.
If you’re looking for a coating specifically designed for microwaves, special microwave coatings made from materials such as silicone or polyurethane are available. These coatings can withstand high temperatures and repeated use, providing exceptional long-term durability and performance.
When selecting a coating for your microwave, consider both practical and aesthetic preferences. With various options available, you can find a coating that meets your specific needs and budget.
Applying Multiple Thin Coats for a Smooth Finish
Revamping your microwave can give it a fresh new look, but it’s important to know the right process for achieving a smooth and long-lasting finish. Applying multiple thin coats of paint is the key to getting the desired outcome, and it requires patience and attention to detail.
To start, you’ll need to sand the interior of your microwave with fine-grit sandpaper. This step is crucial in creating a smooth surface for the new coating to stick to, ensuring an even application of paint.
When it comes to applying the paint, using a paintbrush or roller and thin coats is recommended. Each coat needs time to dry completely before applying the next one, which prevents drips and bumps from forming. Applying multiple thin coats also helps prevent peeling or chipping of the new coating over time.
It’s essential to follow the manufacturer’s instructions on drying times and application techniques. Applying at least two to three coats, depending on the condition of your microwave’s interior, is recommended. This process ensures that the paint dries evenly and creates a smooth finish without any imperfections.
Once all necessary coats have been applied and have dried completely, inspect the inside of your microwave for any missed spots or imperfections. Touch up as needed with additional thin coats until you are satisfied with the overall finish.
Common Mistakes to Avoid When Recoating a Microwave
Before you start, it’s important to know the common mistakes to avoid to ensure a successful and safe job.
Firstly, don’t skip the crucial step of properly cleaning the inside of your microwave before applying any coating. Neglecting this step can lead to an uneven finish and bumpy surface. Take the time to scrub away any grease or debris that may be lurking inside.
Secondly, always use a coating that is specifically designed for microwaves. Using regular paint or coating can release harmful chemicals when heated, posing a serious health hazard. Stick with a product that is designed for microwaves to ensure safety.
Thirdly, following the manufacturer’s instructions is key. Each brand may have different application and curing times, so read and follow them carefully. Skipping this step can result in an incomplete or weak finish that may not last long.
Lastly, be patient and allow sufficient time for the coating to dry and cure properly. Rushing through this step can cause premature peeling or chipping of the coating, leading to an unsatisfactory job. So resist the urge to use your newly coated microwave until it has had enough time to set.
Tips for Maintaining Your Newly Coated Microwave
Congratulations on your newly coated microwave. To ensure it stays in top condition, there are some important tips to follow. Here are five sub-sections to help you maintain its longevity and efficiency:
Clean Regularly
Frequent cleaning is crucial to prevent any food or grease buildup that can cause damage to the coating. Use a soft cloth or sponge with a mild detergent to wipe the inside of the microwave. Avoid abrasive cleaning materials or harsh chemicals that can scratch or damage the coating.
Avoid Using Metal Utensils
Metal utensils can create sparks that can be dangerous and cause damage to the coating. Instead, use microwave-safe utensils like glass, ceramic, or plastic. By using the right utensils, you can keep your microwave’s interior in excellent condition for years.
Use Covers
Covering your food with a lid or microwave-safe wrap can prevent spills and splatters that can cause damage to the coating. This will also keep your microwave clean and hygienic. It’s a simple step that will go a long way in maintaining your appliance.
Don’t Overload
Overloading your microwave with too much food or containers can cause damage to the coating and reduce its efficiency. Make sure to follow the manufacturer’s guidelines for maximum capacity. By not overloading your microwave, it will last longer and perform better.
Use Mild Cleaning Solutions
Harsh chemicals like bleach or ammonia can damage the coating, so it’s important to use mild, non-abrasive cleaning solutions like dish soap or vinegar mixed with water to clean the interior of the microwave. These solutions are effective yet gentle on the coating, ensuring its longevity.
Alternatives to Recoating a Microwave
Don’t worry, there are alternative options that can save you time, money, and the hassle of recoating.
Firstly, you can try using a microwave liner to protect the bottom of your microwave from spills and stains. These liners are made of heat-resistant materials like silicone and can be easily removed and washed. They’re a great way to keep your microwave clean and prevent stains from forming in the first place.
Another option is to use microwave-safe dishes and containers to cook or reheat food in the microwave. This will reduce the chances of spills and stains building up on the interior of your microwave. However, it’s important to double-check the labeling or do some research beforehand as not all dishes are safe for use in the microwave.
If you’re not keen on using liners or specific dishes, regular cleaning is another alternative to recoating your microwave. There are various methods for cleaning a microwave, including using a vinegar and water solution, lemon juice and water, or even just soapy water. Regular cleaning can help prevent stains and spills from building up over time and extend the lifespan of your microwave without needing to recoat it.
It’s worth noting that these alternatives may not be as effective as recoating if significant damage or stains are present in your microwave. However, they can be useful as preventative measures or temporary solutions until recoating is possible.
z9RYay7EI80″ >
Conclusion
In conclusion, recoating the inside of a microwave is a simple and cost-effective way to extend the life of your appliance.
With just a few basic tools and some specialized paint, you can restore your microwave’s interior to its original condition in no time. Whether you’re looking to save money on repairs or simply want to keep your kitchen looking its best, recoating is an excellent option.