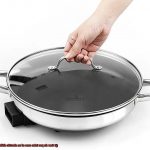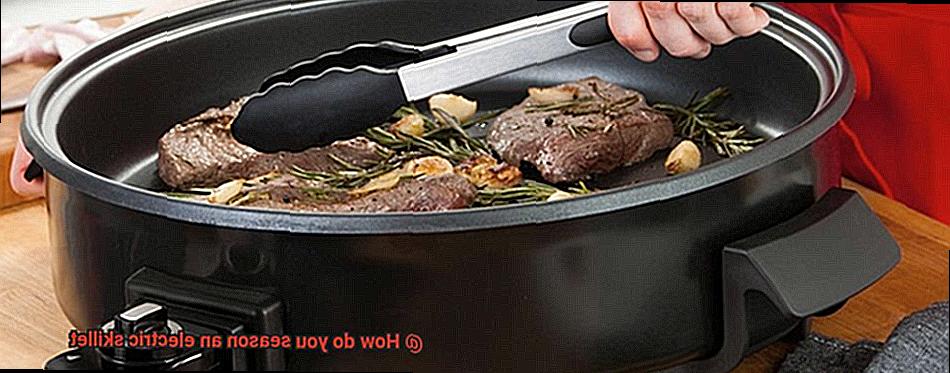
Imagine this – you’ve got a hankering for some succulent seared steak, but the moment you start cooking, your electric skillet turns on you and sticks to your meat like glue. We’ve all been there, and it’s enough to make even the most seasoned cook throw in the towel. But fear not. The solution is simple – seasoning your electric skillet.
Seasoning an electric skillet is a crucial step in creating a nonstick surface that ensures even cooking every time. This process forms a layer of patina that safeguards the skillet from rust and keeps it durable for years to come.
But how do you season an electric skillet? It’s a common question with an easy answer. In this post, we’ll delve deep into this topic, exploring different methods and materials to help you season your electric skillet like a pro.
Whether you’re a seasoned home cook or just starting out on your culinary journey, mastering the art of seasoning your electric skillet is key. From using vegetable oil to shortening as a seasoning agent, we’ll teach you everything you need to know about elevating your cooking game by seasoning your electric skillet. So let’s get started.
Contents
Step 1: Clean the Skillet Thoroughly
Before seasoning, it is essential to start with a clean slate. Properly cleaning your skillet is the first step to ensuring an even and long-lasting seasoning. Here are the steps to follow:
- Step 1: Allow the skillet to cool down completely before cleaning it. This will prevent any burns and ensure that the cleaning process is effective.
- Step 2: Gently scrub the skillet with a soft sponge or cloth and a mild dish soap. Avoid using abrasive sponges or harsh chemicals that could damage the non-stick coating of the skillet.
- Step 3: Rinse the skillet with warm water and dry it with a clean towel. Any moisture left behind can affect the seasoning process, so be sure to dry it thoroughly.
- Step 4: Ensure that the skillet is completely dry before moving on to the next step. Any leftover moisture can cause the oil to pool, resulting in an uneven seasoning.
Now that your skillet is squeaky clean, it’s time to season it for optimal non-stick performance. Choose an oil with a high smoke point, such as vegetable oil, canola oil, or flaxseed oil. Pour a small amount of oil onto the skillet and spread it evenly across the surface using a paper towel or brush.
Preheat the electric skillet to 350°F and let it heat up for 10 minutes. This will open up the pores of the metal and allow the oil to penetrate.
Once the skillet has heated up, turn off the heat and let it cool down to room temperature. Once cooled down, wipe off any excess oil with a paper towel.
Repeat this process 2-3 times until a shiny black coating forms on the surface of the skillet. This coating indicates that the skillet has been properly seasoned and is ready for use.
Remember, seasoning is not a one-time process. It should be repeated periodically to maintain the non-stick surface and prevent rust and corrosion. Regularly cleaning the skillet with soap and water and drying it thoroughly after each use will also help extend its lifespan.
Step 2: Choose the Right Oil
When it comes to seasoning an electric skillet, there’s one step you don’t want to skip: choosing the right oil. This decision can make or break the quality of your skillet’s non-stick surface. But why is it so important to choose an oil with a high smoke point? Let’s explore.
First, let’s define what a smoke point is. It’s the temperature at which an oil begins to smoke and deteriorate, losing its nutritional value and potentially releasing harmful compounds. When you’re seasoning your electric skillet, you need an oil that can withstand high temperatures without burning or smoking. This will ensure that your oil creates a smooth non-stick surface on your skillet instead of a burnt, sticky mess.
Fortunately, there are plenty of oils with high smoke points that are perfect for seasoning an electric skillet. Some of the best options include vegetable oil, canola oil, grapeseed oil, and flaxseed oil. These oils range from 400-500°F in smoke point and are affordable and easy to find at your local grocery store.
Once you’ve chosen your oil, it’s time to apply it to your skillet. But before doing so, make sure your skillet is completely clean and dry. Then, pour a small amount of oil onto a paper towel and evenly rub it over the entire surface of the skillet. Use enough oil to coat the surface but not so much that it pools or drips.
With the oil applied, preheat your skillet on medium heat for about 10-15 minutes. This helps the oil penetrate the surface of the skillet and create a smooth non-stick coating. After heating, wipe off any excess oil with a clean paper towel.
Remember to avoid using oils with low smoke points like butter or olive oil when seasoning your electric skillet. These oils can burn and smoke at high temperatures, ruining the seasoning on your skillet and possibly releasing harmful compounds into your food. Stick to using oils with high smoke points for the best results.
Step 3: Preheat the Skillet
Well, before you dive into the seasoning process, there’s a crucial step you don’t want to skip: preheating the skillet.
Why is preheating so important? Think of it as a warm-up for your skillet – it opens up the pores of the metal, allowing the oil to penetrate and bond with the surface. The result? A smooth, non-stick surface that will make cooking a breeze.
So, let’s get started on preheating your electric skillet. Begin by plugging it in and setting it to a medium-high temperature. Be patient and let it heat up for at least 10-15 minutes until it reaches its desired temperature. How do you know when it’s ready? Here’s a neat trick: sprinkle a few drops of water onto the surface. If the water sizzles and evaporates almost immediately, then your skillet is ready to go.
Before you walk away from your skillet, it’s essential to keep an eye on it during this process. Never leave it unattended and make sure that it doesn’t overheat or get too hot.
Once your skillet is preheated, turn off the heat and let it cool down slightly. You want it still warm to the touch but not hot enough to burn you. Now, your electric skillet is preheated and primed for seasoning.
Step 4: Let the Skillet Cool Down
Let’s dive into why this step shouldn’t be overlooked.
Firstly, allowing the skillet to cool down completely is crucial in ensuring that the oil has properly bonded with the surface of the skillet. If you wipe off the excess oil before it has had a chance to bond, you may end up removing some of the seasoning that you just applied. So, take a deep breath, sit back, and let the skillet cool down before wiping off any excess oil.
Additionally, letting your electric skillet cool down before wiping off any excess oil can also help prevent burns or injuries. Electric skillets can get extremely hot, and attempting to wipe off hot oil can be dangerous. So, it’s best to wait for at least 30 minutes before wiping off any excess oil to avoid any potential hazards.
In summary, by allowing your electric skillet to cool down properly after seasoning, you can ensure that your skillet stays in great condition and continues to provide delicious meals for years to come. To make things easier, here are a few key takeaways:
- Letting the skillet cool down ensures proper bonding of the seasoning with the surface of the skillet
- Wiping off excess oil too soon can remove some of the seasoning
- Waiting at least 30 minutes helps prevent burns or injuries

Step 5: Wipe Away Excess Oil
Step 5 of seasoning your electric skillet is where the magic happens. It’s time to wipe away excess oil and prepare for culinary greatness, but don’t rush in without taking some necessary precautions.
Before you start, ensure that your electric skillet has completely cooled down. This will help create a bond between the oil and the surface of the skillet and prevent any potential burns. Once it’s cooled, get your hands on a clean paper towel or cloth and gently wipe away any excess oil on the surface of the skillet.
But don’t get carried away; remember that a thin layer of oil needs to remain on the surface to protect it from rusting and provide a non-stick surface for cooking. Make sure to wipe away any excess oil that may have collected in the corners or edges of the skillet.
Safety is paramount when dealing with hot kitchen equipment, so use oven mitts or a pot holder to protect your hands while wiping away excess oil. Don’t risk getting burned; take your time and be careful.
Repeating the Process for Maximum Results
Then it’s time to consider the importance of repeating the seasoning process. By doing so, you can enhance the flavor and non-stick capabilities of your skillet, resulting in more enjoyable meals.
But why is repeating the seasoning process so crucial? The answer lies in the gradual buildup of a seasoning layer on the surface of your skillet. This layer not only prevents food from sticking but also adds depth to the taste of your dishes. By repeating the seasoning process, you can continue to build this layer and ultimately achieve better performance over time.
So how do you repeat the seasoning process? It’s simple. Just follow the steps outlined in the previous section – apply a thin layer of oil and heat the skillet for a certain amount of time. It’s recommended that you repeat this process at least 3-4 times before using the skillet for cooking.
However, it’s important to note that even after repeated seasoning, your skillet may still need periodic re-seasoning, especially if you cook acidic foods or use abrasive cleaning tools. Keep an eye on the condition of your skillet and re-season as needed to ensure its longevity and performance.
In addition to re-seasoning, proper cleaning and maintenance are equally important. Avoid harsh chemicals or abrasive materials when cleaning, and always dry thoroughly after washing. Storing your electric skillet in a cool, dry place will also prevent rusting or damage.
To summarize, here are some key takeaways:
- Repeating the seasoning process is crucial for enhancing flavor and non-stick capabilities.
- Follow the steps outlined in the previous section to repeat the process.
- Re-season as needed if you cook acidic foods or use abrasive cleaning tools.
- Properly clean and maintain your electric skillet to ensure its longevity.
- Store in a cool, dry place when not in use to prevent damage.
Benefits of Seasoning an Electric Skillet
Fear not, fellow foodies, because the solution is simple: seasoning. Not only does seasoning improve the non-stick surface of your electric skillet, but it also has numerous other benefits that cannot be ignored.
First and foremost, seasoning your electric skillet improves its non-stick surface. No more burnt bits of food or struggling to flip your pancakes. A properly seasoned skillet will allow your meals to glide smoothly on the surface without sticking or burning.
But that’s not all. Seasoning your electric skillet also improves its overall performance by ensuring even heating. This results in a better tasting and more appetizing meal. Think of the joy of enjoying evenly cooked meals without any hot spots or cold spots.
Moreover, seasoning can prolong the life of your electric skillet by preventing rust and corrosion. This means less money spent on replacements and more delicious meals to enjoy. By taking care of your cooking equipment, you’re investing in your future cooking endeavors.
Cleaning is also a breeze with a well-seasoned electric skillet. Since food doesn’t stick to the surface, you can easily wipe it clean with a paper towel or dishcloth. No more endless scrubbing or harsh cleaning chemicals.
But perhaps the most important benefit is healthier cooking. By using natural oils like vegetable or olive oil instead of cooking spray or butter, you’re reducing the amount of fat and calories in your meals. So not only are you improving the quality of your meals, but you’re also promoting healthy eating habits.
Tips for Maintaining a Non-Stick Surface on an Electric Skillet
Maintaining a non-stick surface on your electric skillet is key to ensuring that your meals come out perfectly cooked every time. Here are five sub-sections outlining tips for maintaining the non-stick surface on your electric skillet:
Use the right utensils
Avoid using metal utensils on your electric skillet as they can easily scratch and damage the non-stick surface. Instead, opt for silicone, wooden, or plastic utensils that won’t scratch or damage the coating.
Clean with care
Once your skillet has cooled down after use, gently clean it with a soft sponge or cloth and mild dish soap. Avoid using abrasive cleaners or scrubbers that can scratch the non-stick surface. Proper cleaning ensures that any food residue or grease is removed without damaging the coating.
Watch the heat
Using high heat settings on your electric skillet can damage the non-stick surface over time. Stick to medium or low heat settings to ensure that the surface remains intact and effective for years to come.
Use oil or cooking spray sparingly
Adding a small amount of oil or cooking spray to your electric skillet before cooking can help prevent food from sticking to the surface. However, too much oil or spray can leave residue that’s difficult to remove and can damage the coating.
Store it properly
When not in use, store your electric skillet in a cool, dry place away from other appliances and utensils that could scratch or damage the non-stick surface. Proper storage ensures that your electric skillet stays in top shape and maintains its non-stick effectiveness.
jue0gKPCLUY” >
Conclusion
To achieve perfectly cooked meals every time, seasoning your electric skillet is a crucial step that should not be overlooked. By following the simple steps outlined in this article, you can easily create a non-stick surface that will allow for even cooking and prevent frustrating food sticking.
Choosing the right oil with a high smoke point, preheating your skillet, and allowing it to cool down before wiping away excess oil are all important factors in achieving optimal seasoning results. Additionally, repeating the seasoning process periodically and properly maintaining and cleaning your electric skillet will help extend its lifespan and ensure top-notch performance.
The benefits of seasoning go beyond just improving its non-stick surface. It also ensures even heating, prevents rust and corrosion, makes cleaning easier, and promotes healthier cooking habits.
However, maintaining a non-stick surface requires using the right utensils, cleaning with care, watching the heat, using oil or cooking spray sparingly, and storing it properly. By implementing these tips and taking proper care of your electric skillet, you can enjoy delicious meals for years to come.
In conclusion, seasoning an electric skillet is an essential step in elevating your cooking game. With proper maintenance and care, you can enjoy perfectly cooked meals without any frustration or hassle.