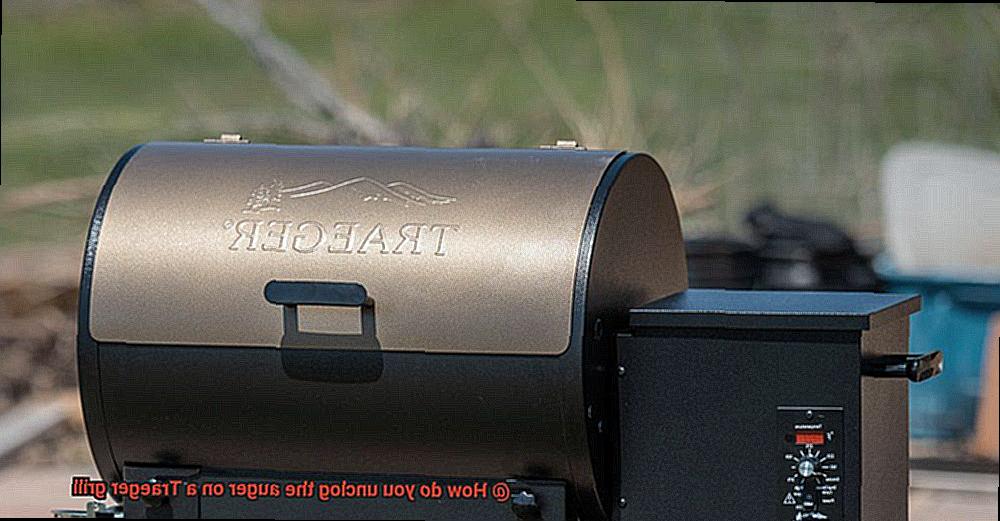
It’s finally grilling season, and you’re ready to fire up your Traeger grill for a mouthwatering cookout. But what happens when your trusty grill suddenly stops working due to a clogged auger? Don’t panic. This is a common issue that can be easily fixed at home.
The auger plays an essential role in moving pellets from the hopper to the firepot, adding that signature smoky flavor to your dishes. If it’s clogged, your grill won’t function properly, and you’ll be left with a frustrating situation. But fear not – we’ve got you covered with step-by-step instructions on how to unclog the auger on your Traeger grill.
In this blog post, we’ll cover everything you need to know about unclogging your Traeger grill’s auger, including the tools required and best practices for keeping your grill in top-notch condition. Whether you’re an experienced griller or just starting out, our guide will help get your Traeger grill back up and running so that you can impress your friends and family with delicious meals once again.
So sit tight, relax, and let us walk you through the process of unclogging that pesky auger. With our easy-to-follow instructions and helpful tips, you’ll have your Traeger grill functioning like new in no time.
Contents
What is an Auger Clog?
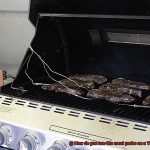
The culprit could be an auger clog, a common issue that can occur in pellet grills. The auger is a critical component of the grill responsible for feeding pellets into the firepot to create the heat and smoke necessary for cooking. When the auger becomes clogged, it disrupts the flow of pellets, leading to uneven cooking or no cooking at all.
Several factors can cause an auger to become clogged. One of the most common causes is the use of low-quality or dirty pellets. These pellets break down and create dust or debris that accumulates in the auger. Additionally, failing to clean your grill regularly can cause grease and other debris to build up in the auger, leading to a blockage.
It’s essential to note that an auger clog can sometimes be misdiagnosed as other issues such as a defective igniter or malfunctioning fan. However, there are some signs to look out for if you suspect an auger clog. These include no smoke or heat, uneven cooking, and a grinding noise from the grill.
Preventing an auger clog is easier than fixing one. To prevent future clogs, use high-quality pellets and clean your grill regularly. Here are some tips on how to handle an auger clog if it arises:
- Turn off and unplug your grill before working on it.
- Remove any damaged or wet pellets from the hopper.
- Use a vacuum cleaner or shop vac to clear out remaining debris.
- Disassemble the auger assembly by removing screws that hold the motor in place and gently lifting it away from the grill.
- Inspect the auger for any damage or blockage and use a long, thin object to push out any pellets or debris.
Why Does an Auger Clog Occur on a Traeger Grill?
As an expert on the topic, I have researched and discovered that there are two main reasons that cause this pesky issue: user error and mechanical issues.
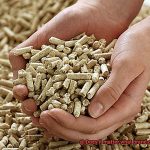
Let’s delve into the first culprit – user error. One common mistake that leads to an auger clog is overfilling the hopper. This can cause the pellets to compact and create a blockage in the auger, leading to an unpleasant experience. Additionally, using low-quality or wet pellets can also cause an auger clog. The pellets can swell up and create a blockage in the auger. To avoid such mishaps, be sure to use high-quality, dry pellets for optimal functioning of your grill.
The next cause of an auger clog is mechanical issues. A malfunctioning auger motor is a leading cause of blockages in the system, which can cause the auger to stop turning. In such cases, it is highly recommended to contact Traeger’s customer service for assistance. Another mechanical issue that can cause a blockage is a misaligned auger. This issue can be rectified by simply adjusting the position of the auger or contacting customer service for further assistance.
Lastly, failing to clean your grill regularly can also lead to an auger clog. Ashes produced from burning pellets accumulate in your grill and can lead to a blockage in the auger if not cleaned regularly. It is essential to clean out the ash after every use and deep clean your grill at least once a year.
How to Prepare for Unclogging the Auger
If you’re experiencing an auger clog on your Traeger grill, don’t panic. With proper preparation, the issue can be resolved safely and efficiently. Here are five sub-sections to follow before attempting to unclog the auger.
Step 1: Turn off and unplug the grill
Before attempting any repairs or maintenance, safety should always come first. Turn off and unplug the grill to avoid any potential accidents or injuries.
Step 2: Prepare the area
Choose a well-lit area with enough space to comfortably work on the grill. Lay down a clean towel or mat to protect the grill and prevent any small parts from getting lost. This will also make it easier to clean up any debris that may be released during the unclogging process.
Step 3: Gather necessary tools
You’ll need a few tools to effectively unclog the auger. These include a screwdriver, pliers, and a long, flexible brush or pipe cleaner. Make sure these tools are easily accessible and in good working condition. It’s also helpful to have a vacuum cleaner nearby to clean up any loose debris.
Step 4: Wear protective gear
It’s crucial to protect your hands with a pair of gloves and wear safety glasses to prevent any debris from getting into your eyes. The dust and debris released during the unclogging process can be harmful, so it’s better to be safe than sorry.
Step 5: Check the warranty
If your Traeger grill is still under warranty, it’s important to check with the manufacturer before attempting any repairs yourself. Doing so may void the warranty. If you’re unsure about anything related to your grill’s warranty, it’s always best to reach out for professional help.
Disassembling the Grill to Access the Auger

In this post, we’ll guide you through the process of disassembling the grill to access the auger in your Traeger grill.
Safety should always come first. So before beginning any maintenance or repairs, make sure that your grill is turned off and unplugged.
Step 1: Remove the grates and drip tray
The grates and drip tray need to be removed to access the auger. Carefully take them out and set them aside, making sure not to damage them.
Step 2: Unscrew and remove the heat baffle and heat shield
The heat baffle and heat shield cover the auger. You’ll need to use a screwdriver to unscrew them carefully and set them aside.
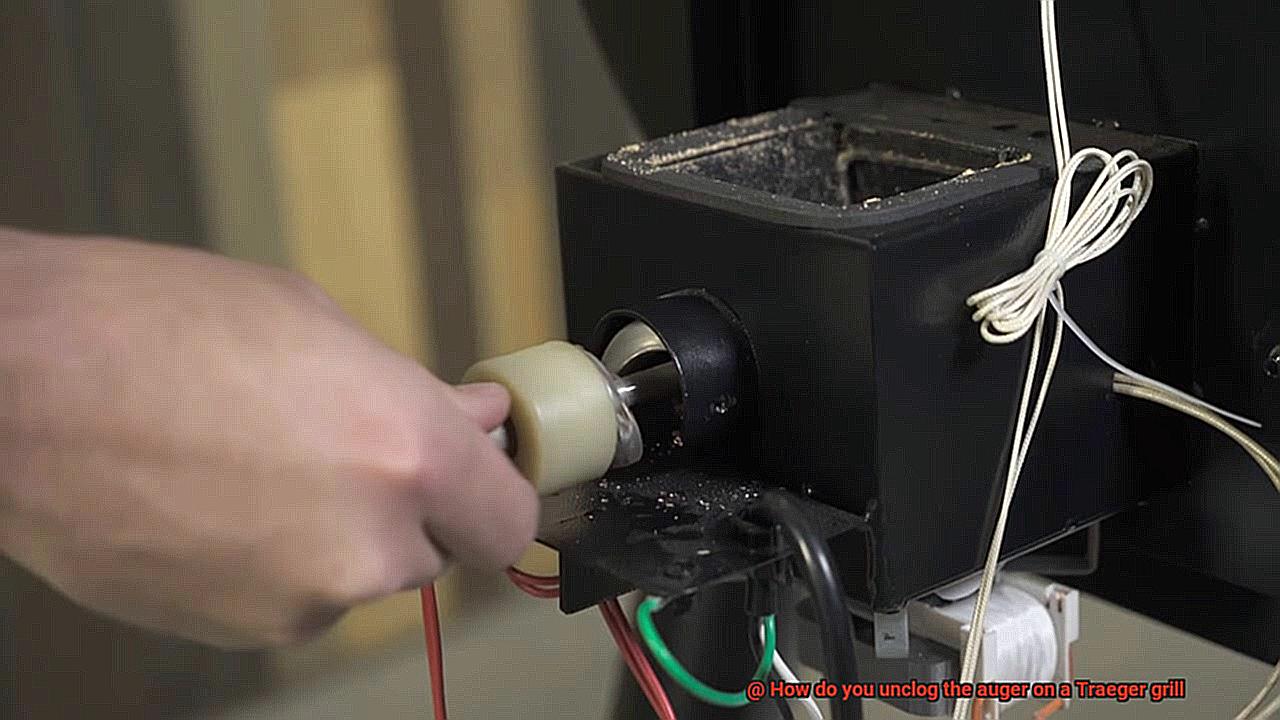
Step 3: Remove the motor and auger assembly
Now it’s time to remove the motor and auger assembly. Disconnect the motor wires carefully and slide out the auger. Make a note of how everything is connected so that you can reassemble it later with ease.
Step 4: Inspect for damage or wear and tear
Check both the motor and auger for any signs of damage or wear and tear. Once you’re certain everything looks fine, proceed with unclogging the auger.
Step 5: Unclog the auger
Use a long cleaning rod or coat hanger to gently remove any debris or pellets stuck inside the auger tube. Be careful not to scratch or damage anything while doing this.
Step 6: Reassemble everything
Now that you’ve cleaned out the auger, it’s time to put everything back together. Reassemble all parts in reverse order, making sure all screws and wires are securely fastened.
Inspecting the Auger for Blockages
Fear not, inspecting the auger for blockages is a straightforward process that can prevent these pesky interruptions.
To start, safety always comes first. Turn off the grill and unplug it from the power source. Then, remove the hopper lid and empty any remaining pellets. With a flashlight, examine the auger for any visible blockages inside the hopper.
If there are no visible blockages, continue by removing the firepot and inspecting the bottom of the auger tube. Check for any debris or pellets that might be blocking the tube. You can use a pipe cleaner or a long, thin brush to gently remove any obstructions from inside the auger tube.
Before restarting the grill, make sure there are no remaining pellets or debris inside the hopper or auger tube. Nobody wants their cookout ruined by a clogged auger. Once you’ve inspected and removed any blockages, reassemble your Traeger grill and test it before cooking again.
Regular inspection of the auger can prevent blockages from happening in the first place. Make it a habit to clean out the hopper after each use and check for any visible blockages before starting a new cooking session. Maintaining your Traeger grill properly will ensure it operates efficiently and effectively for years to come.
Removing Blockages from the Auger
Grilling is always a great idea, but a clogged auger can be a major buzzkill. Fortunately, removing blockages from the auger on your Traeger grill is a simple task that you can easily take care of yourself.
First and foremost, prioritizing safety is key. Turn off the grill and unplug it before beginning any work on the auger. Once you have access to the auger, inspect it for any visible blockages. If you see any debris or pellets stuck in there, use a wooden skewer or wire brush to gently dislodge the blockage. Remember to be gentle and avoid damaging the auger while you’re at it.
If the blockage is more severe, it might be time to remove the entire auger. But don’t worry, this isn’t as scary as it sounds. Locate the two bolts that hold the auger motor in place and remove them with a socket wrench. Gently slide the motor and auger out of the grill, being mindful of any wires or connections that may be attached.
Now that you have removed the auger, it’s time to give it a thorough cleaning. You can use a vacuum or compressed air to remove any remaining debris or pellets from inside the auger tube. Be sure to clean every nook and cranny before reassembling.
When you’re ready to reassemble, slide the auger back into place and reattach the motor with the two bolts. Finally, replace the hopper lid and plug in the grill before testing to make sure everything is working correctly.
Cleaning Out the Auger Assembly
One crucial step in achieving this is by cleaning out the auger assembly regularly. The auger assembly can get clogged with debris such as sawdust, grease, and ash over time, leading to a decrease in pellet flow and motor damage. In this guide, we’ll show you how to clean out the auger assembly like a pro.
First things first, prioritize safety. Unplug your grill and let it cool completely before starting any cleaning. Once your grill is cool, remove the grates and drip tray to access the firepot. Remove the screws that hold the auger tube in place, and carefully slide out the auger tube without damaging any wires or components.
Now comes the fun part, cleaning. Use a vacuum or brush to remove any debris from inside the auger tube and hopper. Be meticulous in this step as any leftover debris can cause future clogs. After cleaning the inside of the tube, wipe down the exterior with a damp cloth.
Moving on to the motor, use a soft brush or vacuum to remove any dust or debris from the motor area. Be gentle and cautious not to get any liquid on the motor as this can cause damage.
Once everything is cleaned and dry, reassemble all components back into place and plug in your grill. To ensure proper pellet flow and check for potential clogs, it’s recommended to run your grill on high for 10-15 minutes.
In summary, here are the steps for cleaning out your Traeger grill’s auger assembly:
- Unplug your grill and allow it to cool completely
- Remove grates and drip tray to access firepot
- Remove screws holding auger tube in place
- Carefully slide out auger tube without damaging any wires or components
- Use a vacuum or brush to clean the inside of the auger tube and hopper
- Wipe down the exterior with a damp cloth
- Use a soft brush or vacuum to remove any dust or debris from the motor area
- Reassemble all components back into place and plug in your grill
- Run your grill on high for 10-15 minutes to ensure proper pellet flow and check for potential clogs.
Reassembling the Grill
Now it’s time to get back to grilling those delicious meals. However, reassembling your grill can be a bit intimidating. To ensure that your grill functions safely and properly, attention to detail and proper alignment of all parts is essential. Here are some easy steps to follow for reassembling the grill.
First, start by reattaching the hopper to the body of the grill. The hopper holds all the pellets that fuel the grill’s fire, so it is essential to tighten all screws and bolts securely to prevent any pellets from spilling out.
Next, reattach the auger motor to the hopper. Ensuring that the motor is properly aligned and tightened securely will allow the auger to turn without any issues.
Now it’s time to reattach the auger to the motor. This step is crucial since the auger is responsible for delivering pellets to the fire pot. It’s important to make sure that the auger is inserted correctly into the motor and tightened securely.
After that, reattach the fire pot and heat shield to the body of the grill. The fire pot is where the pellets are burned, and the heat shield helps protect other components from heat damage. Make sure that they are positioned correctly and tightened securely.
Finally, reattach the grates and drip tray. These parts are where your food sits while it cooks, so you’ll want to make sure they are secure and in their proper place.
Once everything is put back together, it’s important to test your grill before using it again. Turn on the grill and allow it to run for a few minutes to ensure that everything is functioning properly. Double-check all connections and parts for any loose screws or bolts.
ykI6KKpXXa8″ >
Also Read: How to Remove Pellets from Traeger Auger
Conclusion
In conclusion, a clogged auger can be a real buzzkill when you’re all set to grill up a storm on your Traeger grill. But don’t let it dampen your spirits. Armed with the right tools and knowledge, you can easily unclog the auger at home and get back to cooking up a feast.
Safety first. Always turn off and unplug your grill before attempting any repairs or maintenance. A clog can occur due to user error or mechanical issues like overfilling the hopper or a malfunctioning motor. To avoid future blockages, use high-quality pellets and clean your grill regularly.
Unclogging the auger involves five simple steps: prepare the area, gather necessary tools, wear protective gear, check the warranty, and turn off and unplug the grill. Once you have everything in place, it’s time to dive in.
Disassembling the grill is an essential part of accessing the auger. Remove grates and drip tray, unscrew and remove heat baffle and shield, take out motor and auger assembly, inspect for damage or wear and tear, unclog with cleaning rod or coat hanger, then reassemble everything securely.
Inspecting for blockages involves removing hopper lid and checking for visible blockages inside hopper using a flashlight. Remove firepot to inspect bottom of auger tube for debris or pellets blocking tube using pipe cleaner or long thin brush.
Removing blockages from the auger may require gentle dislodging of debris using wooden skewers or wire brushes if visible in hopper. In severe cases where blockage is present throughout the entire auger assembly, you may need to remove it entirely.
Cleaning out the auger assembly involves vacuuming or brushing out debris from inside of tube and hopper while being cautious not to get any liquid on motor that could cause damage. Reassemble all components back into place securely before testing your grill before using it again.
With these easy-to-follow instructions and helpful tips, you can unclog your Traeger grill’s pesky auger blockage issue like a pro.