Are you a coffee lover who craves the bold and rich flavor of Italian-style espresso, but lacks access to a fancy coffee maker? Don’t fret. A moka pot can easily satisfy your caffeine cravings. However, if you’re using a glass top stove, you might be wondering if it’s safe to use a moka pot without damaging your stove.
Fear not, my fellow coffee aficionados. Using a moka pot on a glass top stove is not only possible but also deliciously easy. With some simple tricks and important safety measures, you can enjoy piping hot espresso without any damage or accidents.
First things first – choosing the right size of moka pot for your stove is crucial. Selecting one that’s too large or too small can cause uneven heating and potentially harm your stove. Additionally, make sure that your moka pot has a flat bottom to avoid scratches or damages to your glass top surface.
Another essential tip is to avoid overheating the moka pot. Glass top stoves heat up faster than other stovetops, so keep an eye on your moka pot and turn down the heat if necessary.
Using a moka pot on a glass top stove might seem intimidating at first, but it’s actually quite simple. All you need are these key tips and some practice, and voila. You’ll be brewing perfect espressos in no time.
So go ahead and indulge in that aromatic cup of espresso with confidence – thanks to these tips for using a moka pot on a glass top stove.
Contents
Choosing the Right Size Moka Pot
Choosing the right size moka pot is key to ensuring a perfect cup of coffee without damaging your stove. Here are some factors to consider:
Burner size: The size of your stove’s burner is an important factor to consider when choosing a moka pot. You want to select a pot that sits comfortably on the burner without hanging over the edges. This will prevent uneven heating and potential damage to your stove.
Desired coffee quantity: Consider how much coffee you want to make at once. If you’re the only coffee drinker in your household, a small 1-2 cup moka pot may suffice. But if you frequently entertain or have multiple coffee drinkers in your household, a larger pot may be necessary.
Brewing time and strength: The size of your moka pot also affects the brewing time and strength of your coffee. A smaller pot will brew faster and deliver a stronger cup of coffee, while a larger pot will take longer to brew and produce a milder cup.
Proper technique: Once you’ve chosen the right size moka pot for your glass top stove, it’s important to use the proper technique. Fill the lower chamber with cold water up to just below the safety valve, add finely ground coffee to the filter basket, and screw the top part of the pot onto the base tightly. Place it on your stove over medium-low heat, and as soon as you hear a gurgling sound, turn off the heat and let the coffee continue percolating until it stops completely.
Filling the Lower Chamber with Water

Well, the first step is filling the lower chamber with water, and I’m here to guide you through it like a pro.
To ensure that your moka pot works properly and your stove remains undamaged, there are some important things to keep in mind when filling the lower chamber with water.
Firstly, always use cold water when filling the lower chamber. This will guarantee that the water heats up evenly as it flows through the coffee grounds and into the upper chamber, resulting in a deliciously brewed cup of coffee.
Next, fill the lower chamber up to the designated fill line. Avoid overfilling it, as this can cause boiling water to be forced through the coffee too quickly, leading to a bitter taste. On the other hand, underfilling the chamber may result in weak coffee. It’s all about finding the perfect balance.
It’s also important to ensure that the gasket and filter are properly in place before screwing on the upper chamber. This will prevent any leaks during brewing and ensure that your coffee tastes just as good as it smells.

Finally, when placing your moka pot on the stove, make sure it’s centered over the burner and not touching any other pots or pans on the stove. This will prevent any damage to your stove and ensure that your moka pot brews evenly.
Adding Coffee to the Filter Basket
The art of brewing a perfect cup of coffee starts with the simple act of adding coffee to the filter basket. If you’re using a moka pot on a glass top stove, this step is crucial to achieving that rich, bold flavor that gets you going and ready to tackle the day.
To begin, let’s talk about the type of coffee you need. The ideal coffee for a moka pot is a medium roast with a fine grind. This allows for optimal extraction and flavor, giving you that perfect cup every time. So, make sure you have the right type of coffee on hand before starting the brewing process.
Now, it’s time to measure out your coffee. The amount you need will depend on the size of your moka pot and how strong you like your coffee. As a general rule, use one heaping tablespoon of coffee per cup of water. Be careful not to overfill the filter basket, as this can lead to clogs and affect the brewing process.
With your desired amount of coffee measured out, it’s time to add it to the filter basket. Make sure it’s evenly distributed and use a tamper or spoon to lightly press down on it. But don’t pack it too tightly – we want to create an even surface for the water to flow through.
Now that your coffee is in place, it’s time to assemble your moka pot. Make sure everything is securely attached and that the spout is facing towards you. Then turn on the heat to medium-low and wait for the water to boil and begin brewing.
As you watch your moka pot work its magic, take a moment to appreciate the simplicity and beauty of this process. Adding coffee to the filter basket may seem like a small step, but it’s crucial to getting that perfect cup every time. By using the right type of coffee and measuring it carefully, you can ensure that your brewing process goes smoothly and yields delicious results.
Screwing on the Top Part of the Moka Pot
Using a moka pot on a glass top stove adds an extra layer of complexity to the process, and screwing on the top part of the pot is a crucial step that requires careful attention.
The top part of the moka pot is comprised of the upper chamber and lid, which need to be tightly screwed on to prevent any leaks or spills. Before screwing on the top part, ensure that the bottom part of the pot is securely fastened onto the stove and set the heat source to medium-low. This gradual heating process is essential for brewing a perfect cup of coffee.
When screwing on the top part of the moka pot, start by checking that the rubber gasket or seal is in place. This gasket creates a tight seal between the two parts of the pot, preventing any water or steam from escaping. If it’s damaged or missing, replace it before use.
Next, carefully screw on the top part of the moka pot onto the bottom part while holding onto both parts firmly to prevent any accidental spills or drops. Once the top part is securely in place, turn up the heat slightly and wait for the water in the bottom chamber to boil and percolate up into the upper chamber.
To avoid potential damage to both your stove and moka pot, it’s recommended to use a diffuser or heat-resistant mat when using your moka pot on a glass top stove. This will help distribute heat evenly and prevent any mishaps.
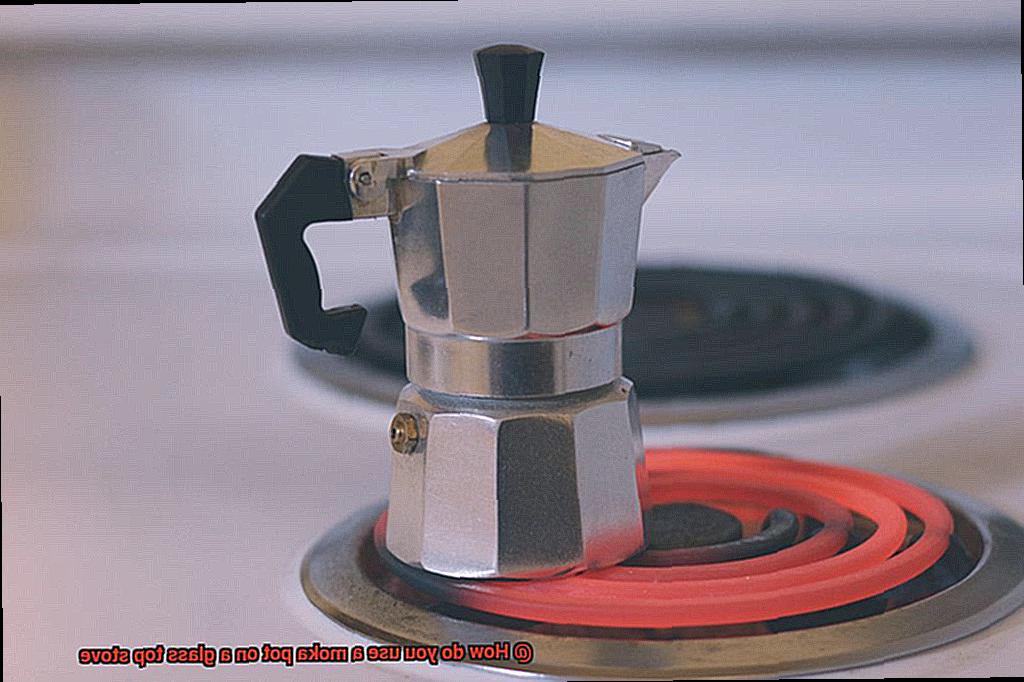
Heating the Moka Pot on a Glass Top Stove
Well, you’re in luck. However, it’s important to know that glass top stoves require some extra care and attention when using certain types of cookware, including moka pots.
To avoid any potential damage or accidents, it’s essential to choose a moka pot with a smooth and flat bottom that can sit evenly on the glass top stove. Additionally, it’s crucial to ensure the size of the pot matches the size of the heating element on the stove. Following these tips will help you heat your moka pot safely and efficiently.
Now, it’s time to get brewing. Fill the bottom chamber of your moka pot with cold water up to the designated level and add your desired amount of coffee grounds to the filter basket. Place the pot on the burner and turn on the heat to medium-high.
However, don’t walk away just yet. Keep a close eye on the moka pot as it heats up, as it can quickly reach high temperatures and boil over if left unattended. Once you hear that magical gurgling sound and coffee starts flowing into the top chamber, quickly remove the pot from the heat source.
To prevent any residual heat from damaging your glass top stove, use a trivet or heat-resistant pad under the moka pot before setting it down. This will help disperse any heat and protect both your moka pot and stove.
Listening for Gurgling Sounds
There’s one simple trick that can ensure you make the perfect cup of coffee every time: listening for gurgling sounds.
To achieve this, there are a few steps you should follow:
Use the Right Amount of Water and Coffee Grounds
Before starting the brewing process, make sure to measure the right amount of water and coffee grounds. While most moka pots come with instructions on how much water and coffee to use, it’s always best to experiment with different ratios until you find your perfect blend.
Keep an Eye on the Moka Pot
While brewing your coffee, it’s crucial to keep an eye on the pot to prevent boiling over. If you notice that the water is starting to boil over, simply turn down the heat and wait for the gurgling sound to start again.
Listen for Gurgling Sounds
The gurgling sound is an indication that your coffee is ready to be served. It signals that the water is boiling and the coffee is brewing correctly. So, listen carefully for that sound as it’s a vital step in making the perfect cup of coffee.
Look at the Top of the Pot
Another way to tell when your coffee is ready is by looking at the top of the pot. Once you see a steady stream of coffee coming out, it’s time to remove the pot from the stove and pour yourself a delicious cup of coffee.
By following these steps and listening for gurgling sounds, you’ll be able to make the perfect cup of coffee every time without damaging your glass top stove.
Allowing the Coffee to Percolate
The sound of coffee percolating in a moka pot is music to the ears of coffee aficionados. But did you know that allowing the coffee to percolate properly is the key to brewing the perfect cup of joe? Here’s everything you need to know about allowing your coffee to percolate.
First things first, never leave your moka pot unattended during the percolation process. It’s tempting to step away and let the coffee do its magic, but it’s not worth the risk of over-extraction or burnt coffee. Keep a close eye on the pot and listen for that characteristic percolating sound.
Once you hear that sound, it’s time to lower the heat to a simmer. This ensures that your coffee continues to brew without burning, resulting in a rich and flavorful cup of coffee. Don’t forget to keep the lid open during this process as this will allow you to monitor the progress of your coffee and prevent over-extraction.
The length of time needed for your coffee to percolate varies depending on several factors such as the size of your moka pot, the amount of coffee used, and your personal preference for strength. As a general rule of thumb, it should take around 5-10 minutes for a full pot of coffee to percolate.
Once your coffee has finished percolating, remove the moka pot from the heat and transfer it to a heat-resistant surface. It’s crucial to let it cool down before serving or cleaning as it will be extremely hot from the brewing process.
In summary, allowing your coffee to percolate is an essential step in using a moka pot on a glass top stove. Here are some tips to follow:
- Keep a close eye on your pot and listen for that characteristic percolating sound.
- Lower the heat to a simmer once you hear that sound.
- Keep the lid open during this process to monitor the progress of your coffee.
- The length of time needed for your coffee to percolate varies depending on several factors.
- Let your moka pot cool down before serving or cleaning.
Pouring Out the Freshly Brewed Coffee
As a coffee aficionado, you know that brewing coffee with a moka pot on a glass top stove is an art. But the art doesn’t end with brewing – pouring out the freshly brewed coffee is equally important. Here’s how to do it like a pro.
First and foremost, safety is paramount. The moka pot will be hot to the touch, so use a hot pad or oven mitt to handle it. Once you’ve got that covered, remove the moka pot from the stove and place it on a heat-resistant surface like a trivet or wooden board.
Next, it’s time to give your coffee a quick stir. Use a spoon to stir the coffee before pouring it out. This will ensure that any sediment is evenly distributed and won’t settle at the bottom of your cup. You wouldn’t want your last sip to be gritty.
Now, let’s get pouring. Pouring too quickly or vigorously can cause spillage or splashing, which is not what you want when dealing with hot coffee. Hold the moka pot close to your cup and pour from a low height. Take it slow and steady – savor every moment of this delicious process.
Congratulations. You’re now ready to enjoy your freshly brewed cup of coffee. Don’t forget to clean your moka pot properly after each use to maintain its longevity and functionality.
In summary, here’s how to pour out the freshly brewed coffee from your moka pot:
- Use a hot pad or oven mitt to handle the hot moka pot
- Remove the moka pot from the stove and place it on a heat-resistant surface
- Use a spoon to stir the coffee before pouring it out
- Pour slowly and steadily from a low height, holding the moka pot close to your cup
- Clean your moka pot properly after each use for maximum longevity and functionality
q1QTWbz120k” >
Conclusion
In summary, mastering the art of using a moka pot on a glass top stove is not only feasible but also quite enjoyable. By implementing some simple yet essential tips and safety precautions, you can relish a hot cup of espresso without any mishaps or damages.
The key to success lies in selecting the appropriate size of the moka pot for your stove, filling the lower chamber with cold water up to the designated level, and adding finely ground coffee to the filter basket. Tightening the top part of the moka pot while holding onto both parts firmly is crucial to prevent any spills or drops.
As you listen for gurgling sounds indicating that your coffee is ready to be served, ensure that you let it percolate correctly by lowering the heat to a simmer once you hear that sound. Finally, pour out your freshly brewed coffee slowly and steadily from a low height while holding your moka pot close to your cup.
With these tips in mind, brewing perfect espressos on your glass top stove will become second nature.