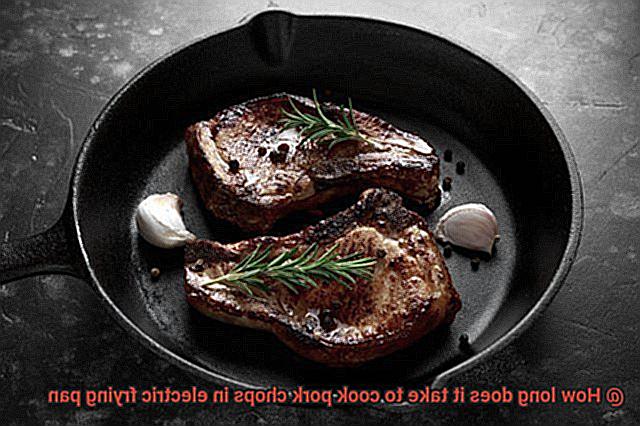
Do you want to cook pork chops without breaking a sweat? Your electric frying pan can do the job for you. This multi-purpose appliance is perfect for cooking pork chops to perfection. Its even heat distribution ensures that the meat is cooked through and juicy every time. But, how long does it take to cook pork chops in an electric frying pan?
The answer depends on several factors such as the thickness of your chops, temperature of your pan, and personal preference for doneness. However, as a general rule of thumb, expect your pork chops to take between 8-10 minutes to cook on each side or until they reach an internal temperature of 145 degrees Fahrenheit.
This blog post will guide you through the ins and outs of cooking pork chops in an electric frying pan. We’ll cover everything from choosing the best cuts of meat to seasoning and marinade options available. Whether you’re a seasoned home cook or just starting out in the kitchen, we’ve got you covered. So put on your apron and let’s get started.
Contents
Factors Affecting Cooking Time
Cooking pork chops in an electric frying pan is a simple way to prepare a delicious protein, but it requires careful consideration of various factors that can affect cooking time. The thickness of the pork chops is one of the most crucial factors that can impact cooking time. Thicker cuts of pork require longer cooking times compared to thinner ones, so it is essential to consider this factor when determining cooking time. For example, bone-in pork chops that are 1 inch thick will take approximately 8-10 minutes per side to cook thoroughly.
Another critical factor that affects cooking time in an electric frying pan is the temperature of the pan. Cooking at higher temperatures will cook the pork chops faster, while lower temperatures will take longer. However, cooking at higher temperatures may result in a crispy exterior but could potentially dry out the pork chops inside. Conversely, lower temperatures may result in a more tender and juicy interior but with a less crispy exterior. Therefore, it is important to find the perfect balance between temperature and desired texture.
The number of pork chops being cooked at once can also affect the cooking time in an electric frying pan. Overcrowding the pan can cause uneven cooking or steaming instead of frying, leading to an undesirable texture. It is essential to ensure that the pork chops are not overcrowded in the electric frying pan for optimal results.
The type of cut used can also affect cooking time as different cuts of pork have varying levels of fat content and connective tissue. Boneless pork chops tend to cook faster than bone-in pork chops due to their thinner composition. Therefore, it is crucial to select the right cut for your recipe and adjust your cooking time accordingly.
To ensure that your pork chops are perfectly cooked, use a meat thermometer to check for doneness. Pork should be cooked to an internal temperature of 145°F (63°C) for safe consumption. Moreover, it is important to let your pork chops rest for a few minutes before serving them. This allows the juices to redistribute within the meat, resulting in tender and juicy pork chops.
Thickness of Pork Chops
Let’s start with the thickness of your pork chops. The thickness of your chops plays a crucial role in determining the cooking time, as thicker cuts require more time on the heat than thinner ones. A general rule of thumb for 1-inch thick pork chops is to cook them for about 4-5 minutes per side on medium-high heat. However, if your pork chops are thicker than 1 inch, you may need to adjust your cooking time accordingly.
To ensure that your pork chops are cooked to perfection, use a meat thermometer to check the internal temperature of the meat. The USDA recommends cooking pork to an internal temperature of 145°F (63°C) with a 3-minute rest time before serving. This will ensure that your pork is cooked thoroughly and safe to eat.
Conversely, if your pork chops are thinner than 1 inch, it’s essential to reduce your cooking time to prevent overcooking and drying out the meat. A thinner chop can be cooked for about 2-3 minutes per side on medium-high heat. Keep a close eye on the meat while it cooks to prevent overcooking.
It’s also important to note that different electric frying pans may have varying heating elements or heat settings that can affect cooking times. Adjust accordingly and keep a close eye on your pork chops as they cook.
Temperature of the Pan
Cooking pork chops in an electric frying pan can be a delicate art, and one of the most crucial components to getting it right is the temperature of the pan. Knowing how to heat your pan to the correct temperature can mean the difference between juicy, tender pork chops and dry, tough ones. In this post, we’ll explore everything you need to know about the temperature of your electric frying pan.
To cook pork chops perfectly, you should aim for a temperature range between 350-375°F. This range ensures even cooking without leaving your meat dry or tough. However, it’s important to note that different types of electric frying pans have varying temperature settings or heating capabilities. Refer to your user manual to determine the ideal temperature setting for cooking pork chops on your specific electric frying pan.
To test the temperature of your electric frying pan, you can use a simple trick: sprinkle a few drops of water onto the surface of the pan. If the water sizzles and evaporates immediately, then your pan is ready for cooking. If not, continue heating until it reaches the desired temperature.
Maintaining a consistent temperature throughout the cooking process is also essential. Here are some tips to make sure your pork chops are cooked to perfection:
<
- Adjust the heat as necessary: If you notice that your pork chops are cooking too quickly or slowly, adjust the heat accordingly.
- Use a meat thermometer: This tool helps ensure that your pork chops reach an internal temperature of 145°F (63°C) before serving.
- Monitor progress closely: Keep an eye on your pork chops as they cook to ensure that they’re not overcooking or undercooking.
Desired Level of Doneness
Cooking pork chops in an electric frying pan can be a daunting task, but with the right tips, you can achieve the perfect level of doneness to impress your family and friends with your culinary skills. The desired level of doneness is everything when it comes to pork chops, and the United States Department of Agriculture (USDA) recommends cooking pork to an internal temperature of 145°F (63°C) with a three-minute rest time before serving. This ensures that your pork chops are not only delicious but also safe to eat.
Achieving the perfect level of doneness requires monitoring the internal temperature of your pork chops as they cook in the electric frying pan. The easiest way to do this is by using a digital meat thermometer. Simply insert it into the thickest part of the meat without touching any bones, and you will get an accurate reading of the internal temperature. Remember that the temperature will continue to rise by several degrees during the resting time after cooking.
If you prefer your pork chops cooked differently, no worries. You can adjust the cooking time according to your personal preferences. For medium-rare pork chops with a pink center, cook them until they reach an internal temperature of 135°F (57°C) and allow them to rest for three minutes before serving. For well-done pork chops with no pink in the center, cook them until they reach an internal temperature of 160°F (71°C).
Thickness is another essential factor to consider when determining the cooking time for your pork chops. Thicker pork chops require more cooking time than thinner ones. A general rule of thumb is to cook your pork chops for around four to six minutes per side on medium-high heat in an electric frying pan, depending on their thickness.
In summary, achieving the desired level of doneness when cooking pork chops in an electric frying pan is all about monitoring the internal temperature and adjusting the cooking time accordingly. Here are some tips to help you achieve your desired level of doneness:
- Use a digital meat thermometer to monitor the internal temperature
- Cook for around four to six minutes per side on medium-high heat in an electric frying pan
- Adjust cooking time according to the thickness of your pork chops
- Rest for three minutes before serving
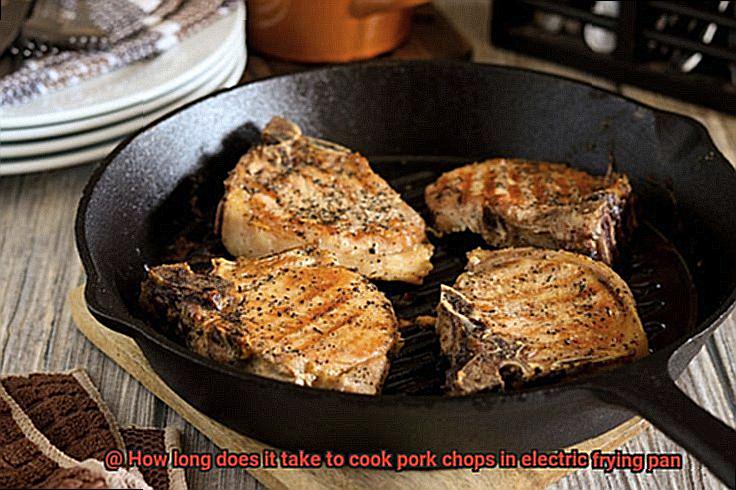
Recommended Cooking Time for 1-Inch Thick, Bone-In Pork Chops
As an expert in the field, I have gathered all the necessary tips and tricks to ensure that your pork chops come out juicy, flavorful, and cooked to perfection.
To start, it is crucial to note that the recommended cooking time for bone-in, 1-inch thick pork chops is between 8-10 minutes per side. However, this timing can vary depending on factors such as the heat of your electric frying pan and how well-done you prefer your meat. Keep an eye on your pork chops as they cook and use a meat thermometer to ensure that they reach an internal temperature of at least 145°F (63°C), making them safe to eat.
If you’re working with boneless pork chops or thinner cuts of meat, the cooking time will be shorter. For boneless pork chops, aim for around 4-5 minutes per side. Thinner cuts like pork cutlets or medallions may only need 2-3 minutes per side.
Aside from timing, it’s essential to adjust the cooking time based on the heat of your electric frying pan. If your pan is too hot, you may need to reduce the cooking time slightly to prevent overcooking. On the other hand, if your pan is not hot enough, you may need to increase the cooking time.
To ensure that your pork chops are tender and juicy, it’s important to let them rest for a few minutes before serving. This allows the meat’s juices to redistribute throughout the chop and ensures that every bite is packed with flavor.
How to Achieve the Desired Level of Doneness with a Meat Thermometer
Cooking pork chops in an electric frying pan is a mouth-watering experience. However, it’s essential to achieve the perfect doneness to ensure that the meat is safe and tasty. The key to achieving the desired level of doneness is by using a meat thermometer. Here are five sub-sections that will guide you on how to use a meat thermometer when cooking pork chops in an electric frying pan.
Know the Temperature Ranges
Different levels of doneness require different internal temperature ranges. For medium-rare pork chops, the thermometer should read 145°F (63°C), while for well-done pork chops, it should read 160°F (71°C). Before you start cooking, make sure you know the desired level of doneness.
Insert the Thermometer Correctly
To get the most accurate reading, insert the meat thermometer into the thickest part of the pork chop, making sure not to touch any bones. This will ensure that your pork chops are cooked evenly.
Check the Temperature Frequently
The temperature of the pork chop will continue to rise slightly after it is removed from the heat source. Therefore, remove it from the heat when it is a few degrees away from the desired temperature. Check the temperature frequently while cooking to avoid overcooking or undercooking your pork chops.
Let Your Pork Chops Rest
Letting your pork chops rest for a few minutes before serving helps to distribute the juices evenly throughout the meat and ensures that your pork is tender and juicy. Don’t forget this crucial step.
Adjust Cooking Time as Needed
The thickness of your pork chop and the heat setting on your electric frying pan will determine the cooking time needed to achieve perfect doneness. Thinner pork chops may take as little as 5-6 minutes per side on medium-high heat, while thicker cuts may take up to 10-12 minutes per side on medium heat. Be patient and adjust the cooking time as needed to achieve the desired level of doneness.
Letting the Pork Chops Rest before Serving
You’ve done everything right: you seasoned your pork chops, cooked them to perfection in your electric frying pan, and now you’re ready to serve. But wait. Don’t make the mistake of cutting into them just yet. Letting your pork chops rest before serving is a crucial step that can make all the difference in achieving a juicy and tender result.
Why is resting so important? During cooking, the heat forces the juices in the meat towards the center. If you cut into the pork chops too soon, those juices will escape and leave you with a dry and tough texture. By letting your pork chops rest, you give the juices time to redistribute throughout the meat, resulting in a more flavorful and moist pork chop.
To properly let your pork chops rest, remove them from the heat source and place them on a clean plate or cutting board. Cover them loosely with aluminum foil, which will help retain the heat while allowing excess steam to escape. The length of time you should let them rest will depend on their thickness. A good rule of thumb is to let them rest for approximately 5 minutes per 1/2 inch of thickness.
Don’t skip this step. Cutting into your pork chops too soon can ruin all your hard work. Take just a few extra minutes to let them rest and you’ll be rewarded with a delicious and satisfying meal. To summarize, here are some key points to remember:
- Resting allows juices to redistribute for a more flavorful and moist result.
- Remove from heat source and cover loosely with foil.
- Rest for approximately 5 minutes per 1/2 inch of thickness.
- Skipping resting can result in a loss of juices and a dry, tough texture.
Benefits of Cooking with an Electric Frying Pan
Look no further than an electric frying pan. As an expert in the benefits of cooking with an electric frying pan, I can tell you that it’s a game-changer when it comes to cooking delicious and healthy meals.
One of the biggest advantages of using an electric frying pan is its convenience. It heats up quickly and maintains a consistent temperature, which means you can focus on other tasks while your pork chops cook to perfection. This feature is especially helpful for beginners who are just learning how to cook pork chops. You don’t have to worry about constantly monitoring the heat on your stove anymore.
Moreover, electric frying pans are versatile. You can use them to cook a wide variety of dishes, from stir-fries to pancakes to grilled cheese sandwiches. This means that you won’t need multiple pans cluttering up your kitchen and making clean-up a nightmare. Plus, it saves space in your kitchen, which is always a plus.
When it comes to cooking pork chops specifically, using an electric frying pan is a healthier option than traditional frying pans. Because it requires less oil, you can cut down on your fat intake without sacrificing flavor. Pork chops are already high in fat, so this is an important factor to consider when preparing this dish.
Lastly, cleaning up after cooking with an electric frying pan is a breeze. With non-stick surfaces on most models and less grease and grime to deal with, you’ll be spending less time scrubbing and more time enjoying your meal. It’s easy to clean, which makes it perfect for busy individuals or families.
In conclusion, an electric frying pan is a great investment for anyone who wants to cook pork chops quickly, easily, and healthily. It’s versatile, convenient, and easy to clean – what more could you want in a kitchen appliance? So why not give it a try? You might just be surprised at how much you love cooking with an electric frying pan. And don’t forget, letting your pork chops rest before devouring them will make for a succulent and satisfying meal.
Overall, the benefits of cooking with an electric frying pan can be summarized into four main points:
Convenience: electric frying pans heat up quickly and maintain a consistent temperature, making it easier to cook pork chops to perfection without having to constantly monitor the heat.
Tips for Perfectly Cooked Pork Chops Every Time
Pork chops are a delicious and satisfying dish that can be cooked in different ways. One of the easiest and most convenient ways to cook pork chops is by using an electric frying pan. However, getting them cooked perfectly can be a bit challenging. Here are some tips to help you achieve perfectly cooked pork chops every time in an electric frying pan.
Use a Meat Thermometer
One of the most important tips for cooking pork chops is to use a meat thermometer. This will help you ensure that your pork chops are cooked to the ideal temperature, which is 145°F (63°C). Insert the thermometer into the thickest part of the meat and wait for the reading. This will give you an accurate reading of the internal temperature of the meat.
Preheat the Frying Pan
Before you start cooking, preheat your electric frying pan to the desired temperature. This will help ensure even cooking. Heat the pan to medium-high heat and add a small amount of oil or butter to prevent sticking. A preheated frying pan ensures that your pork chops cook evenly, leaving no undercooked or overcooked parts.
Season Well
Pork chops can be quite bland on their own; therefore, it is essential to season them well with herbs and spices of your choice. You can also marinate them beforehand to add more flavor. Adding salt and pepper is a must, but adding other seasonings such as garlic powder or paprika can also enhance the flavor. A well-seasoned pork chop makes all the difference in taste.
Don’t Overcrowd the Pan
It is crucial not to overcrowd the electric frying pan with too many pork chops at once. This will cause uneven cooking and may result in undercooked or overcooked meat. Leave enough space between each pork chop for even cooking. Also, resist the urge to move them around as they cook, as this can also affect the cooking process.
Flip Once
When cooking pork chops, it’s best to flip them only once. This will help prevent them from becoming tough or dry. Let them cook for 3-4 minutes on each side, or until they are golden brown on the outside. To check if they are cooked through, use a meat thermometer to measure the internal temperature.
Bonus Tip: Let Them Rest
Once the pork chops are cooked, let them rest for a few minutes before serving. This allows the juices to redistribute throughout the meat, resulting in a more tender and juicy pork chop. Covering the pork chops with foil will keep them warm while they rest.
Common Mistakes to Avoid When Cooking Pork Chops in an Electric Frying Pan
Avoid these common mistakes that can easily ruin the taste and texture of your dish.
First off, don’t forget to preheat your electric frying pan. Skipping this crucial step can result in a lack of proper searing, leading to bland and unappetizing pork chops. Properly preheating your pan will create a crispy crust on the outside while keeping the inside juicy and tender.
Another mistake to avoid is overcrowding the pan. It’s tempting to try to cook all your pork chops at once, but doing so can cause the meat to steam instead of sear, resulting in a tough and rubbery texture. Cook in batches if necessary to ensure each chop is cooked to perfection.
When it comes to oil, less is more. A thin layer is all that’s needed to prevent sticking and ensure even browning. Using too much oil can result in greasy and oily pork chops, which nobody wants. Additionally, too much oil can cause flare-ups and smoke, creating a potentially hazardous situation.
Lastly, be careful not to overcook your pork chops. Overcooking can lead to dry and tough meat that’s difficult to chew. Use a meat thermometer to ensure your pork chops reach an internal temperature of 145°F (63°C), which is the safe consumption temperature. Remember, it’s better to undercook slightly than to overcook.
NjHoTnkGLkc” >
Conclusion
Cooking pork chops in an electric frying pan is a quick and easy way to prepare a delicious meal.
With the right temperature and cooking time, you can have perfectly cooked pork chops that are juicy and tender. It typically takes around 6-8 minutes per side to cook pork chops in an electric frying pan, but this can vary depending on the thickness of the meat.
To ensure your pork chops are cooked to perfection, use a meat thermometer to check that they have reached an internal temperature of 145°F.