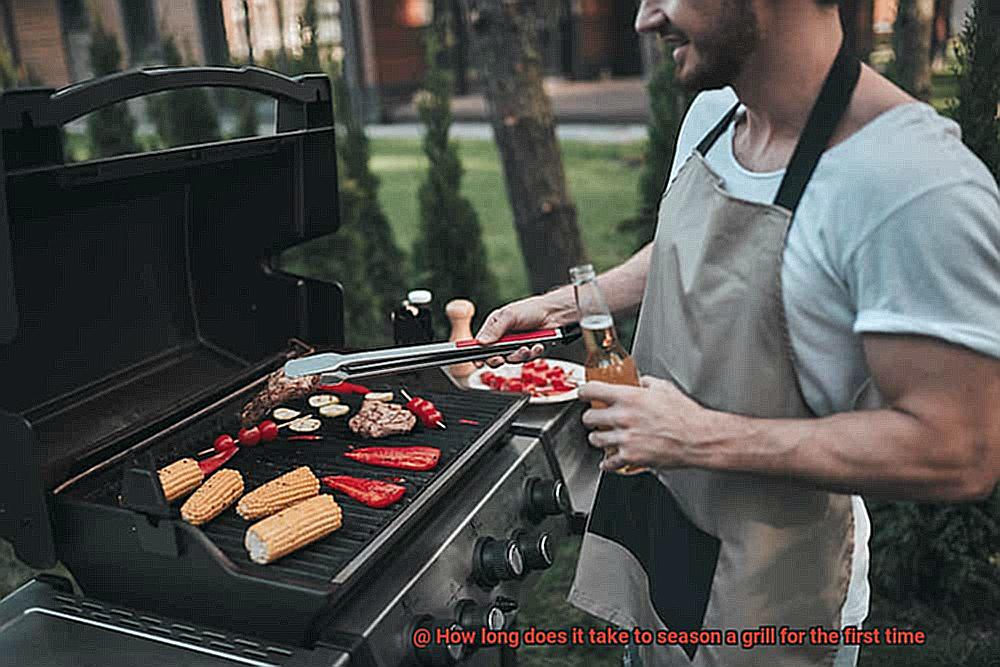
Can you smell that? The sizzling sound of meat cooking on the grill, the aroma wafting through the air, and the anticipation of a delicious meal. Grilling is one of life’s simple pleasures, but before you can start cooking up a storm, you need to season your grill properly.
Seasoning your grill involves heating it up and coating the grates with oil to create a non-stick surface that enhances food flavor. But how long does this process take? As an expert in all things grilling, I’m here to answer that burning question.
In this blog post, we’ll delve into the details of how long it takes to season a grill for the first time. We’ll walk you through each stage of seasoning and share tips and tricks to ensure your grill is perfectly seasoned.
But why is seasoning important? Well-seasoned grills not only make food taste better but also prevent rust and extend the lifespan of your grill. So whether you’re a new grill owner or just want to keep your current one in top shape, this guide is for you.
So grab a cold drink, put on your apron, and let’s dive into the world of grill seasoning.
Contents
What is Grill Seasoning?
Grilling season is here, and nothing beats the taste of juicy, flavorful meats hot off the grill. But before you start cooking, it’s crucial to prepare your grill properly. This is where grill seasoning comes in – a vital step that can make or break your meal.
What is Grill Seasoning?
Grill seasoning is the process of coating your grill grates with oil to create a non-stick surface and protect against rust and corrosion. You can use various oils for seasoning, such as vegetable oil, canola oil, or grapeseed oil. It’s important to choose an oil with a high smoke point to prevent it from burning off while seasoning.
Why is Grill Seasoning Important?
Seasoning your grill has several benefits. First and foremost, it creates a non-stick surface that prevents food from sticking to the grates. This ensures that your food cooks evenly and doesn’t fall apart when you try to flip it over. Additionally, it protects the metal from rust and corrosion, which can cause your grill to deteriorate faster.
How to Season Your Grill
To season your grill, start by cleaning the grates thoroughly with a wire brush to remove any debris or rust. Then, using a paper towel or brush, apply a thin layer of oil to both sides of the grates. Make sure to coat them evenly.
Next, preheat your grill on high heat for 15-20 minutes to allow the oil to penetrate the metal and create a non-stick surface. Once the grill is heated, turn off the burners and let it cool down completely before wiping away any excess oil with a clean cloth or paper towel.
When Should You Season Your Grill?
It’s recommended to season your grill at least once a year, preferably before the start of grilling season. However, if you notice rust or food sticking to the grates, you may need to season it more often. Regular maintenance, including cleaning and seasoning, can extend the life of your grill and ensure that it performs at its best.
Types of Grills and Materials Used
Grilling is a popular cooking method that has been enjoyed for centuries. It’s the perfect way to cook food outdoors, whether you’re hosting a big barbecue or just enjoying a quiet evening at home. However, with so many different types of grills available, it can be difficult to know which one is right for you. In this article, we’ll explore the different types of grills and the materials used in their construction.
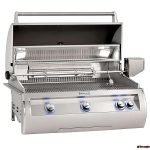
Gas Grills
Gas grills are a popular choice among grill enthusiasts for their convenience and ease of use. They are powered by propane or natural gas and offer quick ignition, adjustable temperature control, and easy cleanup. Whether you’re looking for a portable model for camping or tailgating or a large built-in model for your outdoor kitchen, gas grills come in a variety of sizes and styles to suit your needs. They are made from materials like stainless steel, cast aluminum, and porcelain-coated steel.
Charcoal Grills
For those who prefer a more traditional grilling experience, charcoal grills are an excellent option. They use charcoal briquettes or natural lump charcoal as fuel and provide a distinct smoky flavor that many grill enthusiasts prefer. Charcoal grills come in various sizes and styles, including kettle grills, barrel grills, and kamado-style grills. They are made from materials like cast iron, stainless steel, and ceramic.
Electric Grills
Electric grills are ideal for those who live in apartments or condos where gas or charcoal grilling is not permitted. They are also convenient for indoor use during inclement weather. Electric grills come in various sizes and styles, including tabletop models and built-in models for outdoor kitchens. They are made from materials like stainless steel and cast aluminum.
Pellet Grills
Pellet grills use wood pellets as fuel and are known for their ability to impart a smoky flavor to food. They can also be used for smoking and roasting, in addition to grilling. Pellet grills come in various sizes and styles, including portable models and built-in models for outdoor kitchens. They are made from materials like stainless steel and cast iron.
Materials Used in Grill Construction
The materials used in grill construction can affect the quality and durability of the grill. Stainless steel is a popular material for its resistance to rust and corrosion, making it a great choice for outdoor use. Cast iron is also a popular material because it retains heat well, allowing for consistent cooking.
Ceramic is another popular material because it holds heat and provides even cooking. Other materials used in grill construction include aluminum and porcelain-coated steel.
How Long Does it Take to Season a Grill for the First Time?
Well, the answer depends on a few factors such as the type of grill you own and its materials. As a grilling expert, I can tell you that seasoning your grill is an essential step to ensure that your food cooks evenly and doesn’t stick to the grates.
If you own a gas grill, seasoning it is relatively straightforward and can be completed in just 30 minutes. Start by turning on your grill and heating it up to its highest temperature. Once it’s heated up, turn off the burners and let it cool down slightly. Next, using a brush or paper towel, apply a thin layer of oil (such as vegetable or canola oil) to the grates. Be sure to cover all areas of the grates, including the corners and edges. Finally, turn on the burners again and let the grill heat up for another 15-20 minutes to allow the oil to bond with the grates.
If you own a charcoal grill, the process of seasoning takes a bit longer but is still relatively simple. First, fill your charcoal chimney halfway with charcoal briquettes and light them. Once they’re heated up and covered in ash, pour them onto the bottom grate of your grill. Add a few chunks of hardwood (such as hickory or mesquite) to create smoke and flavor. Then, using a brush or paper towel, apply a thin layer of oil to the grates. Make sure to cover all areas of the grates thoroughly. Finally, close the lid of your grill and let it heat up for about an hour. This will allow the oil to bond with the grates and create a non-stick surface.
Overall, seasoning your grill is an essential step that shouldn’t be skipped if you want to cook delicious and evenly cooked food. The process may take some time, but it’s well worth it in the end. To recap, here’s a quick list of steps to season your grill:
- Gas Grill: heat up, turn off burners, apply oil to grates, heat up again
- Charcoal Grill: light charcoal, add hardwood, apply oil to grates, let heat up for an hour
Factors That Can Affect the Length of Time to Season a Grill
As a grilling aficionado, I can attest that the key to achieving perfectly cooked meals is properly seasoning your grill. However, the duration of this process largely depends on several factors.
Firstly, the type of grill you own plays a significant role in how long it takes to season. Gas grills typically require less time than charcoal or pellet grills due to their ability to reach higher temperatures more quickly.
Moreover, the material of your grill can also affect seasoning time. Cast iron grates take longer to season than stainless steel grates due to their porous nature and need for more oil. Additionally, the type of oil used for seasoning can impact the length of time required. Flaxseed oil creates a durable non-stick surface but needs multiple coats and longer seasoning times compared to vegetable or canola oil.
Temperature is another crucial factor for proper seasoning. Heating your grill between 400-500 degrees Fahrenheit for 30-60 minutes is recommended for optimal results. If you’re seasoning a brand new grill, it may require more time and effort compared to a well-used one that only needs a touch-up.
Lastly, regular maintenance and cleaning can reduce seasoning time and prolong your grill’s life span. By keeping your grill in good condition, you can avoid potential rusting and build-up that require significant seasoning effort.
The Importance of Using High-Temperature Oils
Before you fire up your grill for the first time, consider the type of oil you use. Using high-temperature oils can make or break your grilling experience. These oils are specially designed to withstand high heat, which is essential for achieving that perfect sear on your meat or veggies.
One of the most significant advantages of using high-temperature oils is that they create a non-stick surface that prevents food from sticking to the grates. This non-stick surface is critical for achieving the ideal char and also makes cleaning up after your grilling session a breeze.
But what exactly are high-temperature oils, and how do you choose the right one? When selecting an oil for seasoning your grill, make sure to choose oils with a high smoke point. Smoke point refers to the temperature at which an oil starts to break down and smoke. Choosing an oil with a high smoke point ensures that it won’t burn when exposed to high heat.
Some of the top high-temperature oils for seasoning your grill include avocado oil, grapeseed oil, peanut oil, and vegetable oil. These oils have smoke points ranging from 400°F to 500°F, making them perfect for grilling.
So why is using high-temperature oils so important when grilling? Not only does it create the perfect non-stick surface for your food, but it also ensures that your oil won’t burn and ruin your meal. Plus, when you use high-temperature oils, you’ll achieve that mouth-watering sear that everyone loves.
Re-Seasoning Your Grill Periodically
Calling all grill masters. If you want to ensure the longevity of your grill and take your grilling game to the next level, re-seasoning your grill periodically is a must. This essential step not only prevents rust and corrosion but also enhances the flavor of your food. Here’s how you can do it in just four easy steps.
Step 1: Thoroughly Clean Your Grill
First things first, you need to clean your grill thoroughly before re-seasoning it. Use a wire brush or scraper to remove any debris or leftover food particles from the grates. You can also use a mild detergent and warm water to clean the grates, making sure to rinse them thoroughly and dry them completely before proceeding.
Step 2: Apply Oil to the Grates
Once your grill is clean and dry, it’s time to apply oil to the surface of the grates. Any type of cooking oil will work, such as vegetable oil or canola oil. Pour a small amount of oil onto a paper towel or cloth and rub it onto the surface of the grates until they are evenly coated.
Step 3: Preheat Your Grill
After applying the oil, preheat your grill to a high temperature for about 15-20 minutes. This will help the oil penetrate into the pores of the metal, creating a protective layer that prevents rust and corrosion.
Step 4: Let Your Grill Cool Down
Once your grill has been heated, turn off the heat and let it cool down completely. Resist the temptation to remove the oil from the grates as it will continue to protect them from rust and corrosion.
In summary, re-seasoning your grill periodically is an easy and essential step to maintain its longevity and enhance your culinary creations. Remember to do it at least once a year, depending on how frequently you use your grill. Additionally, don’t forget to clean your grill regularly and store it in a dry place to keep it in tip-top shape.
Tips for Effective Seasoning
As an avid griller, you know that proper seasoning is crucial to achieving perfectly cooked meals. Seasoning not only helps prevent food from sticking to the grates, but it also adds flavor and protects the metal from rust and corrosion. Here are five tips for effective seasoning of your grill:
Clean the grill thoroughly before seasoning.
Before applying any oil, it’s essential to clean your grill thoroughly. Use a wire brush or scraper to remove any debris or grease that may have accumulated on the grates or inside the grill itself. This step will ensure that the seasoning process is effective and that your food won’t be contaminated with any leftover grime or grease.
Choose the right oil.
When it comes to seasoning a grill, using the right oil is key. You want an oil with a high smoke point and a neutral flavor. Many experts recommend vegetable or canola oil for this purpose. Avoid using low-temperature oils like olive oil, as they can break down and create a sticky residue on your grill.
Apply the oil evenly.
Using a clean cloth or paper towel, spread the oil evenly over every inch of the grates, making sure to coat them in a thin layer of oil. This will help create a non-stick surface on the grates and prevent food from sticking during cooking. Be generous with the oil, but avoid using too much as this can drip into the burners and cause flare-ups.
Heat up the grill.
After applying the oil, it’s time to heat up the grill. Turn all of the burners on high and let the grill run for about 15-20 minutes. This will help burn off any remaining residue and ensure that the oil gets fully absorbed into the metal. As the grill heats up, you’ll see smoke rising from the grates – this is a good sign.
Repeat the process if necessary.
Depending on how dirty your grill was to begin with, you may need to repeat the seasoning process a few times to fully establish a non-stick surface. You’ll know your grill is ready when food no longer sticks to the grates and they have developed a dark, glossy sheen. So don’t be afraid to repeat the process if you’re not quite there yet – a well-seasoned grill is worth the extra effort.
yE7T2Zkeyqw” >
Conclusion
To sum up, seasoning your grill is a crucial step to ensure that your food cooks evenly and doesn’t stick to the grates. It’s like giving your grill a protective shield that enhances its lifespan by preventing rust and corrosion. Plus, it adds an extra layer of flavor to your meals that you won’t get from an unseasoned grill.
The duration of this process depends on various factors such as the type of grill you own, materials used, oil selection, temperature, and maintenance. For instance, gas grills require less time than charcoal or pellet grills due to their ability to reach higher temperatures quickly. Cast iron grates take longer to season than stainless steel grates since they are porous and require more oil.
When selecting an oil for seasoning your grill, choose oils with high smoke points like avocado oil or grapeseed oil. Before applying any oil, make sure to clean your grill thoroughly and heat it up after applying the oil. Repeat the process until you achieve a dark glossy sheen on the grates.
By following these tips for effective seasoning of your grill, you’ll be able to enjoy mouth-watering BBQ with perfectly cooked meals every time.