It’s that time of year again – the sun is shining, and the smell of barbecue is in the air. For those of us who love to cook outdoors, it’s time to break out the Weber gas grill and get grilling. But if you’re new to gas grilling or are used to charcoal models, you might be wondering what all those knobs and dials do. Don’t worry; we’ve got you covered.
In this post, we’ll give you the inside scoop on everything you need to know about the dials on a Weber gas grill. From understanding the thermometer gauge’s importance to mastering different heat zones, we’ll show you how to make the most out of your Weber grill. Whether you’re a seasoned pro or a beginner, knowing how to use your gas grill’s dials is crucial for achieving that perfect cook every time.
So let’s get started and take a closer look at each dial on your Weber gas grill. We’ll explain what each one does and how they can help take your outdoor cooking game up a notch. Get ready for some mouth-watering results.
Contents
What are the Dials on a Weber Gas Grill?
Grilling on a Weber gas grill is an art form, and the dials on the grill are your tools for mastering that art. These dials are an essential part of the grill, and they allow you to control the temperature and cook your food to perfection. Let’s take a closer look at what each dial does and how to use them.
The first dial is located on the front panel of the grill and controls the main burners. This dial is responsible for creating the heat that cooks your food and is labeled with numbers or temperature settings. By adjusting this dial, you can control how much heat is produced. Turning it clockwise will increase the heat output, while turning it counterclockwise will decrease it. This dial is your key to achieving perfectly cooked steaks, burgers, and chicken.
The second dial, if present, controls the side burner. This smaller burner is located on one side of the grill and is perfect for cooking side dishes or sauces. This dial is located near the side burner and works the same way as the main burner dial. Adjusting it allows you to control how much heat is produced by the side burner.
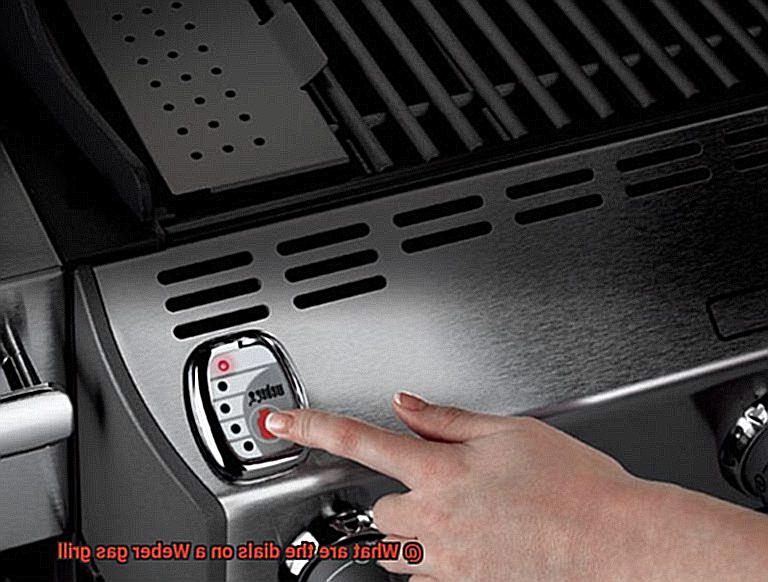
The third dial is for ignition and is typically located near the main burner dial. This dial is used to ignite the burners and get your grill up and running. It’s important to make sure that this dial is in the off position before attempting to light your grill. Once you turn the dial to ignite, press and hold down the ignition button until you see flames.
Understanding how to use each of these dials correctly is essential for achieving great results with your Weber gas grill. With practice, you can master the art of grilling and impress your friends and family with delicious meals cooked to perfection on your Weber gas grill.
It’s important to note that different Weber gas grills may have different types of dials or controls. Some models may have digital controls instead of traditional dials, while others may have additional features like timers or thermometers built into the dials. Make sure to read your grill’s manual carefully to understand how to use its specific controls properly.
The First Dial: Main Burners
Then let’s talk about the first dial on your Weber gas grill – the main burner dial. As an expert in all things grilling, I’m here to share my tips and tricks on how to use this dial like a pro.
The main burner dial is the first step in achieving that perfect sear or juicy, tender meat. Located on the front control panel of your Weber gas grill, this dial controls the heat output of the main burners, which are the primary source of heat for cooking on the grill. Typically, Weber gas grills have two or more main burners, each with its own dial.
The main burner dial is marked with numbers or symbols that indicate the temperature level or heat intensity. By turning the dial clockwise or counterclockwise, you can adjust the heat output of the burners. However, before you start cooking, make sure to preheat your grill for several minutes to ensure that the burners are heated up to the desired temperature.
Different foods require different temperatures and cooking times. For example, high heat is ideal for searing steaks and burgers, while lower heat works best for cooking vegetables and delicate fish. By adjusting the main burner dial, you can achieve the perfect temperature for any type of food you’re grilling.
But wait, there’s more. The main burner dial can also be used to create specific cooking zones on your grill. This technique is especially useful when cooking large pieces of meat that require indirect heat. Simply turn off one or more of the main burners and leave others on to create a cooler zone for indirect cooking.
The Second Dial: Side Burner
As a serious grill master, you know that a Weber gas grill is an investment in your outdoor cooking experience. And when it comes to making the most of your grill, the second dial is the key. Let’s talk about the side burner, an additional feature that provides incredible versatility for your outdoor cooking needs.
What exactly is a side burner? It’s like having an extra stovetop right on your grill. Perfect for whipping up side dishes or sauces while you grill the main course, the side burner is located on the side of your Weber gas grill and can be controlled independently from the main burners.
To use the side burner, simply turn the knob to ignite it just like you would with the main burners. Then, adjust the heat output using the same control knob. Keep in mind that the side burner may take longer to heat up than the main burners since it’s located farther away from the fuel source.
But what about maintenance? The side burner requires regular cleaning to prevent grease buildup or blockages in the gas line. To keep it in top shape, refer to your Weber grill manual for specific cleaning instructions.
Here are some additional tips to make the most of your Weber gas grill’s side burner:
- Use a drip pan under the side burner to catch any drippings and make cleanup easier.
- Avoid using abrasive cleaners or tools on the side burner as they can scratch or damage the surface.
- Always turn off the side burner and let it cool completely before attempting to clean or maintain it.
- If you notice any issues with the side burner, such as uneven flames or difficulty igniting, refer to your Weber grill manual or contact customer service for assistance.
The Third Dial: Ignition Dial
If so, it’s time to get to know the third dial on your Weber gas grill – the ignition dial. This little powerhouse is responsible for starting your grill and getting those delicious burgers and steaks sizzling.
The ignition dial is located on the front of the grill and marked with a lightning bolt symbol. Without it, your grill won’t start, just like a car won’t start without a key. The ignition dial creates a spark that ignites the gas, which heats up the grates and gets your cooking started.
There are two types of ignition systems available on Weber gas grills: electronic and manual. Electronic ignition is the more common option found on modern grills because it’s convenient and reliable. Simply press a button or turn the dial, and the battery-powered module creates the spark needed to ignite the gas.
Manual ignition involves using a match or lighter to ignite the gas. It’s less convenient than electronic ignition, but it’s still an option if your electronic ignition fails or if you prefer a more traditional method.
To keep your ignition system functioning properly, it’s essential to keep it clean and free of debris. If it fails, you may need to replace the battery or even the entire module. Proper maintenance ensures that you can fire up your grill whenever you want without any hassle.
Different Types of Controls on Weber Gas Grills
Grilling is an art form, and like any artist, you need the right tools to create your masterpiece. When it comes to Weber gas grills, understanding the different types of controls is essential for achieving perfectly cooked food every time. Let’s take a closer look at each type of control and how it can help you cook your food to perfection.
Burner control knobs are the first type of control you’ll encounter when using a Weber gas grill. These knobs regulate the flow of gas to each burner, allowing you to cook your food at different temperatures simultaneously. By adjusting the knob corresponding to each burner, you can create different heat zones on your grill and cook a variety of foods at once. This way, you can sear your steak at high heat while slow-cooking your vegetables at a lower temperature.
Next up is the ignition system. Weber gas grills come with either electronic or manual ignition systems. Electronic ignition systems use a battery-powered spark generator to ignite the gas in the burners, while manual ignition systems require you to light the burners manually using a match or lighter. Some models also come with a crossover ignition system that allows you to light all the burners at once by simply turning one knob.
Temperature control knobs are another important control feature on Weber gas grills. These knobs allow you to adjust the heat output of each burner and set the temperature to a specific degree. This precision makes it easier to cook your food evenly, without burning it or leaving it undercooked. Some models also come with built-in thermometers that allow you to monitor the internal temperature of your grill and ensure that your food is cooking at the right temperature.
Flavorizer bars are unique to Weber gas grills and are located beneath the cooking grates. These bars catch drippings from your food and vaporize them, adding an extra layer of flavor to your food while also distributing heat evenly across the grill. They also protect your burners from flare-ups caused by dripping grease.
Finally, the fuel gauge is an essential control feature that shows you how much propane or natural gas is left in your tank. This way, you can plan ahead and avoid running out of fuel in the middle of a cookout. Some models also come with a fuel level indicator that shows you the percentage of gas left in your tank.
How to Use the Dials Properly
Using your Weber gas grill can be a breeze if you know how to use the dials properly. The dials are responsible for controlling the temperature of your grill, which is essential for perfectly cooked food. Here’s a step-by-step guide on how to use the dials on your Weber gas grill:
Understand the purpose of each dial.
The temperature control dial is located on the front panel of the grill and allows you to adjust the heat output of the burners. On the other hand, the gas control dial, located on the propane tank or natural gas line, controls the flow of gas to the burners. Knowing what each dial does will help you use them properly.
Preheat your grill.
Before you start cooking, preheat your grill by turning all of the burners to their highest setting and closing the lid for 10-15 minutes. This ensures that your grill is hot enough to cook your food thoroughly.
Adjust the temperature control dial.
Once your grill is preheated, adjust the temperature control dial to achieve your desired level of heat. For high-heat cooking such as steak or burgers, set it to a higher setting, but for lower-heat cooking such as fish or vegetables, set it to a lower setting.
Use the gas control dial wisely.
The gas control dial should only be used to turn your grill on and off. Once your grill is lit, avoid adjusting this dial while cooking and use the temperature control dial instead to adjust heat output.
Consult your owner’s manual.
It’s essential to read your owner’s manual for specific instructions on how to use your particular Weber gas grill’s dials. Additionally, regularly check for any signs of wear and tear on the dials and clean your grill regularly for optimal performance.
Tips for Ensuring Perfectly Cooked Food Every Time
Grilling is a beloved cooking method that requires precision and attention to detail. To achieve perfectly cooked meals every time, it’s crucial to understand and utilize the various dials on your Weber gas grill. Here are five sub-sections that will help you become a grilling expert:
Master the Burner Control Knob
The burner control knob is the heartbeat of your Weber gas grill. This dial controls the amount of heat produced by your grill’s burners, making it essential to know how to adjust it. Whether you’re searing steaks or slow-cooking meats, understanding how to create high or low heat with this dial is crucial for perfect grilling results.
Use the Thermometer Dial
The thermometer dial is like a window into your grill’s internal temperature. Measuring the temperature inside your grill, this dial helps you monitor and regulate the heat while cooking. Different foods require different internal temperatures to cook correctly, so use this dial to ensure that your food is cooked to perfection.
Check Your Igniter Button
Before starting your grill, make sure that your igniter button is functioning correctly. This button produces a spark that ignites the gas and starts the fire, so ensuring that it works is vital for getting your grill started.
Set a Timer
The timer dial on your Weber gas grill is an essential tool for ensuring perfectly cooked food every time. Setting a timer helps you keep track of cooking times, reducing the risk of overcooking or undercooking your food. Regularly checking the timer and adjusting as needed will help you achieve delicious results.
Read Your Grill’s Manual Carefully
Every Weber gas grill model may have different dials or controls, so it’s crucial to read the manual carefully. Some models may have digital controls, while others may have additional features like timers or thermometers built into the dials. Understanding how to use your specific grill’s controls properly is essential for achieving perfectly cooked food every time.
cyGB-6c8L_E” >
Conclusion
In conclusion, the dials on your Weber gas grill are not just for show; they are essential tools in achieving mouth-watering results every time you fire up your grill. The main burner dial is like a maestro’s baton, allowing you to control the heat output of the burners and create different cooking zones on your grill. Meanwhile, the side burner dial adds versatility to your outdoor cooking game by providing a space for cooking side dishes or sauces while grilling your main course. And let’s not forget about the ignition dial, responsible for starting your grill and getting those delicious burgers and steaks sizzling.
But mastering these dials is only half the battle. To truly take your grilling skills to the next level, it’s important to utilize other control features such as temperature control knobs, flavorizer bars, and fuel gauges. By following tips such as mastering the burner control knob, using the thermometer dial to monitor internal temperatures, checking your igniter button before each use, setting a timer to avoid overcooking or undercooking food, and reading your grill’s manual carefully to understand all its features and functions – you’ll be well on your way to becoming a true grilling expert.
So don’t be afraid to break out that Weber gas grill and experiment with different techniques and recipes. With a little practice and some attention to detail, you’ll soon be impressing friends and family with perfectly cooked meals every time.