Are you a fan of waking up to the tantalizing aroma of freshly baked bread? Do you crave the taste of homemade bread but dread the time and effort it takes to make it from scratch? Well, have no fear because a bread machine is here. This ingenious device takes all the hard work out of baking bread and produces scrumptious loaves with just a push of a button. But, before we delve into the first steps of using a bread machine, let’s talk about why it’s such a game-changer.
Kneading and proofing dough can be a tedious and daunting task, especially for beginners. A bread machine eliminates all that hassle by taking care of everything from mixing to rising, allowing you to focus on other things while your dough is being prepared.
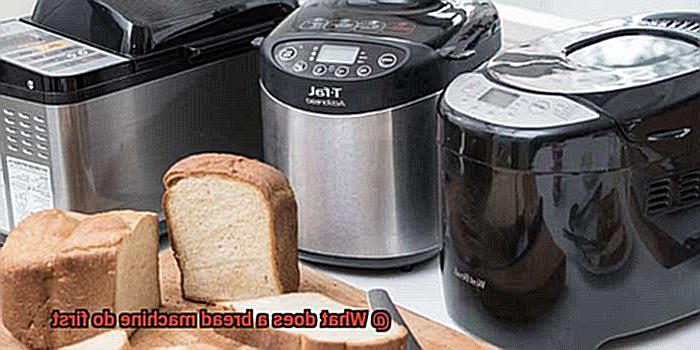
So, what does a bread machine do first? The initial step is crucial in determining the success of your loaf. It involves adding ingredients in the correct order – liquid ingredients first, followed by dry ingredients and yeast last. This sequence ensures that everything mixes thoroughly and that the yeast activates properly, which helps your dough rise perfectly.
Overall, investing in a bread machine is an excellent decision for anyone who loves baking bread or wants to try their hand at it. Knowing how to use it correctly will ensure that every loaf comes out perfect every time. So put on your apron and get ready to savor the delicious taste of homemade bread.
Contents
What is a Bread Machine?
A bread machine is an innovative electrical kitchen appliance designed to automate the bread-making process, making it simpler and less time-consuming.
The components of a bread machine are straightforward – a bread pan (or tin), one or more kneading paddles, and a control panel with various settings and options. With just a few button presses, your bread machine will do all the heavy lifting for you. It’ll go through several pre-programmed cycles to prepare itself for making your bread.
The first cycle is where the machine heats up to the perfect temperature for making bread. Then comes the kneading cycle, where the mixing paddle rotates and kneads the dough to develop gluten, which gives bread its structure and texture. After that, the rising cycle begins, where the dough is left to rise in a warm environment inside the machine. This cycle allows the yeast in the dough to ferment and release carbon dioxide gas, which causes the dough to rise.
Next up is another kneading cycle designed to punch down the dough and remove any air bubbles that may have formed during rising. And finally, there’s a baking cycle where the heating element is turned on again, and the bread is baked until it reaches an internal temperature of 190-200°F.
Bread machines come in various sizes and shapes with different features and price points. Some models have multiple programs for different types of bread, such as white, wheat, or gluten-free. Others have settings for making dough for pizza or rolls. With a bread machine in your kitchen, you can enjoy fresh-baked bread whenever you want, without any hassle.
How Does a Bread Machine Work?
The process of making bread can be time-consuming and labor-intensive. That’s where the bread machine comes in. This electric kitchen appliance automates the process of making bread, making it a convenient tool for those who want to enjoy homemade bread without having to spend hours kneading, rising, and baking the dough.
The first step in using a bread machine is to add the ingredients. Flour, yeast, salt, sugar, and water are usually included in the recipe. It’s important to add these ingredients in the correct order to ensure that the bread rises properly. Fortunately, most bread machines have a specific order that you should follow.
Once you’ve added your ingredients, the bread machine takes over. It starts mixing the dough for anywhere from 5 to 15 minutes depending on the type of bread being made. During this process, the bread machine kneads the dough, which helps develop gluten and creates that perfect texture we all love.
After the mixing process is complete, it’s time for the dough to rise. The rising time can vary depending on factors such as temperature and humidity. Fortunately, most bread machines come with settings that allow you to adjust the rising time to suit your preferences.
Once the dough has risen, it’s ready for baking. The bread machine will automatically start baking at a specific temperature for a set amount of time. Some models even have different settings for different types of bread like white or whole wheat.
When the baking cycle is complete, your bread machine will beep to let you know it’s done. You can now take out your freshly baked loaf and enjoy it warm or let it cool before slicing it up.
The Pre-Programmed Cycles of a Bread Machine
A bread machine may be the answer. But, before you start, it’s important to understand the pre-programmed cycles that make it all possible.
There are four main pre-programmed cycles that a bread machine goes through: mixing, kneading, proofing, and baking. Each cycle is designed to ensure that your ingredients are combined in the correct order and time to create the perfect loaf of bread.
The mixing cycle is where all of your dry and wet ingredients come together in the bread pan. This step ensures that everything is evenly distributed before kneading begins.
Once mixed, the kneading cycle begins, where the machine’s paddle or blade stretches and folds the dough to develop gluten, which gives bread its chewy texture. The length of this cycle varies depending on your recipe and machine’s settings.
After kneading comes the proofing cycle. This is where your dough rests and rises thanks to yeast fermentation and carbon dioxide production. Proofing time can vary depending on how much rise you want your dough to have or how much time you have available.
Finally, it’s time for baking. This cycle will bake your bread to golden-brown perfection at a high temperature until it’s fully cooked. The baking time can vary depending on your recipe and machine’s settings.
It’s important to note that not all bread machines have the same pre-programmed cycles or settings. Therefore, it’s crucial to read your machine’s manual before diving into your bread-making adventure.
Heating Up the Interior of the Machine
The first step towards achieving that goal is heating up the interior of the machine. This vital step helps to create an ideal environment for the yeast to work its magic. As an expert in this area, I’ll guide you through the process of heating up your bread machine like a pro.
The heating element is responsible for warming up your ingredients to the optimal temperature. Located at the bottom of the bread machine, it’s crucial to ensure that it’s working correctly. When you turn on your bread machine, the heating element starts to warm up, and the temperature inside begins to rise. Depending on your bread machine’s model, it may take from 5 to 15 minutes for the machine to reach the desired temperature.
While waiting for your bread machine to heat up, make sure that the non-stick bread pan is correctly inserted into the machine. This small but essential step will ensure that everything goes smoothly when it’s time to add ingredients.
Speaking of ingredients, pay close attention to their order as you add them to the bread pan. It’s crucial to combine everything in the right way and at the right time for a perfect loaf of bread. Some bread machines come with a preheat cycle that automatically runs before starting the actual baking process. This cycle helps ensure that all ingredients are at an optimal temperature for baking. Follow the manufacturer’s instructions carefully and allow enough time for preheating before adding your ingredients.
Kneading Cycle
Let’s dive in and explore why this step is crucial in creating delicious, homemade bread.
The kneading cycle is where the real work begins. After adding all the ingredients, the machine mixes them together to form a smooth and elastic dough. But why is this step so important? Well, it’s all about developing the gluten.
Gluten is what gives bread its structure and texture. Without proper gluten development, your bread could end up dense and heavy instead of light and fluffy. During the kneading cycle, the bread machine works hard to stretch and fold the dough over and over again, helping to develop the gluten.
But that’s not all. The kneading cycle also incorporates air into the dough, giving your bread its sought-after lightness and fluffiness. This process ensures that all of your ingredients are evenly distributed throughout the dough, allowing the yeast to begin activating before any moisture is added.
Some bread machines have multiple kneading blades that work together to knead the dough more efficiently. Regardless of the number of blades, the kneading cycle typically lasts between 10 and 20 minutes, depending on the specific recipe.
Rising Cycle
Bread-making is a fascinating process that involves a series of steps, each crucial to creating the perfect loaf. Among these steps, the rising cycle is where the real magic happens. This is when the dough is left to rest and ferment, allowing it to rise and develop the soft and fluffy texture we all crave in our bread.
To start the rising cycle, a bread machine first mixes all the ingredients together, including flour, water, yeast, and salt. Once the dough is thoroughly mixed, the machine automatically moves on to the rising cycle, where the dough is left to rise for a specific amount of time depending on the recipe.
During this cycle, enzymes in the flour break down complex carbohydrates into simple sugars, releasing natural sweetness and contributing to a richer and more satisfying taste. With longer rising times, more complex flavors develop, giving your bread a unique character that’s hard to resist.
However, rising times can be affected by temperature and humidity. If it’s too hot or humid in your kitchen, your dough may rise too quickly, resulting in a dense and heavy loaf. If it’s too cold, the dough may not rise enough, leading to a denser loaf with less flavor. Luckily, a bread machine takes care of these factors for you with its precise temperature control and automated mixing and rising cycles.
Punching Down the Dough
Understanding the importance of punching down the dough is a crucial step in achieving bakery-worthy results.
Let’s dive into what makes this seemingly simple step so essential. After the initial rise, the bread machine will prompt you to remove the dough and give it a good punch. This step helps remove any unwanted air pockets that may have formed, ensuring a uniform texture throughout the loaf. No more biting into a slice of bread only to find a gaping hole in the middle.
But there’s more to punching down the dough than just texture. It’s also key in redistributing the yeast and other ingredients evenly throughout the dough. This is especially important if you’re using whole grain flours, which can be heavier and require more effort to rise properly. By redistributing these ingredients, you can ensure that your bread will rise evenly and have a consistent flavor profile.
While most bread machines may do this automatically, it’s still important to understand why this step is necessary. Following machine-specific instructions is also crucial during this process, as some may require additional steps or adjustments at this point in the process.
Baking Cycle
If your answer is yes, then you must be curious about how a bread machine works during the baking cycle. Fear not, for I am here to break it down for you.
Firstly, the dough needs to be kneaded thoroughly during the kneading cycle. This step is critical as it ensures that all the ingredients are evenly distributed and mixed well. After the dough has been kneaded, it is allowed to rise for a specified amount of time based on the recipe.
Now, let’s get to the main event – the baking cycle. At this stage, your bread machine heats up and begins to bake the dough. The heating element generates heat, which is then circulated around the bread pan by a fan. This ensures that your bread is cooked evenly on all sides and results in a perfectly baked loaf.
The duration of the baking cycle varies from 1-2 hours, depending on your recipe and loaf size. As your bread bakes, it rises further, creating that light and fluffy texture we all adore.
Once your bread machine beeps to signal that it’s done, it’s essential to remove the bread from the machine as soon as possible. Overcooking or burning can occur if you leave it in too long – and nobody wants that.
The baking cycle comprises three critical sub-topics: kneading cycle, rising period, and baking process. Understanding these sub-topics is crucial in mastering the perfect loaf of bread every time.
wR4iwCtky_s” >
Conclusion
In conclusion, the bread machine is a revolutionary appliance for anyone who craves the taste of freshly baked bread but lacks the time and energy to make it from scratch. This innovative kitchen gadget automates the bread-making process, making it simpler and less time-consuming. The first step in using a bread machine is crucial – adding ingredients in the correct order. Liquid ingredients should be added first, followed by dry ingredients and yeast last. This ensures that everything mixes thoroughly and that the yeast activates properly, helping your dough rise perfectly.
The pre-programmed cycles of a bread machine are mixing, kneading, proofing, and baking. Each cycle is designed to ensure that your ingredients are combined correctly and at the right time to produce a perfect loaf of bread. The kneading cycle is vital in developing gluten, which gives bread its structure and texture. The rising cycle allows enzymes in the flour to break down complex carbohydrates into simple sugars, releasing natural sweetness and contributing to a richer taste. Punching down the dough removes any unwanted air pockets that may have formed during rising, ensuring uniform texture throughout the loaf.
Finally, during the baking cycle, your bread machine heats up and begins to bake the dough until it’s fully cooked. Once your bread machine beeps to signal that it’s done, removing the bread from the machine as soon as possible is essential. With these steps mastered, you can enjoy fresh-baked bread whenever you want without any hassle. So why wait?