Summer is in full swing, and there’s nothing quite like the smell of sizzling meat on a Weber grill. But if you’re new to grilling, you might feel a little lost when it comes to all those knobs and settings. Don’t worry, though – we’ve got your back. In this post, we’re going to tackle one of the most fundamental questions in grilling: what is the high and low setting on a Weber grill?
When it comes to grilling, temperature control is everything. Getting that perfect sear or juicy center requires knowing how to adjust your grill’s heat. And that’s where the high and low settings come in. But what do they actually mean? Is it different for every grill? We’ll break down the basics so you can master temperature control with your own Weber grill.
Whether you’re cooking up burgers, steaks, or veggies, understanding the high and low settings will help you achieve that mouth-watering flavor every time. We’ll even throw in some tips and tricks to take your grilling game to the next level this summer.
So grab your tongs and let’s get started on mastering the art of temperature control with your trusty Weber grill.
Contents
What is the High and Low on a Weber Grill?
Grilling is more than just cooking food; it’s an art form that requires precision and skill. One of the most crucial aspects of grilling is knowing how to control the temperature on your Weber grill. This is where the high and low settings come in.
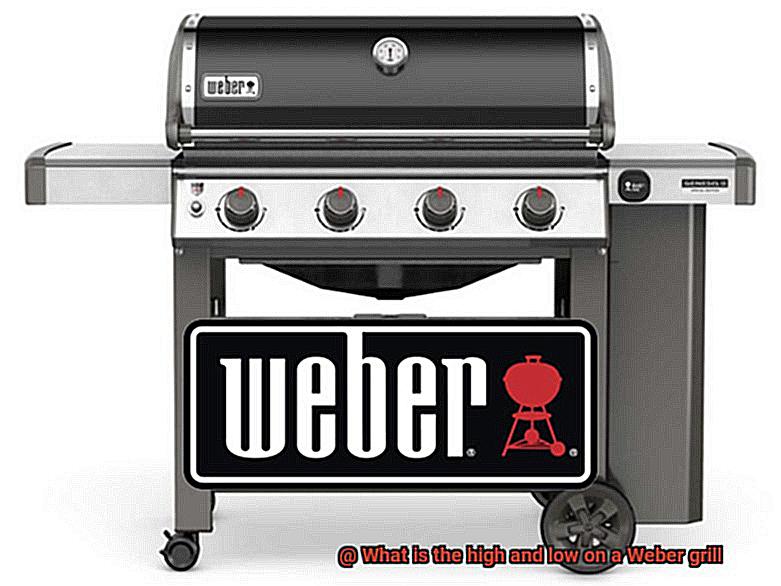
The high and low settings on a Weber grill refer to the level of heat that can be generated by the grill. The high setting is perfect for cooking foods that require a lot of heat, such as a juicy steak or burger. This setting generates more heat than the low setting, allowing you to sear your meat and create a mouth-watering crust. On the other hand, the low setting is ideal for cooking foods that require less heat, such as delicate vegetables or fish. This setting generates less heat than the high setting, preventing your food from burning or overcooking.
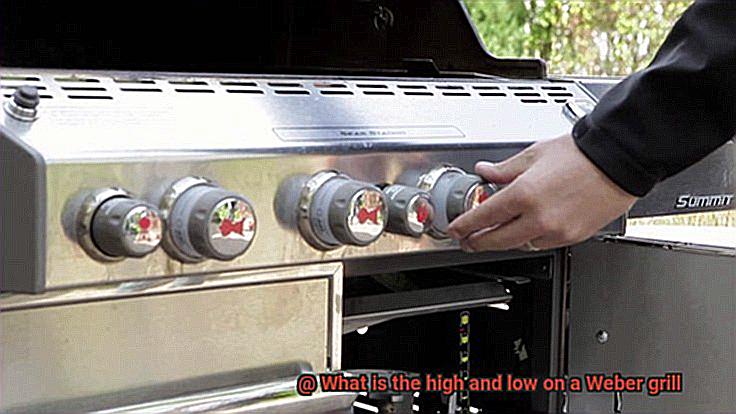
Adjusting the heat on a Weber grill is easy with the burner control knobs located on the front of the grill. By turning the knob clockwise, you increase the heat, while turning it counterclockwise decreases it. It’s important to note that different types of food require different levels of heat to cook properly, so it’s essential to adjust the temperature accordingly.
Preheating your Weber grill before cooking is an essential step in ensuring your food cooks evenly and doesn’t stick to the grates. To preheat your grill, turn all burners to high and close the lid for 10-15 minutes. This ensures that your grill reaches the desired temperature before you start cooking.
In addition to adjusting the burner control knobs, you can also adjust the position of your food on the grill to control the level of heat. For example, if you want to cook something on low heat, move it further away from the burners. Conversely, if you want to cook something on high heat, move it closer to the burners.
It’s worth noting that high and low settings may vary depending on the model of your Weber grill. Some models have a maximum temperature of 600 degrees Fahrenheit on high, while others go up to 750 degrees Fahrenheit. Similarly, some models have a low setting that can go as low as 200 degrees Fahrenheit, while others start at 250 degrees Fahrenheit. It’s important to consult your owner’s manual for specific temperature ranges on your particular model.
Adjusting the Heat on a Weber Grill
Grilling is an art, and adjusting the heat on a Weber grill is a crucial aspect to master. Achieving the perfect level of doneness and flavor for your food requires precise temperature control. Luckily, Weber grills are designed to make this process easy and straightforward.
To adjust the heat on your Weber grill, you need to understand how the burners work. Most Weber grills have two or three burners controlled by knobs on the front of the grill. Each burner has its own control knob, allowing you to adjust the heat independently.
To start, turn all the burners to their highest setting and close the lid. Allow the grill to preheat for at least 10 minutes to ensure it reaches the desired temperature. Once preheated, you can start adjusting the heat.
Lowering the heat is easy. Turn one or more of the burners down to a lower setting. This reduces the amount of heat coming from those burners, leading to a lower overall temperature inside the grill. For two-burner grills, create a cooler side by turning one burner down and leaving the other on high.
For three-burner grills, you can create multiple heat zones by adjusting each burner independently. If you’re cooking burgers and want to sear them on high heat before finishing them off at a lower temperature, turn one burner to high and leave the other two on medium or low.
Remember that every grill is different, so experiment with your Weber grill to find the right settings for your cooking needs. Once you master adjusting the heat on your Weber grill, you’ll be able to cook a wide variety of foods with ease.
Different Types of Foods Require Different Levels of Heat
Grilling is not just about cooking food, it’s an art that requires precision and a deep understanding of the different levels of heat required for different types of foods. When cooking on a Weber grill, this becomes even more important as the temperature zones can be adjusted to achieve perfect results.
To begin with, thinner and more delicate foods like fish and vegetables require lower levels of heat. This is because they tend to cook quickly and can easily burn if exposed to high temperatures for too long. In contrast, thicker meats like steaks and pork chops need higher levels of heat to ensure that they cook thoroughly and develop a nice sear on the outside.
When grilling on a Weber grill, it’s important to understand the two temperature zones
the hot zone and the cool zone. The hot zone is located directly above the burners and can reach temperatures of up to 600 degrees Fahrenheit, while the cool zone is located away from the burners and can maintain temperatures of around 200-300 degrees Fahrenheit.
If you’re cooking delicate foods like fish and vegetables, it’s best to use the cool zone of the grill. This will prevent overcooking or burning while allowing the food to cook through evenly. However, if you’re cooking thicker meats like steaks and pork chops, it’s best to use the hot zone of the grill to ensure that they cook through thoroughly and develop a nice sear on the outside.
Besides using the right temperature zone, you also need to consider your preferred level of doneness when cooking different types of meats on a Weber grill. For instance, if you like your steak rare or medium-rare, use higher heat for a shorter amount of time to achieve a nice sear on the outside while keeping the inside tender and juicy. On the other hand, if you prefer your steak well done, use lower heat for a longer amount of time to ensure that it cooks through completely without burning on the outside.
It’s essential to note that the temperature of your grill can be influenced by various factors such as weather conditions, the type and amount of fuel used, and the position of the vents. Thus, it may take some trial and error to find the right temperature for your specific grill and cooking needs.
Moving Food to Control Heat Levels
Fire up the grill and get ready to elevate your grilling game. If you want to achieve perfectly cooked and delicious grilled dishes, mastering the art of moving food to control heat levels on a Weber grill is a must-know technique for grilling experts.
To get started, it’s crucial to understand the high and low heat zones on your grill. The high heat zone sits directly above the lit burners, while the low heat zone resides on the outer edges of the grill. By knowing where these zones are and how to use them, you can take control of the cooking process and achieve mouth-watering results.
When cooking on a grill, it’s not uncommon for food to cook too quickly or burn. That’s when moving food to the low heat zone comes in handy. By doing this, you can slow down the cooking process and prevent burning. Conversely, if you want to add char or speed up the cooking process, move your food to the high heat zone.
It’s important to note that different foods require different levels of heat. For example, steaks and burgers require high heat for searing and caramelization, while vegetables and delicate fish need lower heat to prevent burning or overcooking. Knowing these differences will help you achieve perfectly cooked dishes every time.
To control heat levels effectively, it’s recommended to use a two-zone grilling method. This involves lighting only a portion of the burners to create both high and low heat zones on your grill. With this method, you can move your food between zones as needed without constantly adjusting temperature settings.
Why You Should Master High and Low Settings on a Weber Grill
Well, it’s time to master the high and low settings on your Weber grill.
Let’s start with the basics. High heat is ideal for searing meats, grilling vegetables, and cooking foods that require high heat. Low heat, on the other hand, is perfect for slow cooking, smoking meats, and cooking foods at a lower temperature.
But why is mastering both settings so important? For starters, if you only know how to cook with high heat, you risk ending up with burnt or overcooked foods. Conversely, solely relying on low heat can leave you with undercooked or tough meat.
By mastering both settings, you unlock a world of possibilities. Want a steak that’s perfectly seared on the outside but still juicy on the inside? Sear it on high heat and then finish cooking it on low. Craving some melt-in-your-mouth brisket? Keep the temperature low and steady throughout the cooking process.
But mastering high and low settings isn’t just about achieving better results. It’s also about saving time and energy. By using the appropriate setting for each type of food, you can cook more efficiently and avoid constantly adjusting the temperature. This means more time spent enjoying your food and less time fussing with your grill.
Tips for Grilling Perfectly Cooked Meals Every Time
Grilling is an art form that requires skill and knowledge, especially when it comes to understanding the high and low temperature settings on a Weber grill. These settings are essential for achieving perfectly cooked meals every time. Here are five sub-sections to help you master the art of grilling:
Preheat Your Grill Properly
Preheating your grill is crucial to ensure that it reaches the desired temperature before you start cooking. For high-temperature cooking, preheat your grill for at least 10 minutes to achieve a temperature of about 450°F. For low-temperature cooking, preheat your grill for about 5 minutes to reach a temperature of around 225°F.
Use Indirect Heat
Indirect heat is an excellent technique for large cuts of meat or delicate food items like vegetables and fish. It means placing the food on a part of the grill that is not directly above the flame. This allows for even cooking without burning the food.
Monitor the Temperature
Keeping an eye on your food as it cooks is essential to achieving perfectly cooked meals. Use a meat thermometer to check the internal temperature of the meat, ensuring that it’s cooked to your desired level of doneness. For example, medium-rare steak should have an internal temperature of around 135°F, while well-done steak should have an internal temperature of around 160°F.
Let Your Meat Rest
Resting your meat after taking it off the grill is crucial to achieving a more tender and flavorful meal. Let it rest for a few minutes before slicing into it to allow the juices to redistribute.
Adjust the Heat
To achieve perfectly cooked meals every time, start by preheating your grill to the desired temperature. For high heat, turn all burners to their highest setting and let the grill heat up for at least 10-15 minutes before cooking. For low heat, turn one burner to its lowest setting and leave the others off, or use a smoker box for added flavor.
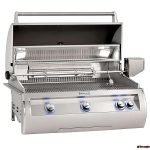
Benefits of Using a Weber Grill
As an expert on the benefits of using a Weber grill, I can attest that these grills are among the best on the market today. Here are five compelling reasons why:
- Even Heat Distribution: Weber grills are engineered to distribute heat evenly across the cooking surface, ensuring that your food is cooked to perfection. No more hot spots or cold zones to worry about – every inch of your grill will be heated evenly.
- Versatility: With a wide range of models and sizes to choose from, there is a Weber grill for every cooking need. Whether you’re looking to grill burgers, smoke ribs, or roast a turkey, there’s a Weber that can handle the job.
- Durability: Weber grills are built to last, made from high-quality materials such as stainless steel and cast iron that can withstand high temperatures and harsh weather conditions. You won’t have to worry about rust or deterioration after just a few uses – your Weber grill is built for longevity.
- Easy to Clean: Weber grills are designed with easy cleaning in mind, with many models featuring removable parts that can be washed in the dishwasher or by hand. Say goodbye to scrubbing away at stubborn grease and grime – cleaning your Weber grill is a breeze.
- Warranty: Finally, Weber offers a warranty on all of their products, providing customers with peace of mind knowing that their investment is protected should anything go wrong with their grill.
Common Mistakes to Avoid When Grilling with a Weber
That’s why I’ve compiled a list of the top five mistakes to avoid when grilling with your Weber.
Mistake #1: Skipping Preheating
Preheating your grill is crucial in ensuring that your food cooks evenly and doesn’t stick to the grates. It also helps reduce the risk of any potential safety hazards. To achieve the perfect temperature, preheat your grill for at least 10-15 minutes before cooking.
Mistake #2: Overusing Fuel
Using too much fuel can cause excessive heat, leading to flare-ups and burnt food. It’s important to follow the manufacturer’s instructions for the amount of fuel to use and adjust the airflow accordingly. This way, you’ll avoid creating a fireball on your grill.
Mistake #3: Constantly Opening the Lid
We all want to check on our food, but opening the lid too often can cause heat loss and increase cooking time. Avoid lifting the lid continuously, especially during the cooking process. Only open the lid when necessary, such as when flipping or checking on your food.
Mistake #4: Crowding the Grates
Crowding the grates can lead to unevenly cooked food and make it difficult to flip and maneuver your food. Make sure to leave some space between each piece of food on the grates. This will allow for better air circulation and even cooking.
Mistake #5: Neglecting Grill Grate Cleaning
Dirty grill grates can cause sticking and unevenly cooked food. To prevent this, make sure to clean the grates before and after each use using a wire brush or scraper. This will ensure that your food doesn’t stick and that your grill lasts longer.
_eydVc1W-Xs” >
Conclusion
In conclusion, the high and low settings on a Weber grill are crucial for achieving perfectly cooked meals that will tantalize your taste buds. The high setting generates more heat, making it ideal for cooking foods that require searing, such as juicy steaks and succulent burgers. Conversely, the low setting is perfect for cooking delicate vegetables or fish that require less heat.
To control the temperature on your Weber grill, adjust the burner control knobs located on the front of the grill. Don’t forget to preheat your grill before cooking to ensure even cooking and prevent food from sticking to the grates. Moreover, using indirect heat and monitoring the temperature with a meat thermometer can help you achieve perfection every time.
Using a Weber grill has many benefits, including even heat distribution, versatility, durability, easy cleaning, and warranty protection. However, it’s important to avoid common mistakes such as skipping preheating, overusing fuel, constantly opening the lid, crowding the grates or neglecting grill grate cleaning.
By mastering temperature control with your Weber grill and avoiding common mistakes – you can elevate your grilling game this summer. Impress your friends and family with mouth-watering dishes every time you fire up that grill.